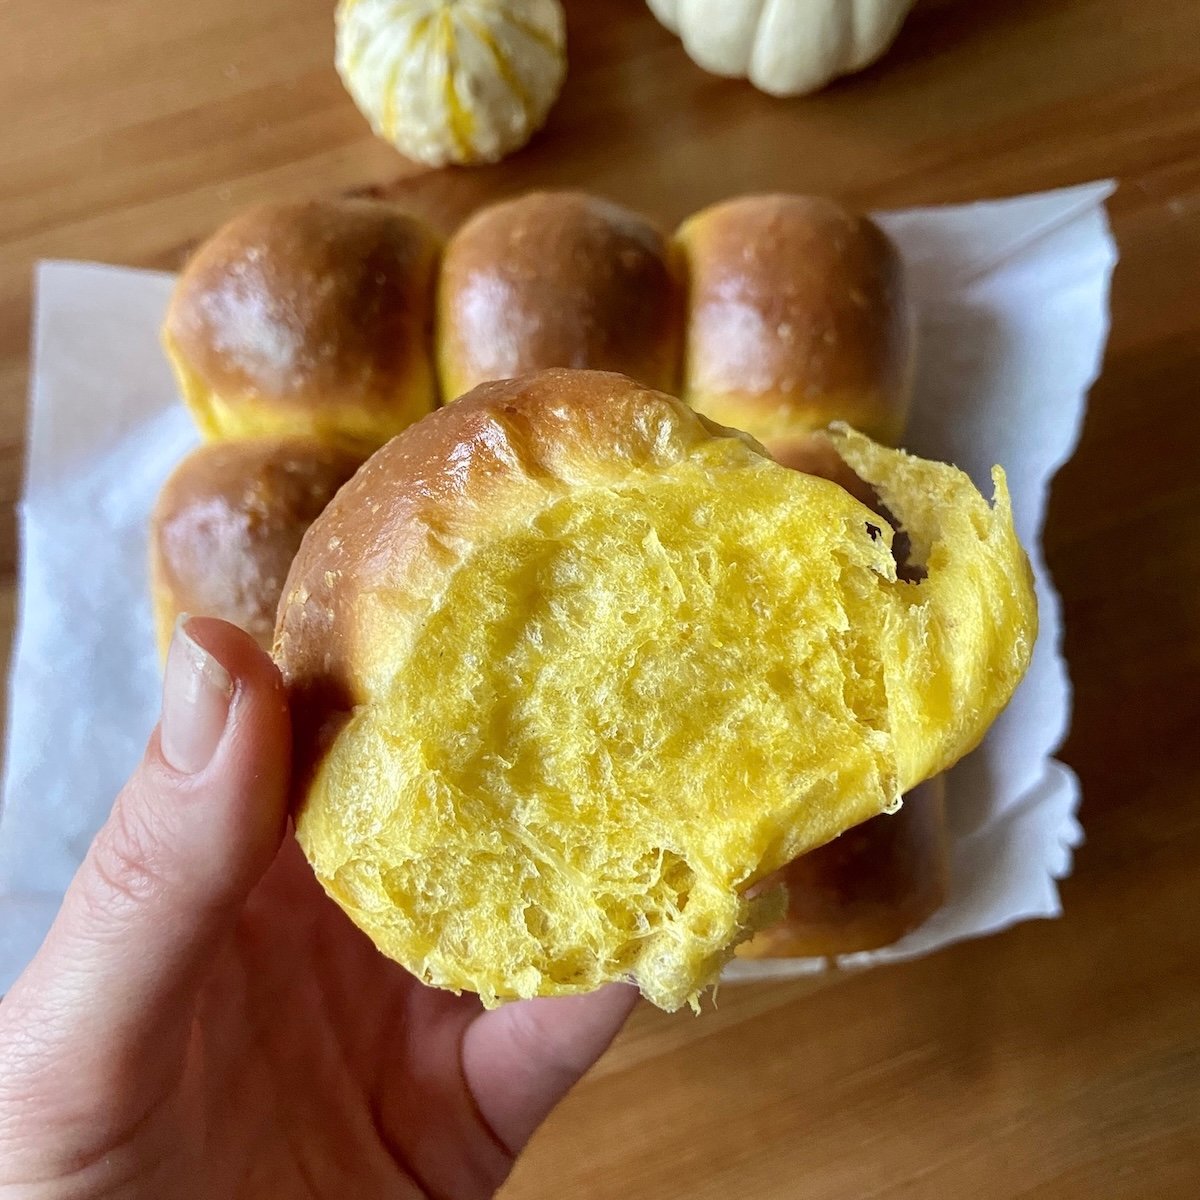
Sourdough Pumpkin Dinner Rolls
193kcal
Ingredients
Sourdough Starter Levain (Night Before)
- 10 g Sourdough starter culture
- 40 g Water
- 40 g Bread flour
The Enriched Pumpkin Dough
- 400 g Bread flour (100%)
- 120 g Whole milk (30%)
- 150 g Canned pumpkin purée (37.5% - Not pumpkin pie mix)
- 80 g Active sourdough starter levain (20% - From the stage above)
- 30 g Honey or maple syrup (7.5%)
- 50 g Unsalted butter, softened (12.5%)
- 7 g Fine sea salt (1.75%)
- 1/2 tsp Ground cinnamon (Optional)
- 1/4 tsp Ground nutmeg (Optional)
The Golden Glaze & Topping
- 1 + 1 tbsp Egg + Milk (Whisked together for the egg wash)
- 20 g + 1 tbsp Melted butter + Honey (Whisked for the post-bake glaze)
Equipment
- 9x13 Inch Baking Pan Or a standard metal baking dish to cluster the rolls for uniform vertical climbing
- Stand Mixer Essential for smoothly emulsifying the thick pumpkin purée and butter into the dough
- Pastry Brush For sweeping on the egg wash and final honey butter glaze
Method
Night Before – Levain Optimization
- 10:00 PM – Starter Build: In a small glass jar, add your 10g of starter culture to 40g of water and whisk together cleanly. Stir in 40g of bread flour. Mix thoroughly, cover loosely, and let it sit at room temperature 74–78°F (23–26°C) overnight for 8 to 10 hours until the starter reaches its peak and at least triples in volume.
Day 2 – The Enriched Pumpkin Autolyse & Mixing
- 8:00 AM – The Pumpkin Autolyse: In your stand mixer bowl, combine all 120g of whole milk, 150g of pumpkin purée, 30g of honey, 80g of your active overnight starter peak, and all 400g of bread flour. (If using the optional cinnamon and nutmeg for a spiced profile, add them now). Mix everything together with a spoon just until a dense, shaggy mass forms. Cover and let rest for 1 full hour to completely hydrate the flour proteins.
- 9:00 AM – Developing Gluten: Attach your dough hook. Mix the autolysed dough on low speed for 2 to 3 minutes (or use a KitchenAid mixer on speed 3 for 3 to 4 minutes) until well incorporated. Add the 7g of salt and continue mixing for a couple of minutes until the dough gathers tightly together.
- Butter Emulsification: With the mixing machine running, gradually drop in the 50g of softened unsalted butter piece by piece. Once introduced, increase the speed to medium-high and mix continuously for 10 to 12 minutes until the fat is completely emulsified, the dough cleans the sides of the bowl, and it passes a clear windowpane test.
- Bulk Proof with Intervals: Cover the container tightly and let it proof for 3 to 4 hours at a warm 76–80°F (24–28°C). During this window, perform 2 gentle rounds of stretches and folds to build structural tension. The dough should look visibly lighter, smooth, and slightly puffy.
- 1:00 PM – Cold Fermentation Retard: Slide the entire covered proofing container directly into the refrigerator to rise slowly for 7 to 8 hours of cold fermentation retard until evening.
Day 2 (Night) – Dividing, Shaping, and Overnight Proof
- 9:00 PM – Dividing the Portions: Remove the chilled dough from your refrigerator. Tip it onto a clean work surface. Using a bench scraper and a kitchen scale, divide the dough cleanly into 12 equal portions (roughly 70–75g each).
- Tension Ball Shaping: Take a portion of dough, cup your hand over it, and roll it firmly against the counter in a circular motion to form a smooth, taut, uniform ball. Repeat for all 12 portions. Grease a 9x13 inch baking pan with butter or line it with parchment paper, and arrange the shaped dough balls in a 3x4 grid pattern.
- The Overnight Counter Rise: Cover the baking pan loosely with plastic wrap or a damp kitchen towel. Let the rolls proof overnight on your counter for 8 to 10 hours at a stable room temperature of 70–72°F (20–22°C) until the next morning. They must completely double in volume, swelling until they are nestled tightly against one another.
Day 3 – The Golden Holiday Bake
- Next Morning – Baking: Preheat your home oven to 375°F (190°C). Brush the top crowns of your beautifully risen, clustered rolls lightly with your prepared egg wash mixture. Slide the pan onto the middle oven rack and bake for 20 to 25 minutes until the tops turn a stunning, deep golden bronze.
- The Honey Butter Finish: Remove the pan from the oven. While the rolls are sizzling hot, immediately brush their tops generously with the melted honey butter mixture. Allow them to cool directly in the pan for 10 minutes before pulling them apart to serve warm!
Nutrition
Calories193kcalCarbohydrates30gProtein5gFat6gSaturated Fat3gPolyunsaturated Fat0.5gMonounsaturated Fat1gTrans Fat0.2gCholesterol14mgSodium243mgPotassium80mgFiber1gSugar3gVitamin A2108IUVitamin C1mgCalcium23mgIron1mg
Notes
- Managing the Moisture Variable in Pumpkin Purée: Pumpkin purée contains a highly unpredictable amount of water depending on the brand you buy. Always use thick, 100% pure canned pumpkin purée rather than pumpkin pie mix. If your purée looks notably wet or watery when opened, scoop it onto a plate lined with paper towels and blot it firmly to remove excess moisture before weighing out your 150g. This prevents the dough from running too wet and loose.
- Why the Final Proof Happens Overnight on the Counter: Enriched doughs packed with heavy pumpkin flesh, milk, honey, and butter ferment significantly slower than standard lean flour-and-water artisan loaves. Giving the shaped dinner rolls a slow, 9-hour room temperature proof on your kitchen counter overnight allows the wild yeasts to work steadily over many hours, ensuring a gorgeous, towering rise by the time you wake up.
- Achieving an Ultra-Soft, Non-Sour Crumb: For a classic, sweet holiday profile that complements savory dinner dishes, keeping the sourdough acidity low is essential. Utilizing a sweet honey-milk autolyse and capping the daytime bulk proofing times ensures the rolls remain incredibly mild, sweet, and pillowy, without any sharp sourdough tang.