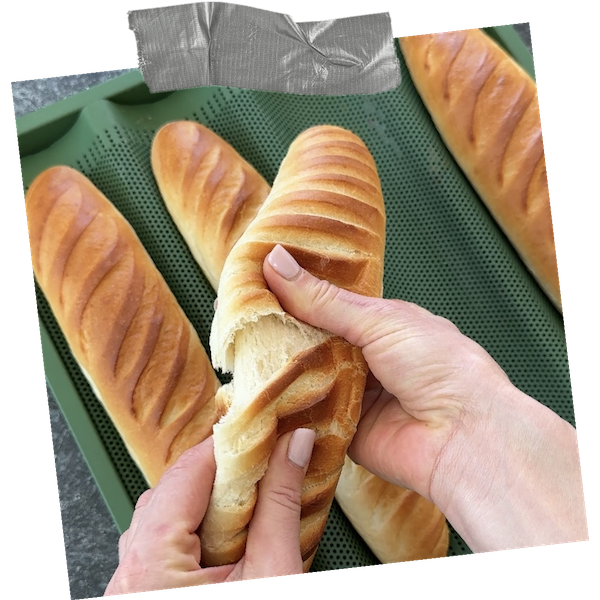
Baguette Viennoise or Viennese baguette is a variation of the traditional French baguette, typically characterized by its softer texture and slightly sweeter flavor. It often contains milk, butter, and sometimes eggs, which contribute to its richness and tender crumb. Viennese baguettes are perfect for breakfast or as a snack, offering a delightful balance between crusty exterior and soft interior. They are a versatile bread that pairs well with both sweet and savory toppings, making them a popular choice for sandwiches or simply enjoyed with butter and jam.
| Ready in: 18 hours | Serves: 8 people |
| Yield: 4 baguettes, 250g each | Units: US, EU |
Ingredients
Dough
- 500g bread flour
- 315g Milk
- 55g Egg
- 10g Salt
- 9g Fresh yeast or 3g dry instant yeast
- 40g Sugar
- 75g butter
Directions
Day 1
- Place all the ingredients, excluding butter, in a mixer bowl and mix for 5 minutes at slow speed
- Increase the speed to medium and continue mixing for 2 minutes
- Add butter and mix for 3 minutes at medium speed. Dough has to become elastic and come together.
- Let the dough rest for 30 min at 76-78F
- Divide the dough into 250g portions.
- Round each piece of dough into the ball.
- Transfer dough balls into a tray, cover with plastic wrap, move to fridge and let ferment for 12-15 hours at 38-40F
Day 2
- Remove the dough from the fridge and bring to room temperature.


- Using a rolling pin, roll the dough the long way to spread it out.
- Fold the top edge of the dough two-thirds of the way down.
- Rotate the dough 180° and fold the top edge of the dough two-thirds of the way down. Use the heel of your hand to press and seal.
- With your thumb, fold the dough in half by pushing the dough top down and inwards.
- Use the side of your other hand to seal the seam around your thumb.
- Using both hands, start from the middle and roll toward both ends of the dough until it is 50-54cm long with pointed ends.
- Score the dough by making closely spaced slashes diagonally over the surface of the dough.
- Place the dough on a baguette pan, scored side up.


- Begin 2nd fermentation of baguettes at 80-84F for 1 hour and 45 min
- Press gently on the dough. The second fermentation is completed if a light fingerprint is visible on the dough.
- Using a pastry brush, apply egg wash on the surface of the dough.
- Preheat oven, to 410F
- Place baguettes into the oven and bake for 14 minutes.
- Place the finished baguettes on a rack to cool down.


Enjoy!
Disclosure: As an Amazon Associate I earn from qualifying purchases.
Hi
I love the look of your silicone baguette . where did you get them from?
Hi if I want to make it eggless ???
Just skip the egg and add little more water.
Bonjour escucez moi pouvez vous traduire en français je ne comprend pas merci beaucoup bonne fin de journée 👍😘
Question- does the egg go in the dough, or is it just for the egg wash?
Hi,Yes,egg needs to go into the dough!
Hi, yes, egg goes into the dough
GREAT recipe! Absolutely delicious! I forgot to use the egg wash before I baked. Instead, I brushed them with butter after baking! EVEN BETTER!!!
I just made them, I thought the egg suppossed to be in the dough or am I wrong. Currently second proof. They look delicious
Hi there! It’s great to hear that your bread rolls are looking delicious!
Thank you for your feedback.Happy baking!
I’ve tried this and it’s soooo delicious !!!!
Thank you for trying out the recipe! We’re thrilled to hear that you found it delicious. Feel free to explore more recipes on our website and let us know if you have any questions or need further assistance. Happy cooking!
Hi there, could you please make the following a bit more clear. Do you fold it lengthways or width ways? Thanks
With your thumb, fold the dough in half by pushing the dough top down and inwards.
Use the side of your other hand to seal the seam around your thumb.
Hi there! To clarify, when folding the dough, you should fold it lengthways by pushing the top of the dough down and inwards. Then, use the side of your other hand to seal the seam around your thumb. This technique helps create layers in the dough for a flakier texture. Let me know if you need further assistance!
I make this weekly! Yummy! Thank you for sharing this recipe!
You’re welcome! I’m glad you enjoy making this recipe weekly. It’s always great to have a go-to recipe that you love. Let me know if you have any other favorite recipes you’d like to share!
After resting for 30 min, dough was hard to make it to a ball. I followed the recipe exactly but dough came out too loose and very sticky
Hi Natasha. My dough didn’t rise a lot after 30 min resting ? Does it normally? Thank you very much for your recipes.
Bonjour est-ce que je pourrais avoir la recette mais en français parce que je comprends pas tout donc je vous remercie beaucoup bonne soirée