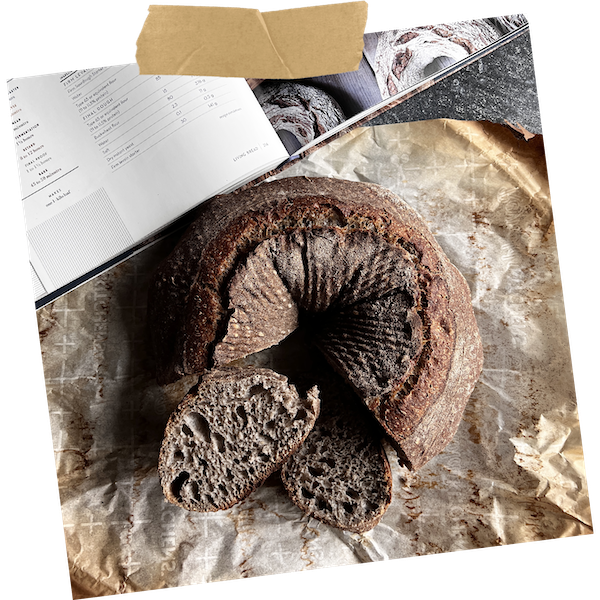
One of my favorite books about bread is Living Bread by Daniel Leader.
When I am looking for an inspiration this book always has something to offer.
Today I want to share with you a recipe of a delicious buckwheat bread, made in a shape of doughnut (couronne). Buckwheat flour doesn’t contain any gluten and adds incredible earthy flavor and dark color to the loaf.
I adjusted some of the directions from the book.
Ingredients
Stiff Sourdough Starter
- 15g sourdough starter
- 50g water
- 75g all purpose flour
Dough
- 400 g bread flour (85%)
- 70g buckwheat flour (15%)
- 376g water (80%)
- 140g sourdough starter (30%)
- 9g salt (2%)
Directions
Night before
- 10 pm add starter to the water and whisk together, add flour, mix well, cover loosely, let it sit at a room temp 74-78F for about 8-10 hours until starter reaches its peak (at least triples in volume). Learn how to make starter from scratch here.

Dough
- 7 am mix water (350g – 74%) with all flour and cover, let it rest for autolyse. Save leftover water for farther steps
- During the autolyse the flour absorbs the water, becoming fully hydrated. This will activate gluten development.
- 8 am add sourdough starter.
- Mix on low speed of your mixing machine for 2-3 min, or KitchenAid on speed 3 for 3-4 minutes until well incorporated.
- Cover, let rest for 30 minutes.
- 8:30 am add salt and saved water (26g-14%).
- Mix on low speed of your mixing machine for 4-5 min, or with KitchenAid on speed 3 for 7-9 minutes until well incorporated. The dough should come up together, but still be sticky on the bottom.
- Continue gluten development and structure building by performing stretches and folds during the warm fermentation period.


- Leave to rest 30 minutes at 74-78F /23-26C.
- 9 am spray your work surface with water, wet your hands to perform 1st nice stretch and fold on a table. Fold the dough, put in a container, cover and it let rest for 45 minutes.
Note: there is 30% of sourdough starter in the dough. This will make fermentation go faster, so stay alert.
- 9:45 am 1st stretch and fold.
- 10:30 am 2nd stretch and fold.
- 11:15 am 3rd stretch and fold.
- After 3rd stretch let the dough proof for 30 minutes at 76-80F/ 23-26C. You should see some bubbles on the surface, the dough has to become lighter and puffy. We are looking for 50% rise.

Shaping
- 11:45 am flip the bowl with the dough on to a floured surface.
- Start stretching the dough by pulling the sides, about 18 inches long.
- Roll the dough into a log (18 inches long).
- Punch the ends together to shape it as a circle, roll a little to smooth the connections.
- Place small cup inside proofing basket to create mold for our bread circle. Line the mold with kitchen towel, generously sprinkled with buckwheat flour.
- Transfer the circle, seam side up, to a prepared proofing basket.
- Cover it with plastic, and transfer the dough to rise for 14-24 hours in the refrigerator.


Baking
Next morning
- Preheat your oven to 500 F, place a cast iron pan with the lid inside for 45 minutes -1 hour.
- Remove the dough from the fridge.
- Flip it over on a parchment paper, score it with a sharp knife or a scoring lame.
- Transfer the dough on to the hot cast iron pan, cover it with the lid (to create steam for a beautiful and crunchy crust).
- Bake at 500F for 15 minutes with lid on.
- Open the lid and continue baking for 20 min at 450F


Enjoy!
Disclosure: As an Amazon Associate I earn from qualifying purchases.
I used your recipe but shaped into two loaves. The bread tastes great but came out very flat!!!
Good afternoon!PLease tell me!Did you use Levito Madre sourdough or wheat 100% moisture?
100% hydration starter
Hi! Thanks for recipe. Should bread rise during baking or not?
hello! where from the dark color comes? thank you!