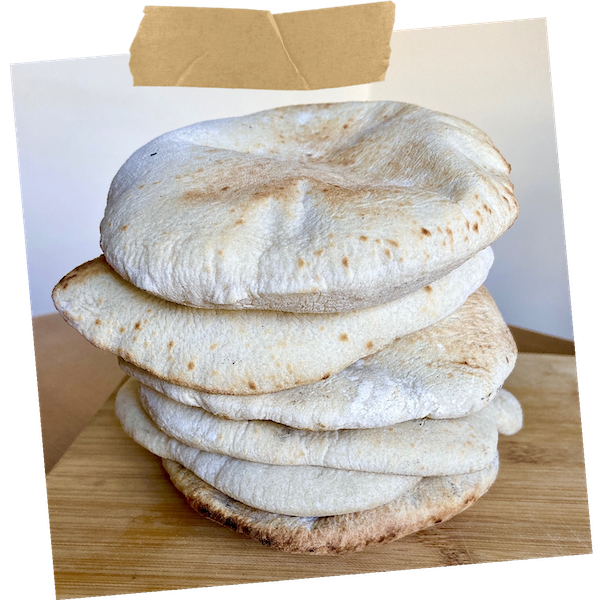
Pita is one of the greatest breads ever created by man, it’s soft and slightly chewy. And the best thing about pita is that it can be made with sourdough starter, and still be absolutely delicious.
Ingredients
Sourdough Starter
- 20g sourdough starter
- 40g water
- 35g all purpose flour or bread flour
- 5g rye flour
Main Dough
- 250g lukewarm water (62.5%)
- 80g sourdough starter(20%)
- 350g bread flour (87.5%)
- 50g whole grain whole wheat flour (13.5%)
- 16g sugar (4%)
- 10g salt (2.5%)
- 30g olive oil (7.5%)
Directions
Starter preparation step
Night before
- 10 pm add starter to the water and whisk together, add flour, mix well, cover loosely, let sit at room temp 72-76F for about 8-10 hours until it reaches the peak, it should at least double (starter isn’t strong enough), or triple in size (strong starter). Instructions on how to make starter from scratch can be found here.
Pita dough preparation steps
- 8 am mix water, sugar and sourdough starter with flour, cover, let it rest 1 hour for autolyse (during the autolyse stage flour absorbs water, becoming fully hydrated. This activates gluten development).
- 9 am add salt, mix on low speed of your mixing machine for 2-3 min, or KitchenAid on speed 3 for 2-3 minutes until well incorporated.
- At the end of mixing add olive oil. Mix until well incorporated. Total mixing time shouldn’t take longer then 10 minutes.
Note: All mixing can be done by hand. Use the Rubaud method to incorporate the ingredients. Do a couple of stops in between mixing, it will help with gluten development, then continue mixing. Total mixing time will take about 10 minutes with stops. The dough should become smooth, and less sticky.
- Leave the dough to rest for 30 minutes at 74-78F/23-26C.
- 9:30 am wet your hands and perform 1st stretch and fold.
- 10:15 am 2nd stretch and fold.
- 11 am 3rd stretch and fold.
- 12:45 pm 4th stretch and fold. Performing stretches and folds will help with gluten development.
- After the final stretch let the dough rest for 15 minutes. You should see some bubbles on the surface, the dough has to become lighter. We are looking for 40%-50% rise.
Note: if for some reason the dough didn’t rise enough, add one more stretch and fold.
If the dough seems too proofed, you can shorten the time in between stretches and folds.
Tip: At this point, you can transfer the dough inside the refrigerator until next day, then divide it, preshape and let it proof for 1 hour 30 minutes at 72-76F, then continue with shaping steps.
Preshaping pita dough
If you decide to make pitas the same day, then follow these steps:
Sprinkle work surface with flour, dump the dough on a work surface.
Divide the dough into 80-90g pieces, shape them into round balls.
Let them rest covered for 30-40 minutes.


Shaping pita dough
- Preheat the oven to 500 degrees with the pizza stone (or iron pan or baking steel) for about 35-45 minutes.
- Remove 1 ball (keeping the others covered) and press into a flat disc with a rolling pin. Roll it into a 6-inch circle, then into an 8-inch, about 1/4 inch thick, dust it with flour if necessary during the process. Please note, the dough will shrink a bit while baking.


- Carefully lift the dough circle and place it quickly on a hot baking stone. After 2 minutes the dough should be nicely puffed. Turn it over with tongs or spatula and bake for 1 more minute. The pita should be pale, with only a few brown speckles. Transfer warm pita on to a napkin-lined basket and cover it to maintain softness. Repeat these steps with the rest of the dough balls. Stack them up and cover.
- If you are using a pizza oven like Gozney, preheat it for about 30 minutes. When the temperature reaches 750F, lower the heat to medium, slide the dough circle inside the oven, let it bake for 20-30 seconds, then flip it on the other side, bake for 10-15 more seconds and take it out.


Tip: when pitas are still warm, put them into a plastic bag for about 30 minutes. Steam inside the bag will make them very soft. But if you want to store pitas for next day or longer, let them completely cool down, then use a new plastic bag. You can also freeze pitas for up to 2 weeks.


Disclosure: As an Amazon Associate I earn from qualifying purchases.
Hello, I confused about the starter. You fed it at 10 pm and it will triple in 4-6 hours. But you mixed the starter with flour after 11 hours. Didn’t your starter begin to fall? Should we use starter at the peak or is it ok to use it after the peak? Thank you 🙂
Absolutely use the starter at its peak. There was a typo in hours. Thank you!
Bom diaaa Querida,
Obrigada, muito obrigada pela sua receita!
Fique bem com sua Família.
My dear Maria, blessings to you and your family 🙏
Do You bake it with the oven open?
Yes🙏
Hello! My family really loves your pizza recipe and we make it on a weekly basis, but we can’t seem to find it anymore. Where can we find this recipe?
Thank you for sharing your recipes, they’re so simple and delicious!
Hi!
Sorry for inconvenience!
I’m working on my book, and pizza recipe will be included in it. According the contract with publisher, I had to hide it.
Thank you for understanding 🙏
Hi Natasha, I do not currently have a pizza steel or stone. Will this recipe work if I pre-heat a baking sheet and cook the pita’s on that in a very hot oven?
Travis, hi!
Sure, you can try very hot baking sheet 🙏
There’s a mistake in the starter recipe I guess you meant 4 gr and not 20 gr starter 🙂
The feeding is 1:2:2
The mistake is in the number of hours
Thanks for sharing:) is it possible to cook on a stove as well with a lid on?
I understand you do 2 and 3 strech and fold after 45 minutes but for the 4th stretch and fold you wait for 1 hour and 45 minutes. is that right or a typo?
Teresa, hi!
Sorry it was a typo.
45 min