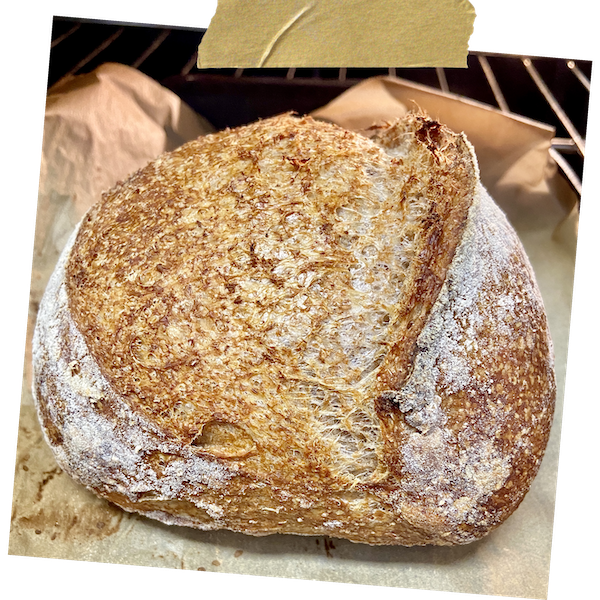
I wanted this wheat bran loaf in my collection for so long. Super rich in flavor, and very beautiful color.
Absolutely worth your attention. And most importantly, this bread is full of healthy fiber and vitamins
Ingredients
Sourdough Starter
- 5g sourdough starter
- 35g water
- 30g all purpose flour or bread flour
- 5g rye flour
Dough
- 240 g bread flour (80%)
- 48g wheat bran (16%)
- 12g whole wheat flour (4%)
- 210g water (70%)+48g extra water added along with salt (16%) total hydration 86%
- 60g sourdough starter (20%)
- 6g salt (2%)
Directions
Night before
- 10 pm add starter to the water and whisk together, add flour, mix well, cover loosely, let it sit at a room temp 74-78F for about 8-10 hours until starter reaches its peak (at least triples in volume). Learn how to make starter from scratch here.
Dough
- 10 pm mix water with all flour and cover, let it rest overnight at 50 F / 9C for autolyse.
- During the autolyse the flour absorbs the water, becoming fully hydrated. This will activate gluten development.


Next day
- 7 am bring the dough to a room temperature to get warm.
- 8 am add sourdough starter.
- Mix on low speed of your mixing machine for 2-3 min, or KitchenAid on speed 3 for 3-4 minutes until well incorporated.
- Cover, let rest for 30 minutes.

- 8:30 am add salt and extra water.
- Mix on low speed of your mixing machine for 4-5 min, or with KitchenAid on speed 3 for 7-9 minutes until well incorporated. The dough should come up together, but still be sticky on the bottom.
- Continue gluten development and structure building by performing stretches and folds during the warm fermentation period.
- Leave to rest 30 minutes. At 74-78F /23-26C.
- 9 am spray your work surface with water, wet your hands to perform 1st nice stretch and fold on a table. Fold the dough, put in a container, cover and it let rest for 45 minutes.
- 9:45 am 1st stretch and fold.
- 10:30 am 2nd stretch and fold.
- 11:15 am 3rd stretch and fold.
- After the final stretch let the dough proof for 30 minutes at 76-80F/ 23-26C. You should see some bubbles on the surface, the dough has to become lighter and puffy. We are looking for 50% rise.


Preshaping sourdough
- 11:45 am transfer the dough on to a work surface and dust its top with flour. Flip the dough over so the floured side faces down.
- Fold the dough onto itself so the flour on the surface remains entirely on the outside of the loaf. This will become the crust.
- Place the dough round on a work surface and let it rest for 30 minutes uncovered.

Shaping sourdough
- 12:15 pm dust the dough with flour. Use a dough scraper to flip it over on to a work surface so the floured sides face down.
- Starting with the side closest to you, pull the right 2 corners of the dough to the left, then fold them up into half of the dough. Repeat this action with the other side too.
- Finally, roll the dough. Shape it into a smooth, taut roll.
- Transfer the roll, seam side up, to a prepared proofing basket (loaf pan with kitchen towel).
- Cover it with plastic and return the dough to the 80F (27C) environment for 15 minutes.
- 12.30 pm Then transfer the dough to rise for 14-24 hours in the refrigerator.
Baking
Next morning
- Preheat your oven to 500 F, place a cast iron pan with the lid inside for 45 minutes -1 hour.
- Remove the dough from the fridge.
- Flip it over on a parchment paper, score it with a sharp knife or a scoring lame.
- Transfer the dough on to the hot cast iron pan, cover it with the lid (to create steam for a beautiful and crunchy crust ).
- Bake at 500F for 15 minutes with lid on.


- Remove the lid, lower temperature to 450F.
- Bake for 20 more minutes until golden brown.


Enjoy!
Disclosure: As an Amazon Associate I earn from qualifying purchases.
can you make the dough and put in the refrigerator to be pre-form and than form and baked next afternoon or late morning. is that possible
Proof it up to 50%, then put in the fridge, then remove, shape and let it proof in a basket for about 2 hours, then bake.
I want to thank a lot for sharing your recipes detail by detail. You are explaining so well so there is no question left. 👍🏻😊
Thank you so much 🙏
Can you shape as buns instead of a loaf?