I think it’s a new trend now to bake a 100% semolina sourdough. So many loaves appear on my Instagram feed from different bakers lately.
Of course I wanted to give it a try. Was kind of scary, because semolina seems kind of grainy to me, that’s why I decided to give it an overnight autolyse, to hydrate it more. The windowpane test after the autolyse didn’t work out, but during stretches and folds, the dough became more elastic and the gluten was on point.
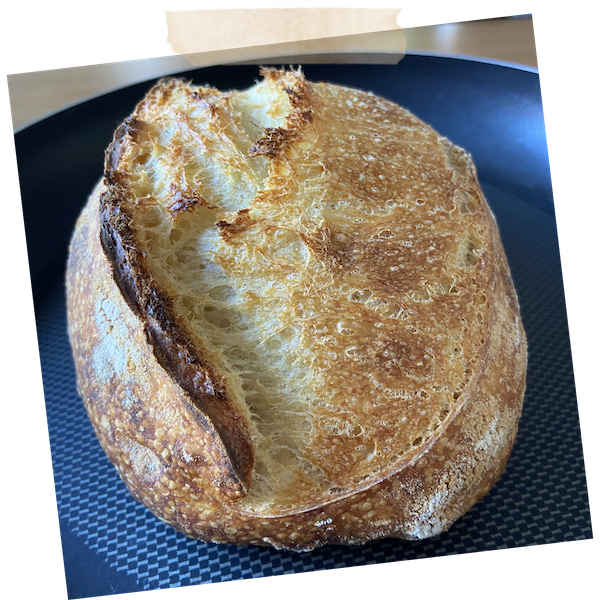
Overall, I was very satisfied with a flavorful and delicious result.
Also, I absolutely loved that yellow color.
Ingredients
Sourdough Starter
- 5g sourdough starter
- 35g water
- 30g all purpose flour or bread flour
- 5g rye flour
Dough
- 300g semolina flour (100%)
- 240g water (80%)
- 60g sourdough starter (20%)
- 6g salt (2%)
Directions
Night before
- 10 pm add starter to the water and whisk together, add flour, mix well, cover loosely, let it sit at a room temp 74-78F for about 8-10 hours until starter reaches its peak (at least triples in volume). Learn how to make starter from scratch here.
Dough
- 10 pm mix water with semolina flour and cover, let it rest overnight at 50 F / 9C for autolyse
- During the autolyse the flour absorbs the water, becoming fully hydrated. This will activate gluten development.


Next day
- 7 am bring the dough to a room temperature to get warm.
- 8 am add sourdough starter.

- Mix on low speed of your mixing machine for 2-3 min, or KitchenAid on speed 3 for 3-4 minutes until well incorporated.
- Cover, let rest for 30 minutes.
- 8:30 am add salt.
- Mix on low speed of your mixing machine for 2-3 min, or with KitchenAid on speed 3 for 5-6 minutes until well incorporated. The dough should come up together, but still be sticky on the bottom.
- Continue gluten development and structure building by performing stretches and folds during the warm fermentation period.
- Leave to rest 30 minutes. At 74-78F /23-26C.
- 9 am spray your work surface with water, wet your hands to perform 1st nice stretch and fold on a table. Fold the dough, put in a container, cover and it let rest for 45 minutes.


- 9:45 am 1st stretch and fold.
- 10:30 am 2nd stretch and fold.
- 11:15 am 3rd stretch and fold


- After the final stretch let the dough proof for 30 minutes at 76-80F/ 23-26C. You should see some bubbles on the surface, the dough has to become lighter and puffy. We are looking for 50% rise.
Preshaping sourdough
- 11:45 am transfer the dough on to a work surface and dust its top with flour. Flip the dough over so the floured side faces down.
- Fold the dough onto itself so the flour on the surface remains entirely on the outside of the loaf. This will become the crust.
- Place the dough round on a work surface and let it rest for 30 minutes uncovered.

Shaping sourdough
- 12:15 pm dust the dough with flour. Use a dough scraper to flip it over on to a work surface so the floured sides face down.
- Starting with the side closest to you, pull the right 2 corners of the dough to the left, then fold them up into half of the dough. Repeat this action with the other side too.
- Finally, roll the dough. Shape it into a smooth, taut roll.

- Transfer the roll, seam side up, to a prepared proofing basket (loaf pan with kitchen towel).
- Cover it with plastic and return the dough to the 80F (27C) environment for 15 minutes.
- 12.30 pm Then transfer the dough to rise for 14-24 hours in the refrigerator.
Baking
Next morning
- Preheat your oven to 500 F, place a cast iron pan with the lid inside for 45 minutes -1 hour.
- Remove the dough from the fridge.
- Flip it over on a parchment paper, score it with a sharp knife or a scoring lame.


- Transfer the dough on to the hot cast iron pan, cover it with the lid (to create steam for a beautiful and crunchy crust ).
- Bake at 500F for 15 minutes with lid on.
- Remove the lid, lower temperature to 450F.
- Bake for 20 more minutes until golden brown.


Enjoy!
Disclosure: As an Amazon Associate I earn from qualifying purchases.
Beautiful! I’ve been wanting to try an all semolina loaf but, like you, was hesitant due to the graininess. I’m going to give it a go.
You’ll love it 😍
Graininess? That is no Graininess. 100% Semolina is the BEST bread ever!
Thank you 🙏
What a beautiful loaf. I had no idea that semolina would work like this, because of its graininess. Did you use the fine one?
Great recipe I would like to give it a try !
But is the semolina flour same as semolina?
Yes it is 😉
I definitely want to try this asap Thank you. But these were the only two instructions that baffled me:
“Fold the dough onto itself so the flour on the surface remains entirely on the outside of the loaf. This will become the crust.”
and
“Starting with the side closest to you, pull the right 2 corners of the dough to the left, then fold them up into half of the dough. Repeat this action with the other side too.”
Could you expand or include some video links detailing the type of folds yr asking for here?
Thank you 🙏🏻
Sorry for the confusion.
Please shape the loaf the way you used to.
Also you can find shaping videos in my Instagram account 🙏
Is there a way to print just the recipe?
Is the dough supposed to be very soft? Made it today, proofing in fridge now. Also making Demi baguettes tomorrow. Can’t wait. Love your recipes.
I’ve been thinking about making this bread ever since you posted! I purchased Herbalia extra fancy fine semolina from Canada on Amazon as my semolina was grainy. Wow!!… Beautiful color, so silky soft with a nice open crumb. Thank you so much for your love for baking and sharing it with us<3
Anita!
Really appreciate your feedback 🙏
Beautiful crumb. I’m now motivated to try this recipe.
I wonder whether flour mentioned is coarse semolina or finely-milled one?
Hi!
It’s finely milled semolina
Can you make a starter out of semolina?
Sure!
What kitchen aids attachment do you use to mix the dough? Is it paddle or hook? Thank you
For bread I’m using hook
Hi ! Like you wanted to try this one. But mine was fine semolina so didn’t hold water much.. yet the taste and texture was amazing after baking. Wish I could share those pictures with you
Thank you so much for your feedback 🙏
50F autolyse.. where can you find a place that cold?
Fridge- vegetable section or vine cooler ( or just do regular warm autolyse)
Do you have to autolyse the night before? or will this recipe still work autolysing the day of???
Hello, do you have a gluten free recipe for sourdough starter? Or know of one I can use, I’ve been looking for one and it is so hard to find. Thank you in advance
In your video, you do not bake in side a typical hot “pot”. How you do that, is it on foil? Is it put on a special metal tray when you put it in. I notice you pour in water in separate pan underneath, I have done that. Focaccia so I do understand that.