Summer Ciabatta with Basil, Sun-Dried Tomatoes & Olives
If you’ve always wanted to bake ciabatta at home but felt intimidated by its high-hydration dough, this recipe is the perfect place to start.
Despite its impressive open crumb and artisan appearance, this ciabatta is surprisingly simple to make. The process relies on a few stretch-and-folds, gentle handling, and patience during fermentation rather than complicated techniques. Once you make it a few times, you’ll realize how forgiving and reliable this dough truly is.
What I love most about this recipe is how consistently it delivers beautiful results. The dough develops incredible strength during fermentation, making it easy to handle while still producing the light, airy texture that ciabatta is known for. Combined with proper baking, you’ll be rewarded with dramatic oven spring, a crisp golden crust, and a soft, open crumb every single time.
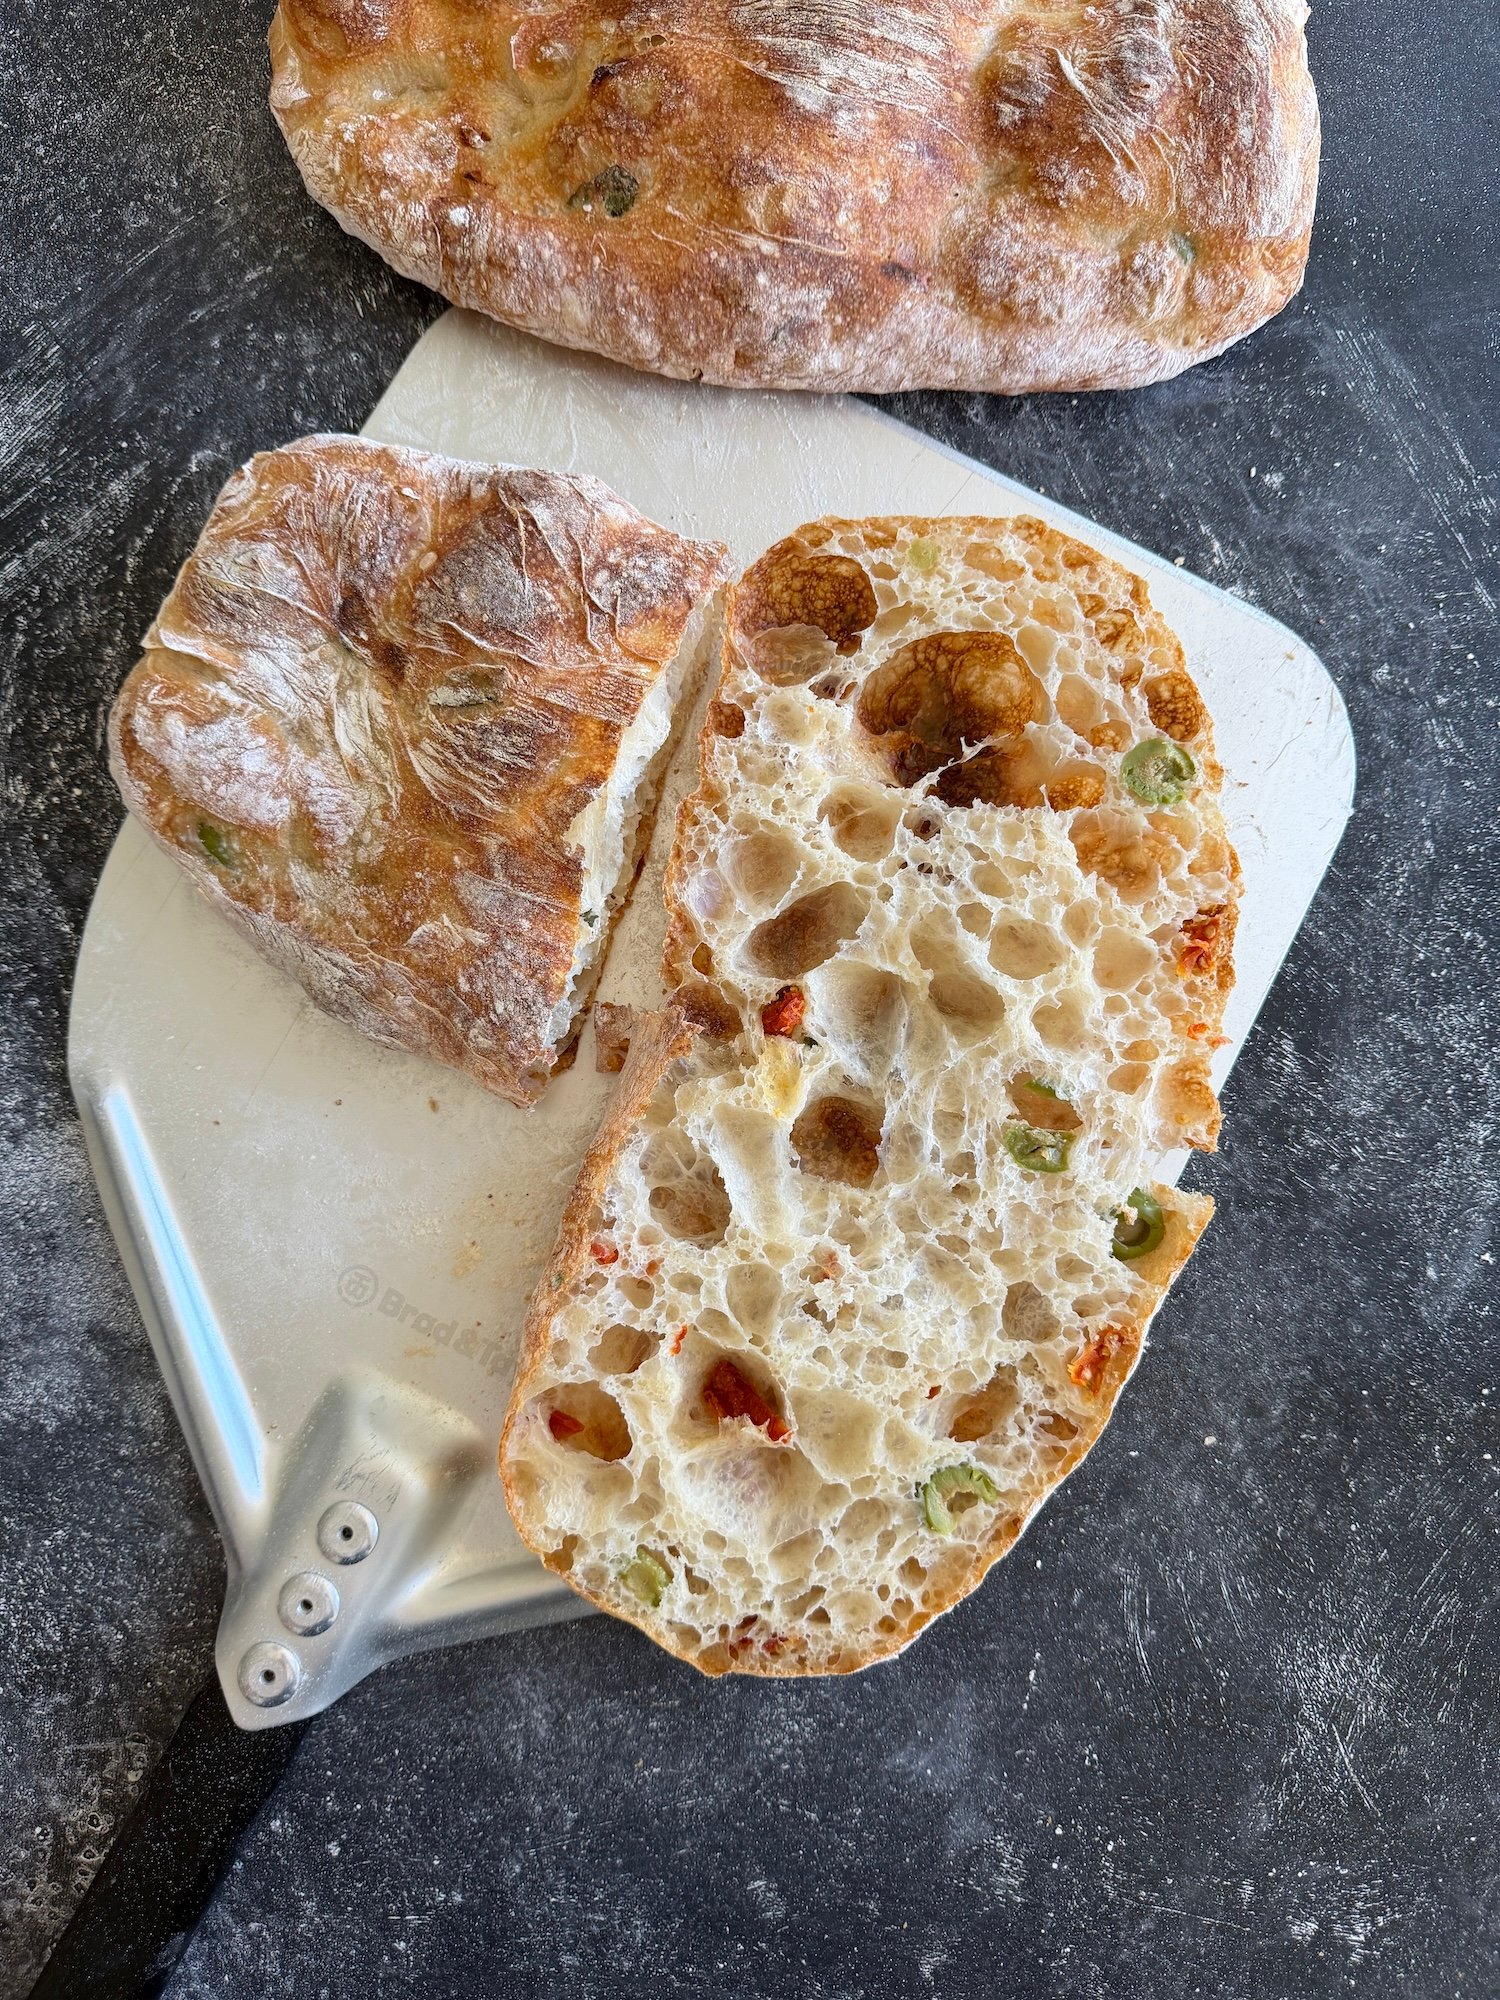
For this summer version, I’ve folded in some of my favorite seasonal flavors: fragrant fresh basil, sweet sun-dried tomatoes, and savory olives. The combination instantly brings to mind Mediterranean summers—simple ingredients that complement each other perfectly without overwhelming the bread itself.
Fresh basil adds a wonderful aroma throughout the loaf, while the sun-dried tomatoes provide bursts of sweetness and the olives add just enough saltiness to create balance. It’s the kind of bread that can easily become the centerpiece of a summer meal.
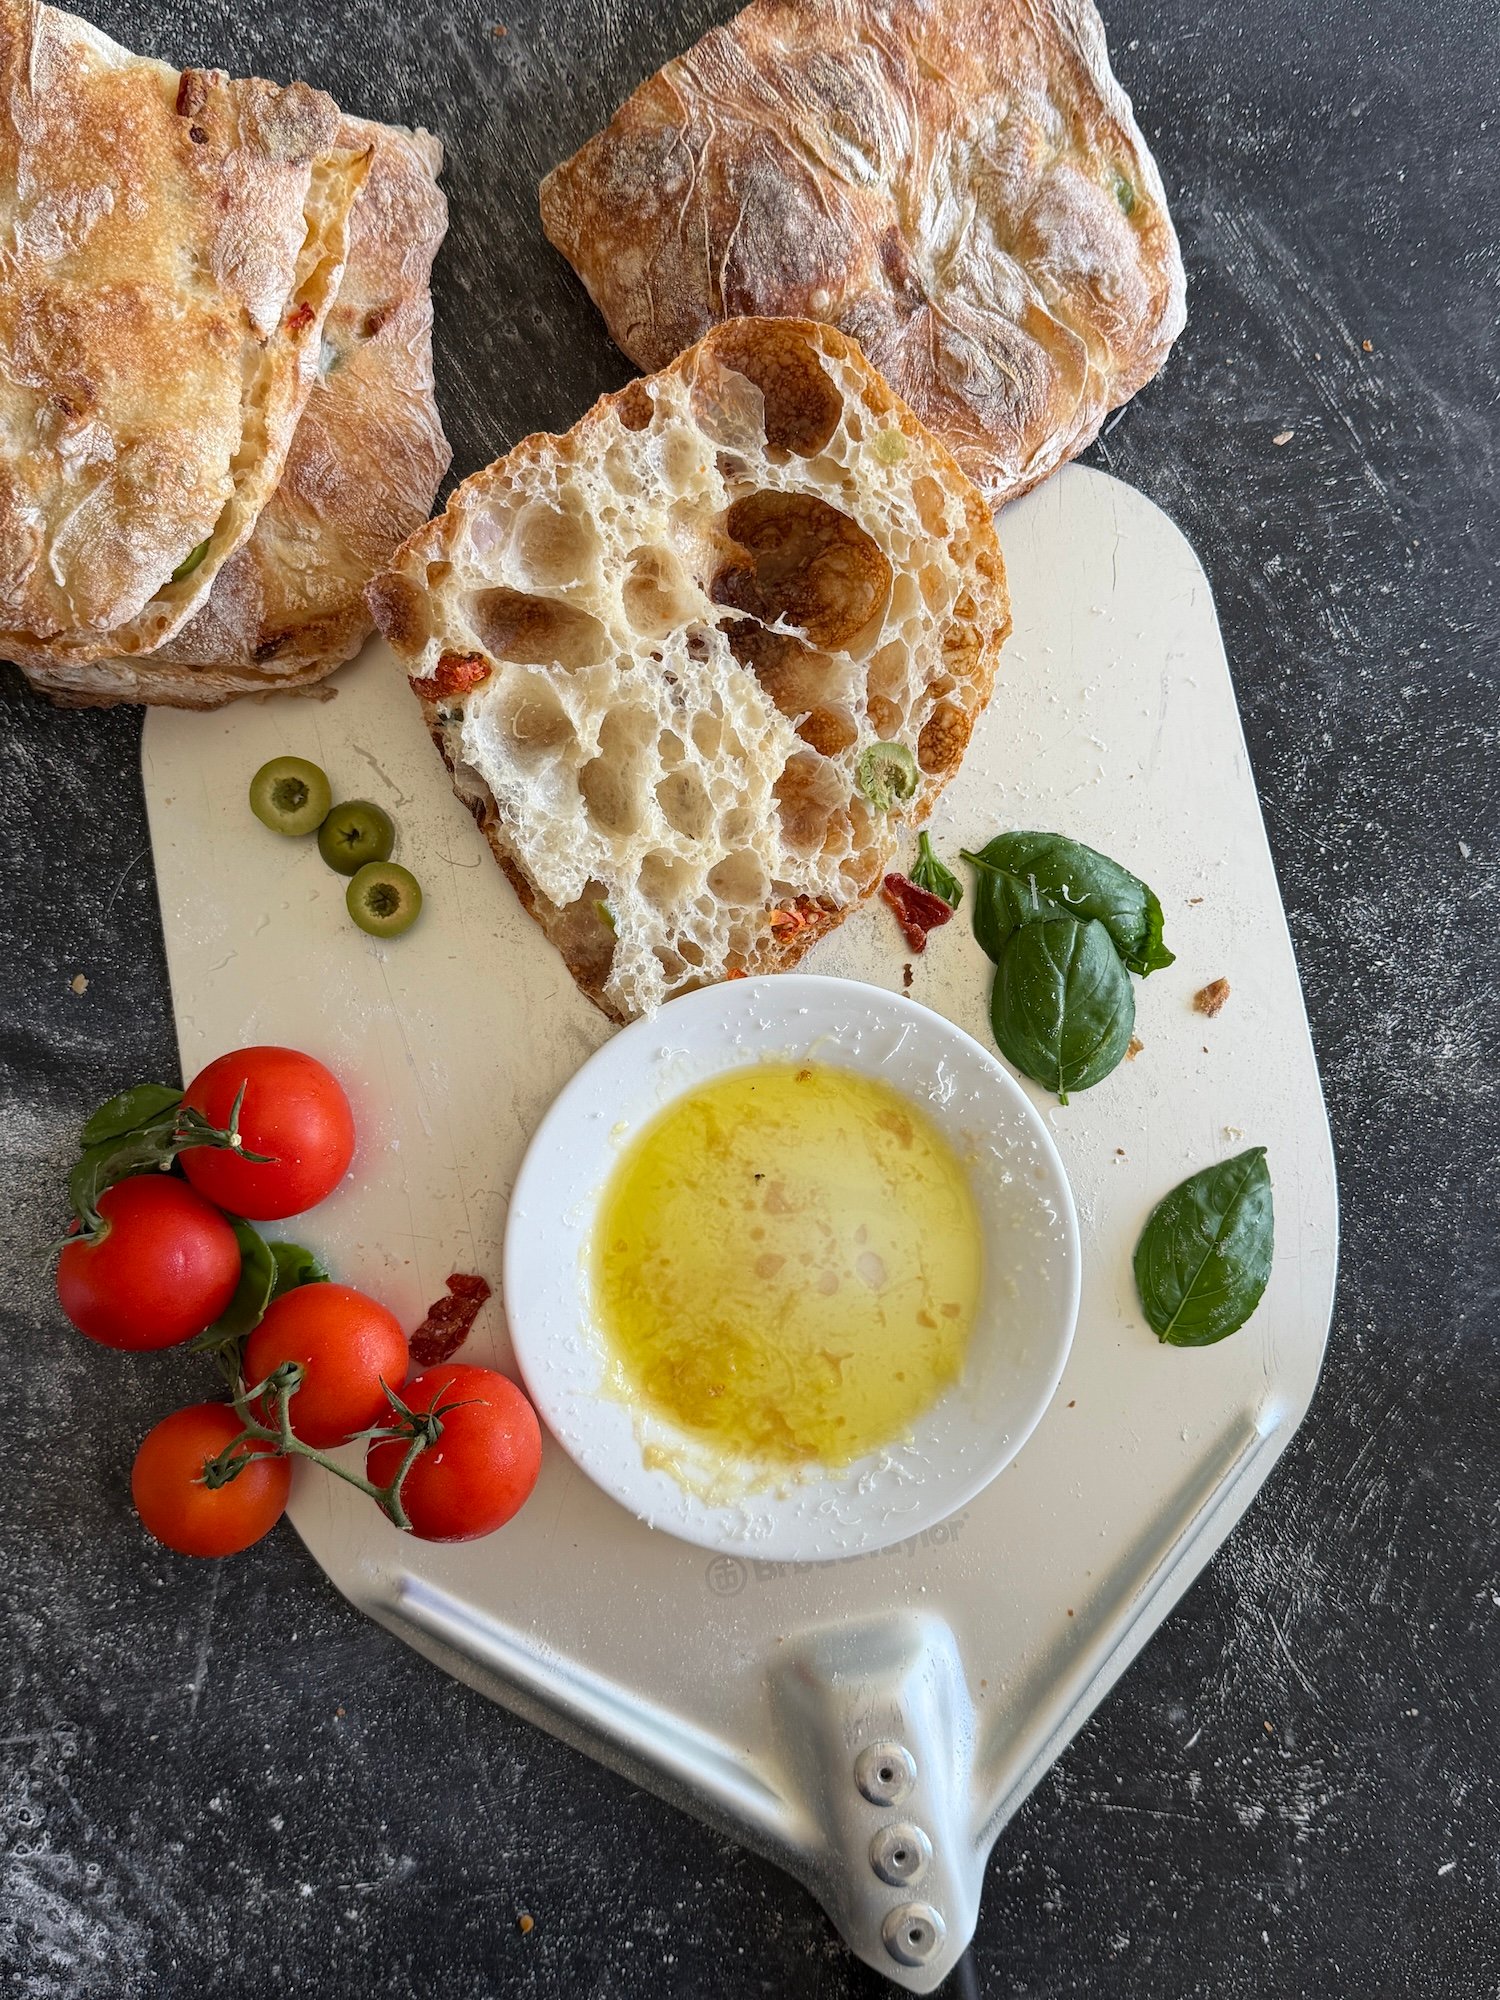
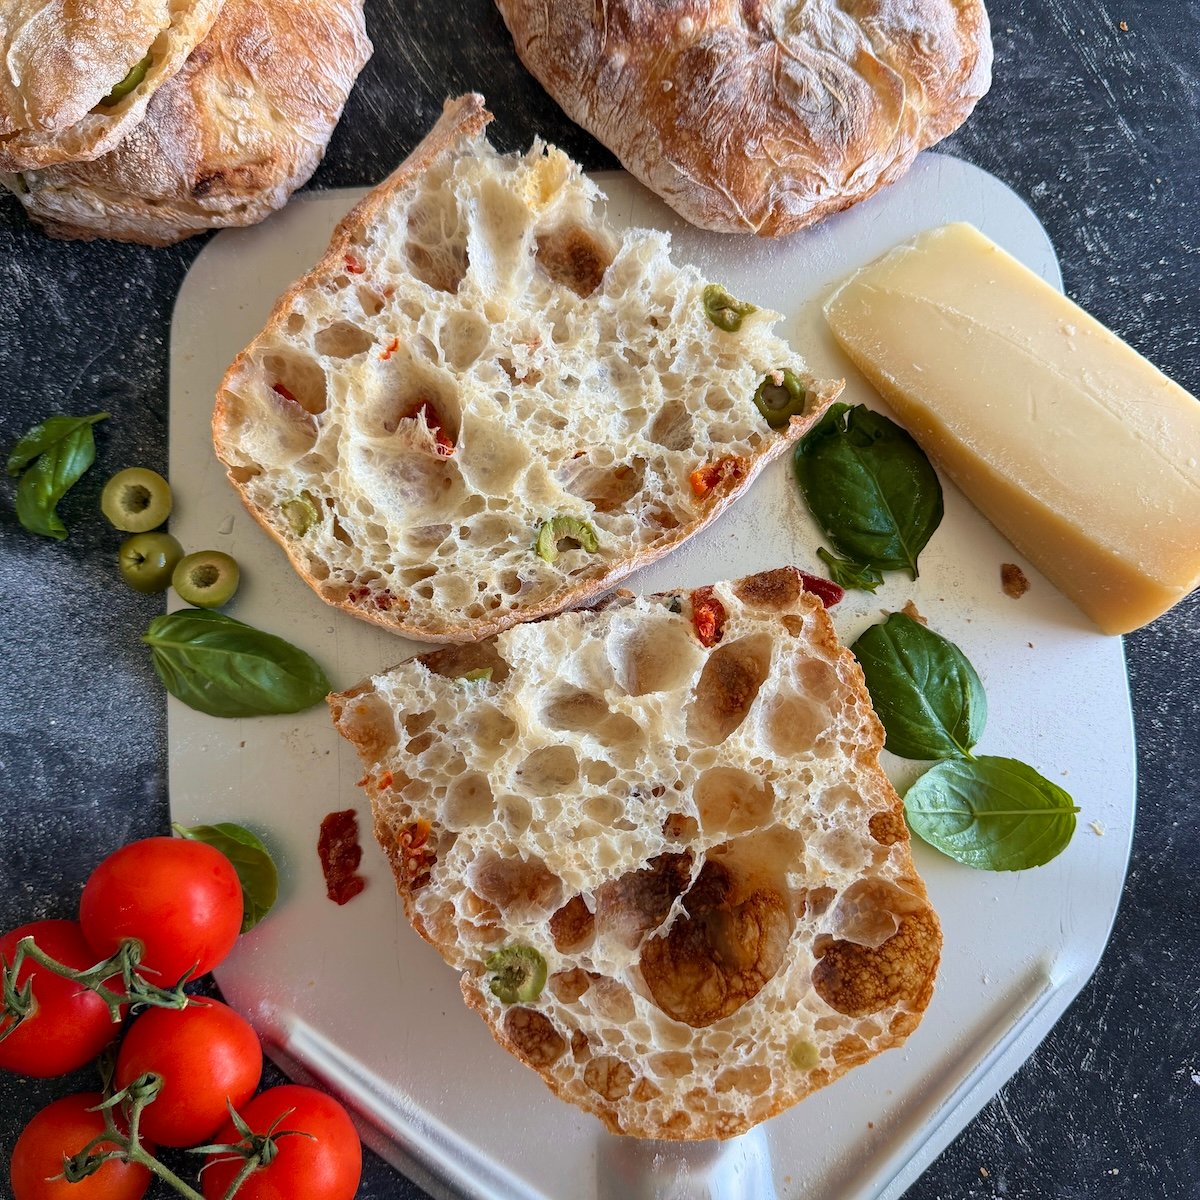
Whether you’re serving it alongside a fresh salad, building sandwiches, pairing it with burrata, or simply enjoying a slice dipped in olive oil, this Summer Ciabatta never disappoints.
This recipe makes 2 ciabatta loaves.
Ingredients
Biga Starter — Night Before
- 210 g bread flour
- 125 g water
- 2 g instant dry yeast
Main Dough
- All prepared overnight biga
- 140 g bread flour
- 190 g water
- 8 g baking salt
Summer Inclusions
- 1 generous handful fresh basil, chopped
- ¼ cup sun-dried tomatoes, chopped
- ¼ cup olives, chopped
Method
Night Before — Prepare the Biga
In a small bowl, dissolve 2 g instant dry yeast in 125 g water. Add 210 g bread flour and mix until a stiff, tight dough ball forms. Cover tightly and let ferment at room temperature for 10–12 hours overnight.
Day 2 — Mix, Add Inclusions, and Bulk Ferment
Tear your mature overnight biga into small pieces and place them directly into the bowl of a stand mixer. Add 100 g water, 140 g bread flour, 8 g salt. Attach the dough hook and mix on low-medium speed for 5–7 minutes, until the preferment pieces dissolve and form a uniform, shaggy mass. Increase the mixer speed to medium-high and knead continuously for 7–10 minutes. At first, the dough will look loose, but it will gradually gain strength, become smoother and more elastic, and begin pulling away from the sides of the bowl. Add the remaining 90 g of water and continue kneading for extra 4-5 min until strong gluten will be developed.
Transfer the sticky dough into a lightly oiled square or rectangular container.
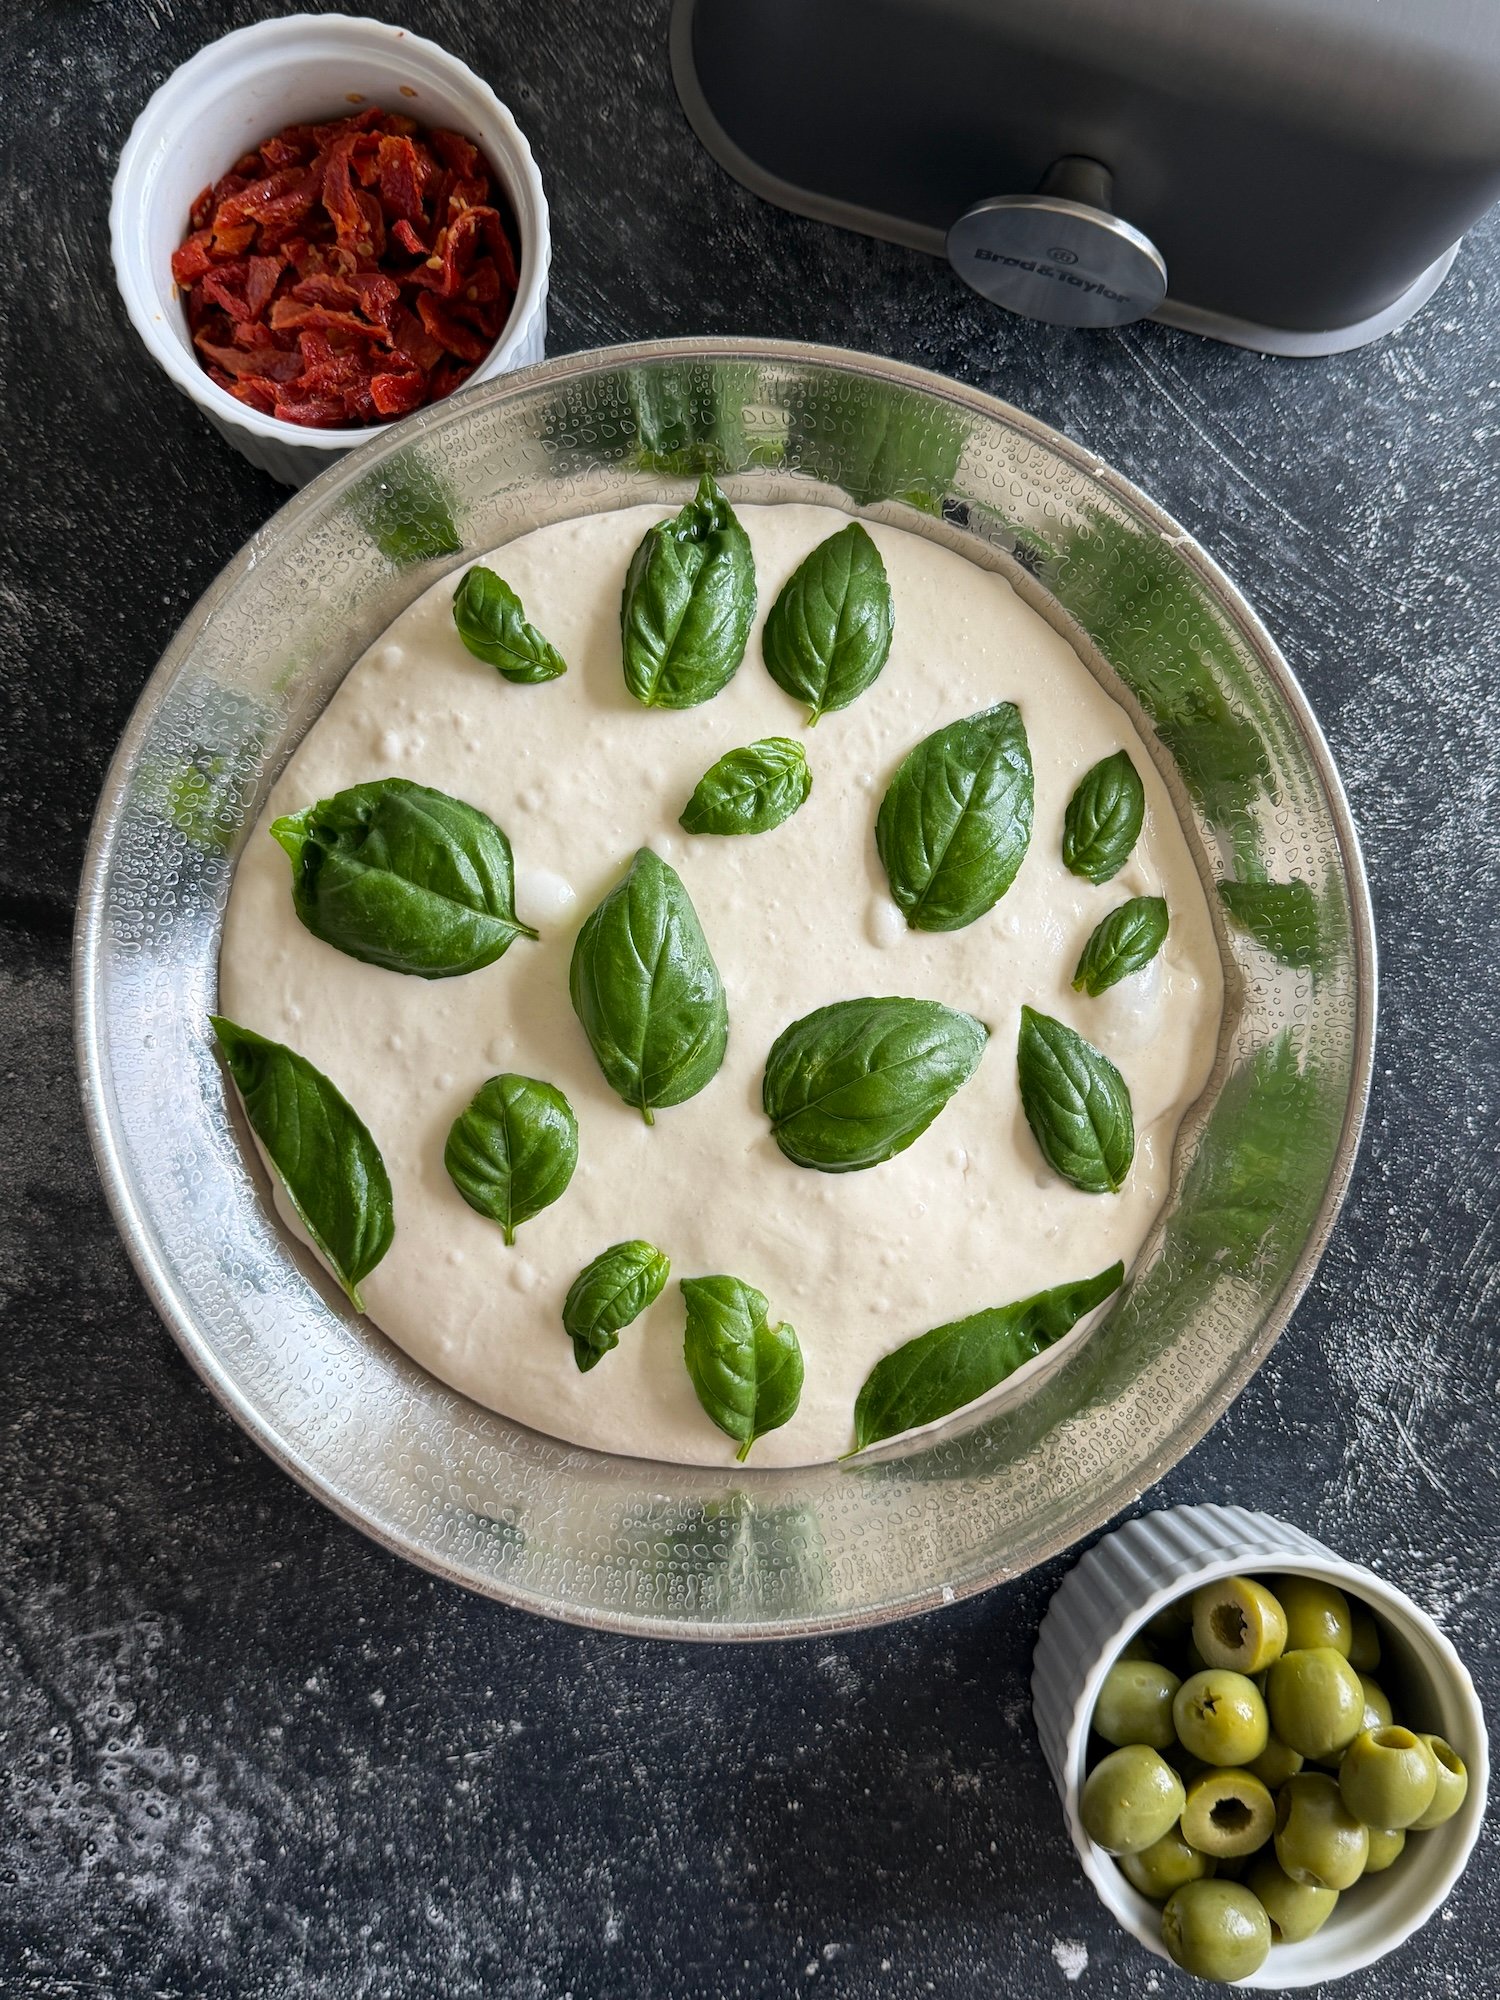
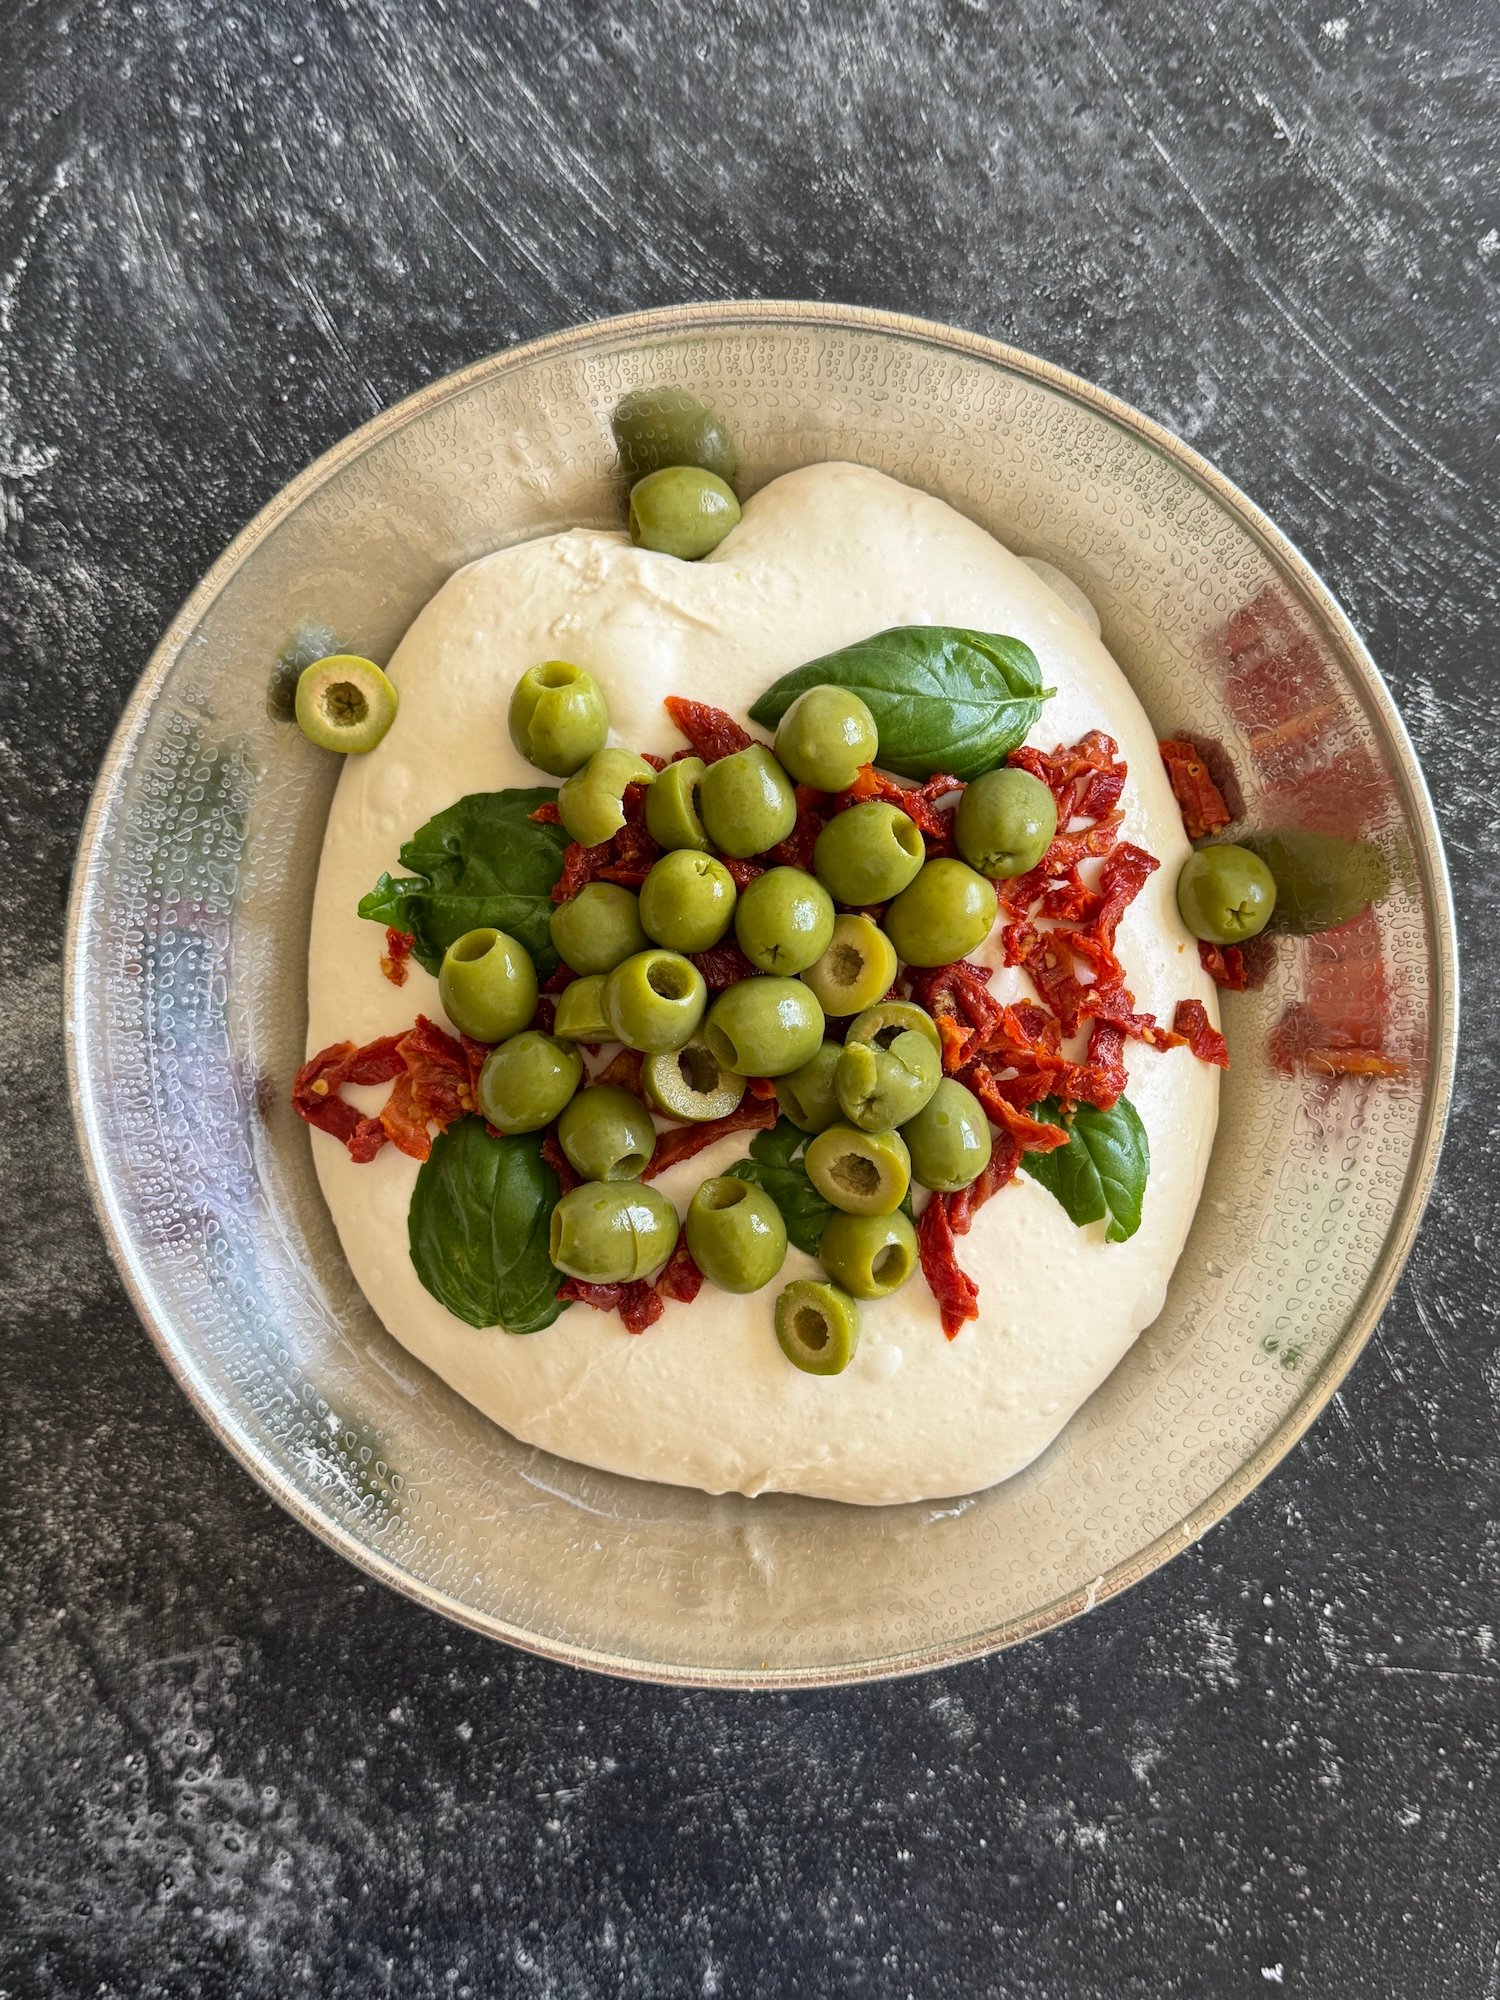
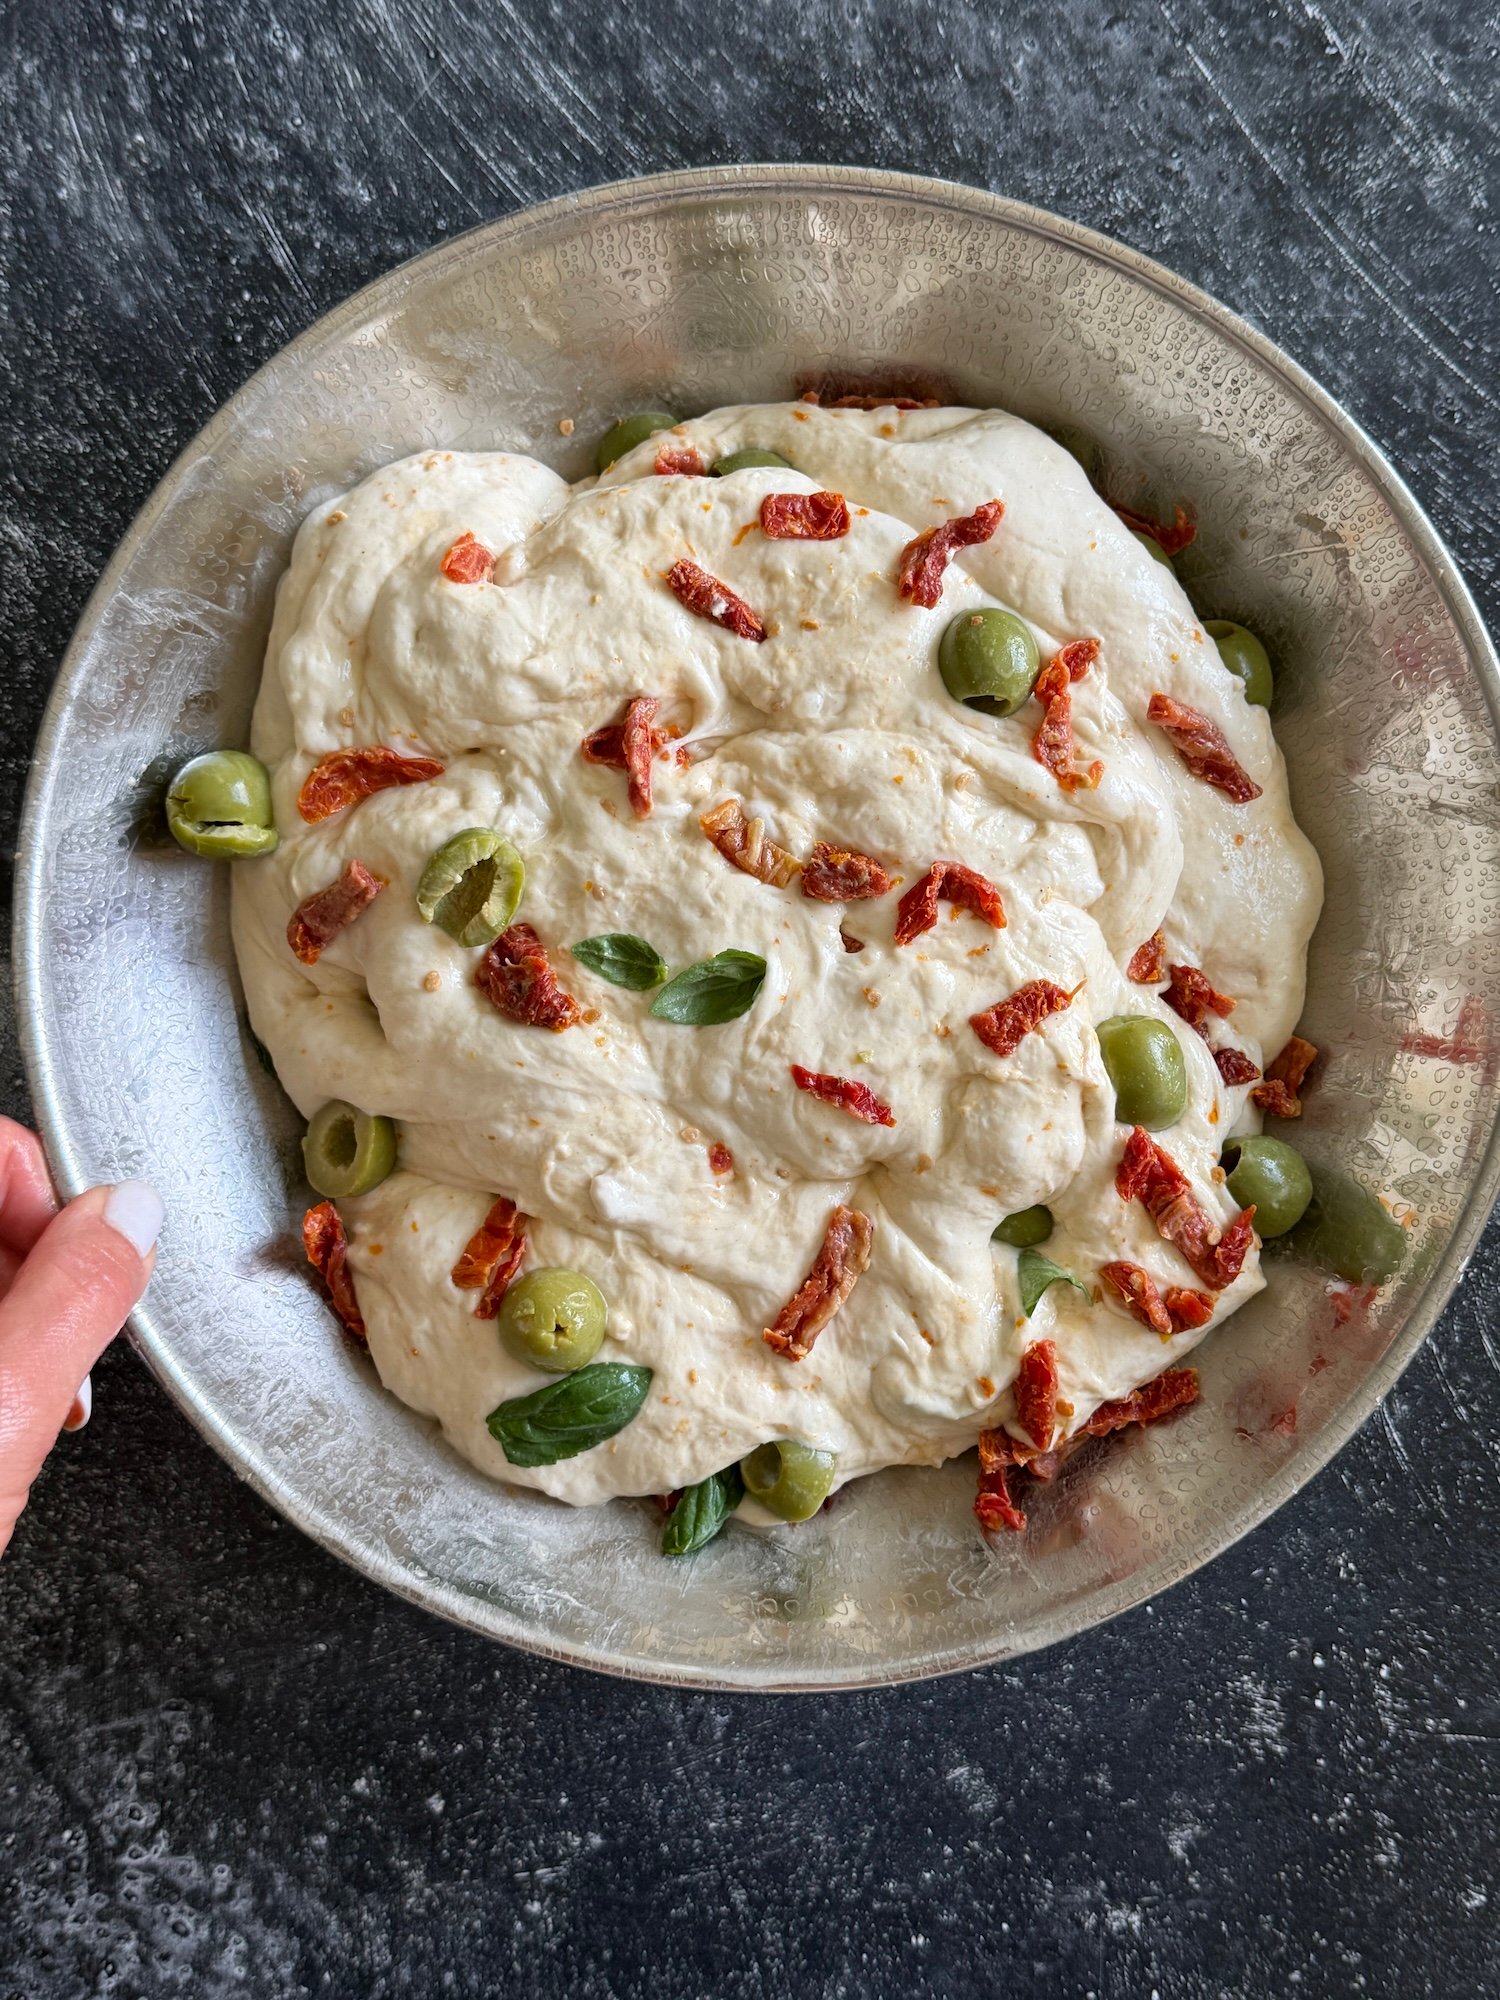
Wet your hands, gently stretch the dough mass out thin, and scatter the chopped fresh basil, sun-dried tomatoes, and olives evenly over the surface. Fold the dough into thirds like a letter to trap the inclusions inside.
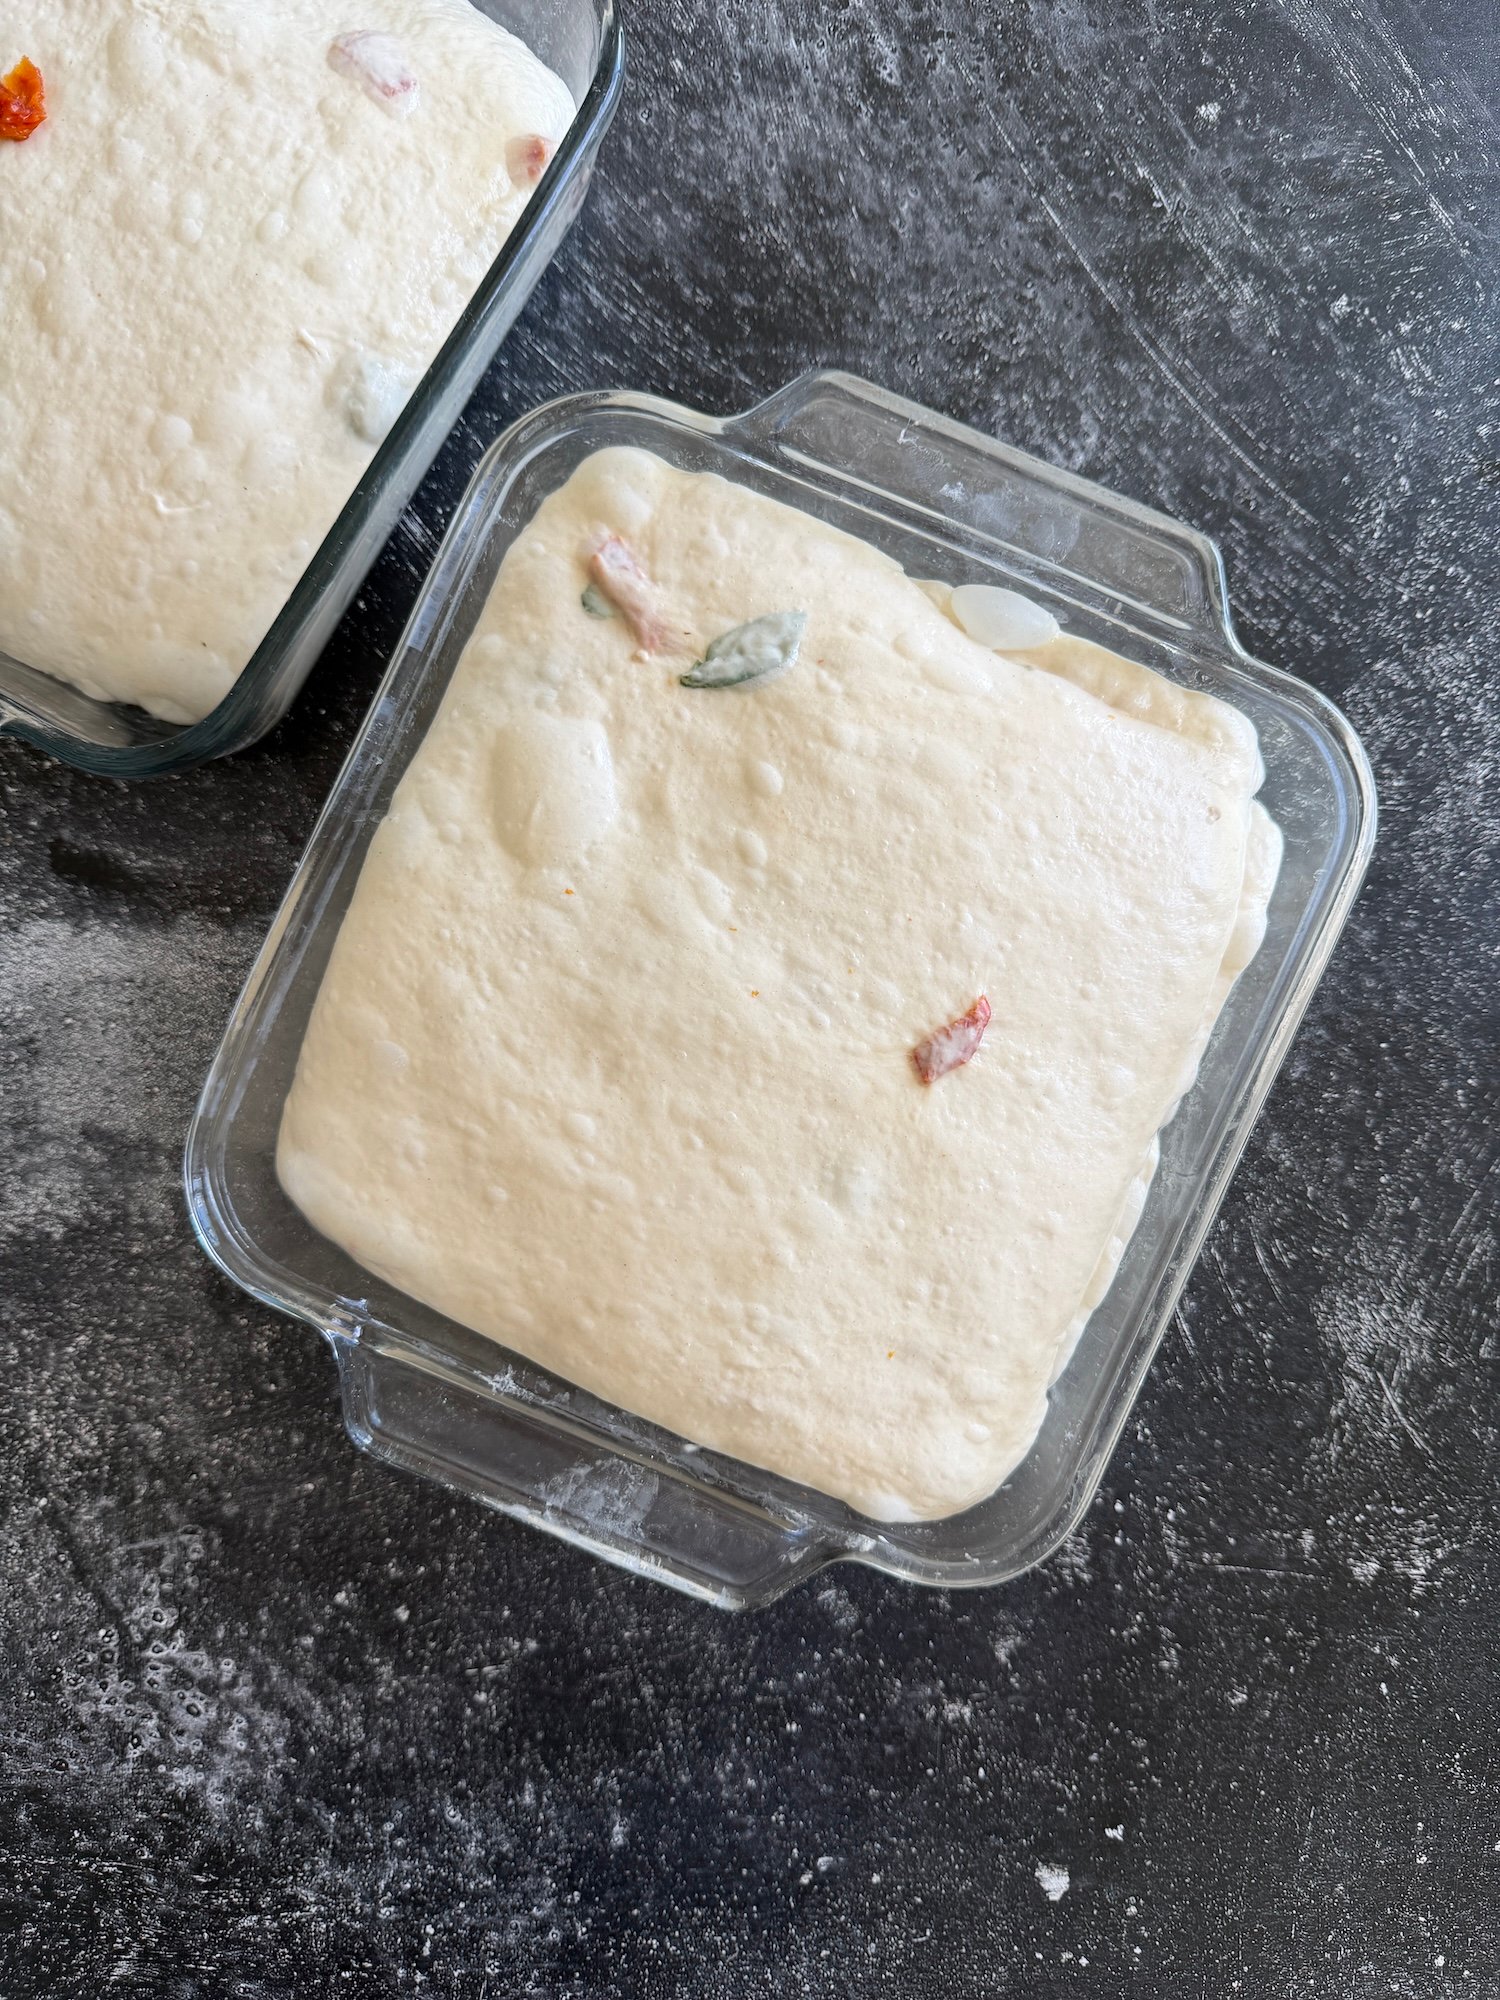
After adding the inclusions and transferring the dough to the greased container, cover with a lid and let the dough double in size completely untouched (about 1.5-2 hours at 24-26C)
Once the dough has doubled in volume, wet your hands with a little water.
Lift the dough from the center, allowing the loose sides to curl underneath themselves, and rotate the tub to form a tighter, more structured square log.
Cover the container again and let the dough double in volume a second time (about 1 hour at 24-28C)
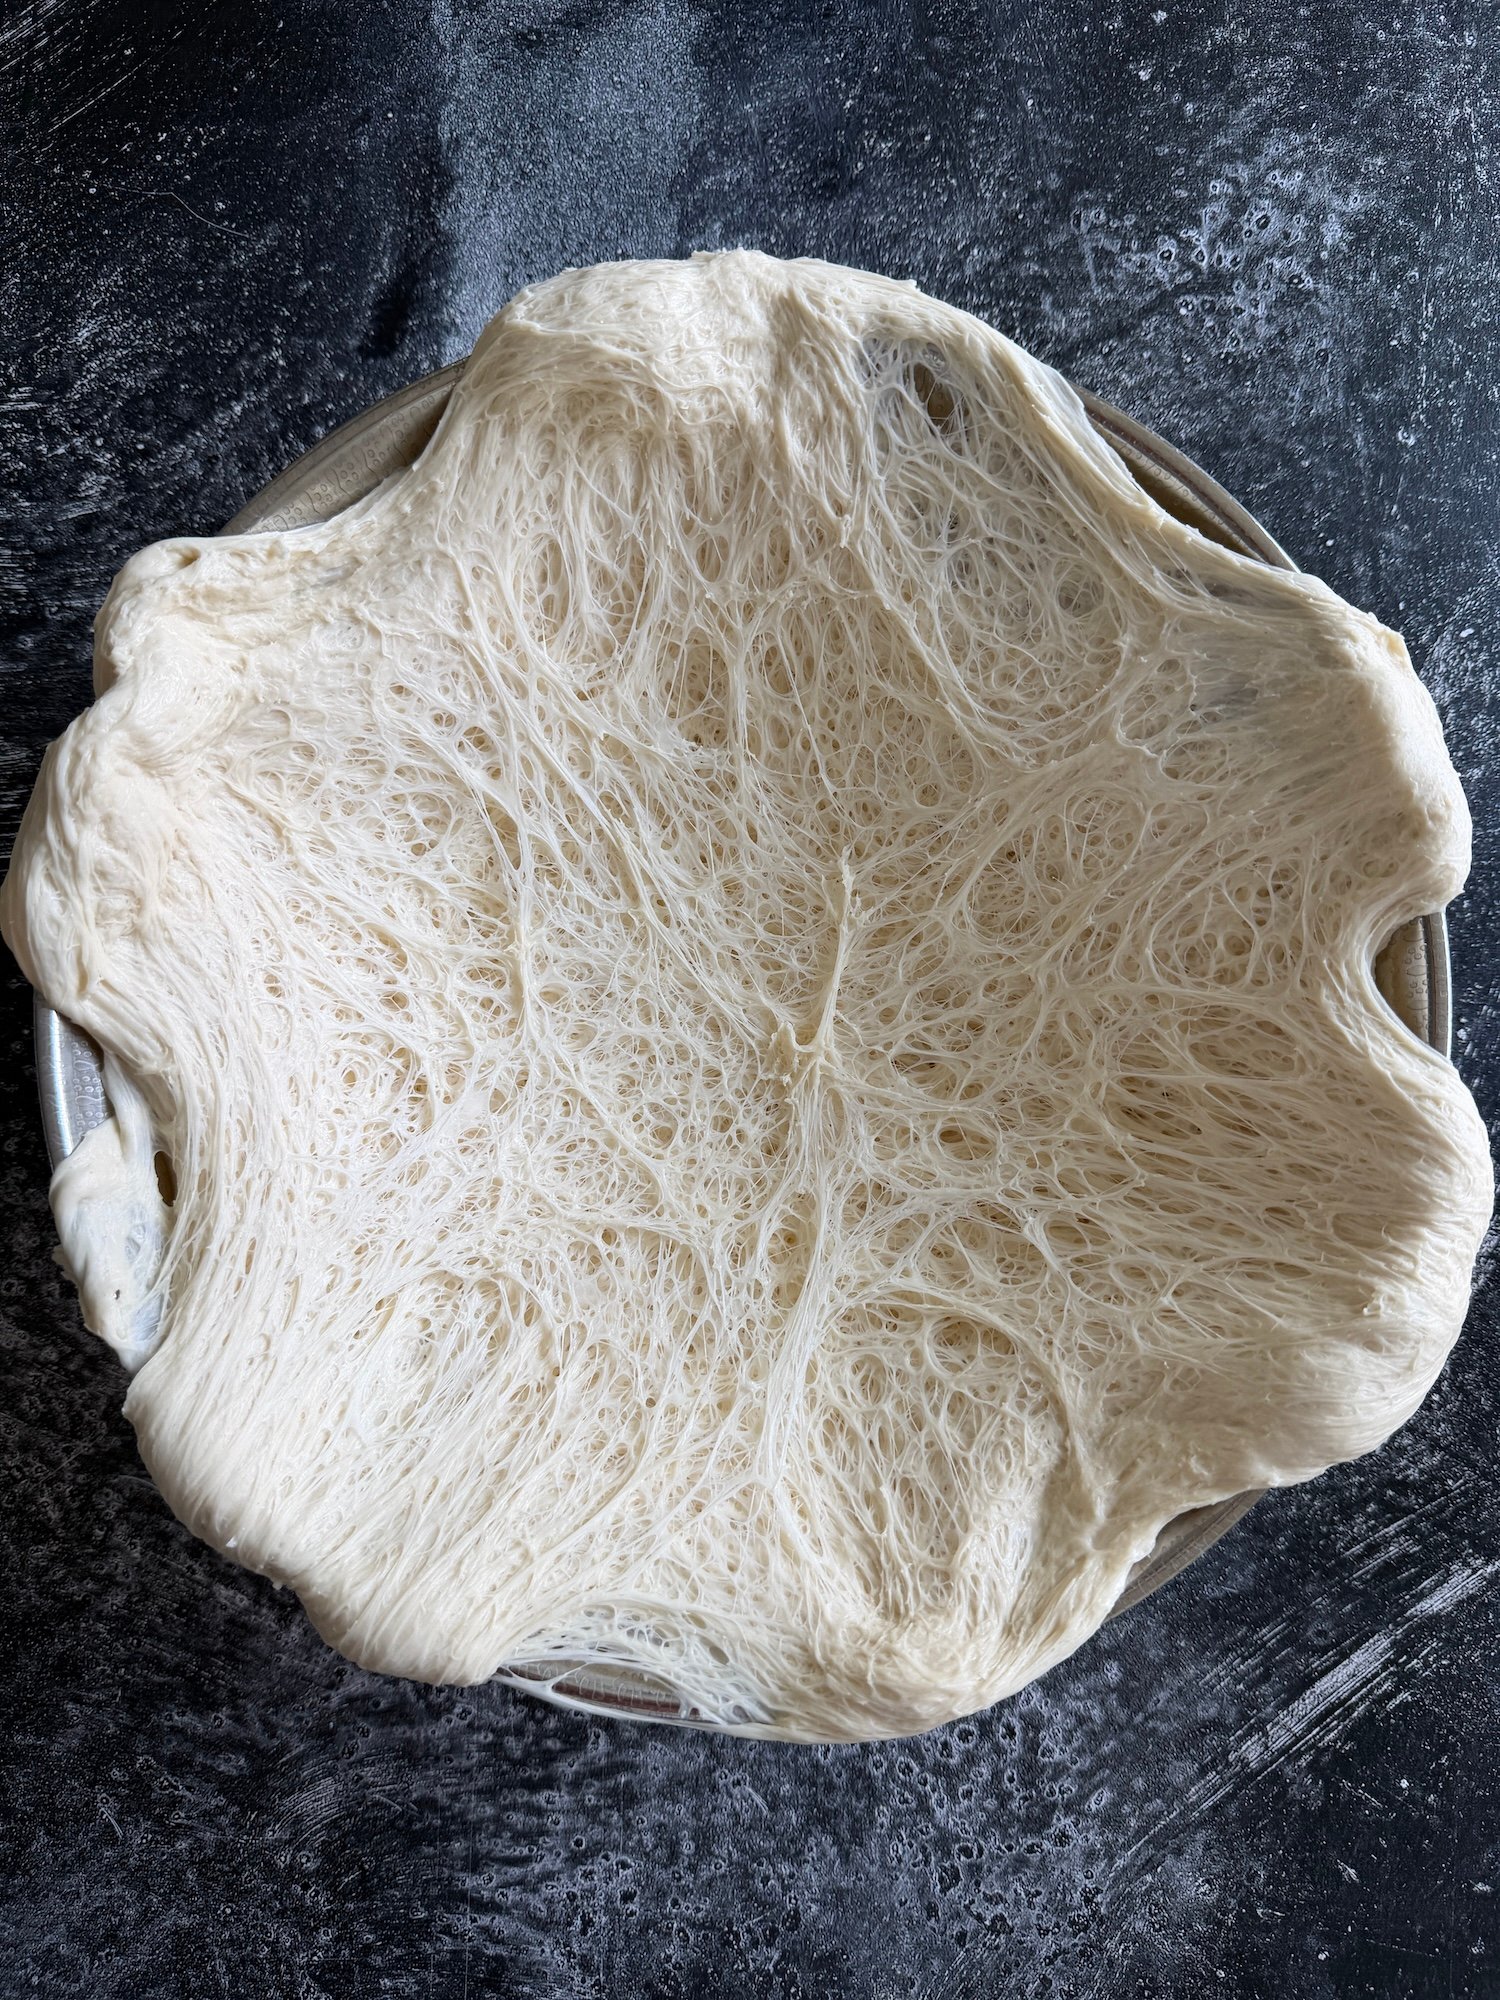
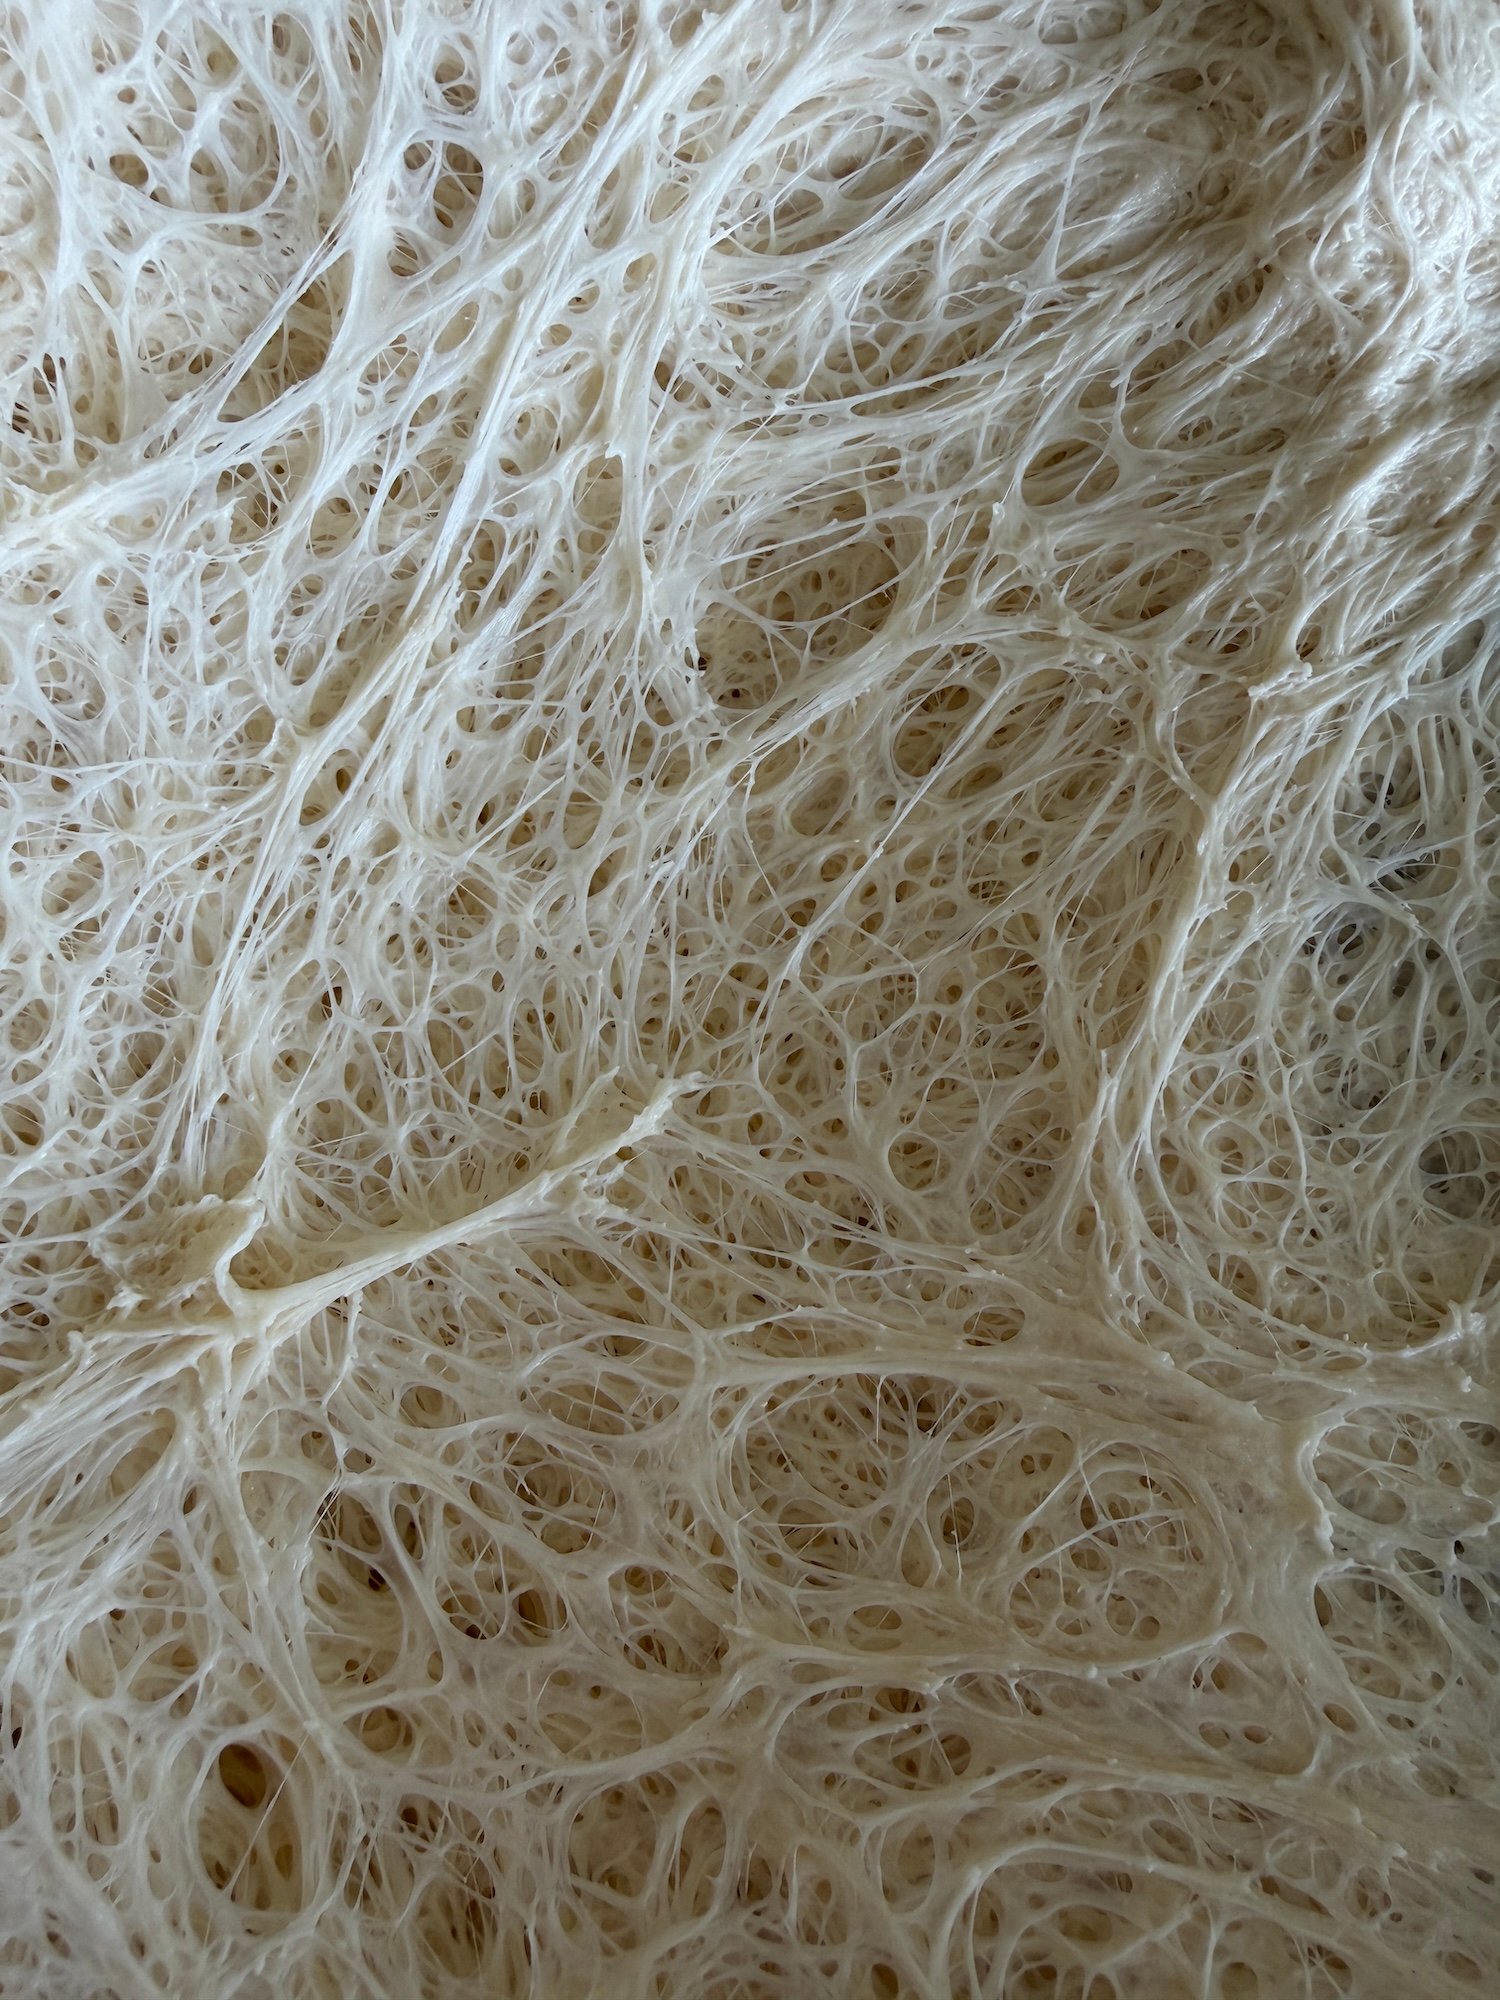
Once the dough reaches the second doubling and is full of large, fragile air pockets, it is ready to be turned out and divided.
Dividing and Shaping
Dust your workspace generously with a thick layer of flour.
Carefully tip the airy dough straight out onto the floured surface. Do not pull, press, or aggressively handle the dough, because you want to preserve all the internal bubbles.
Dust the exposed sticky top surface with another generous layer of flour.
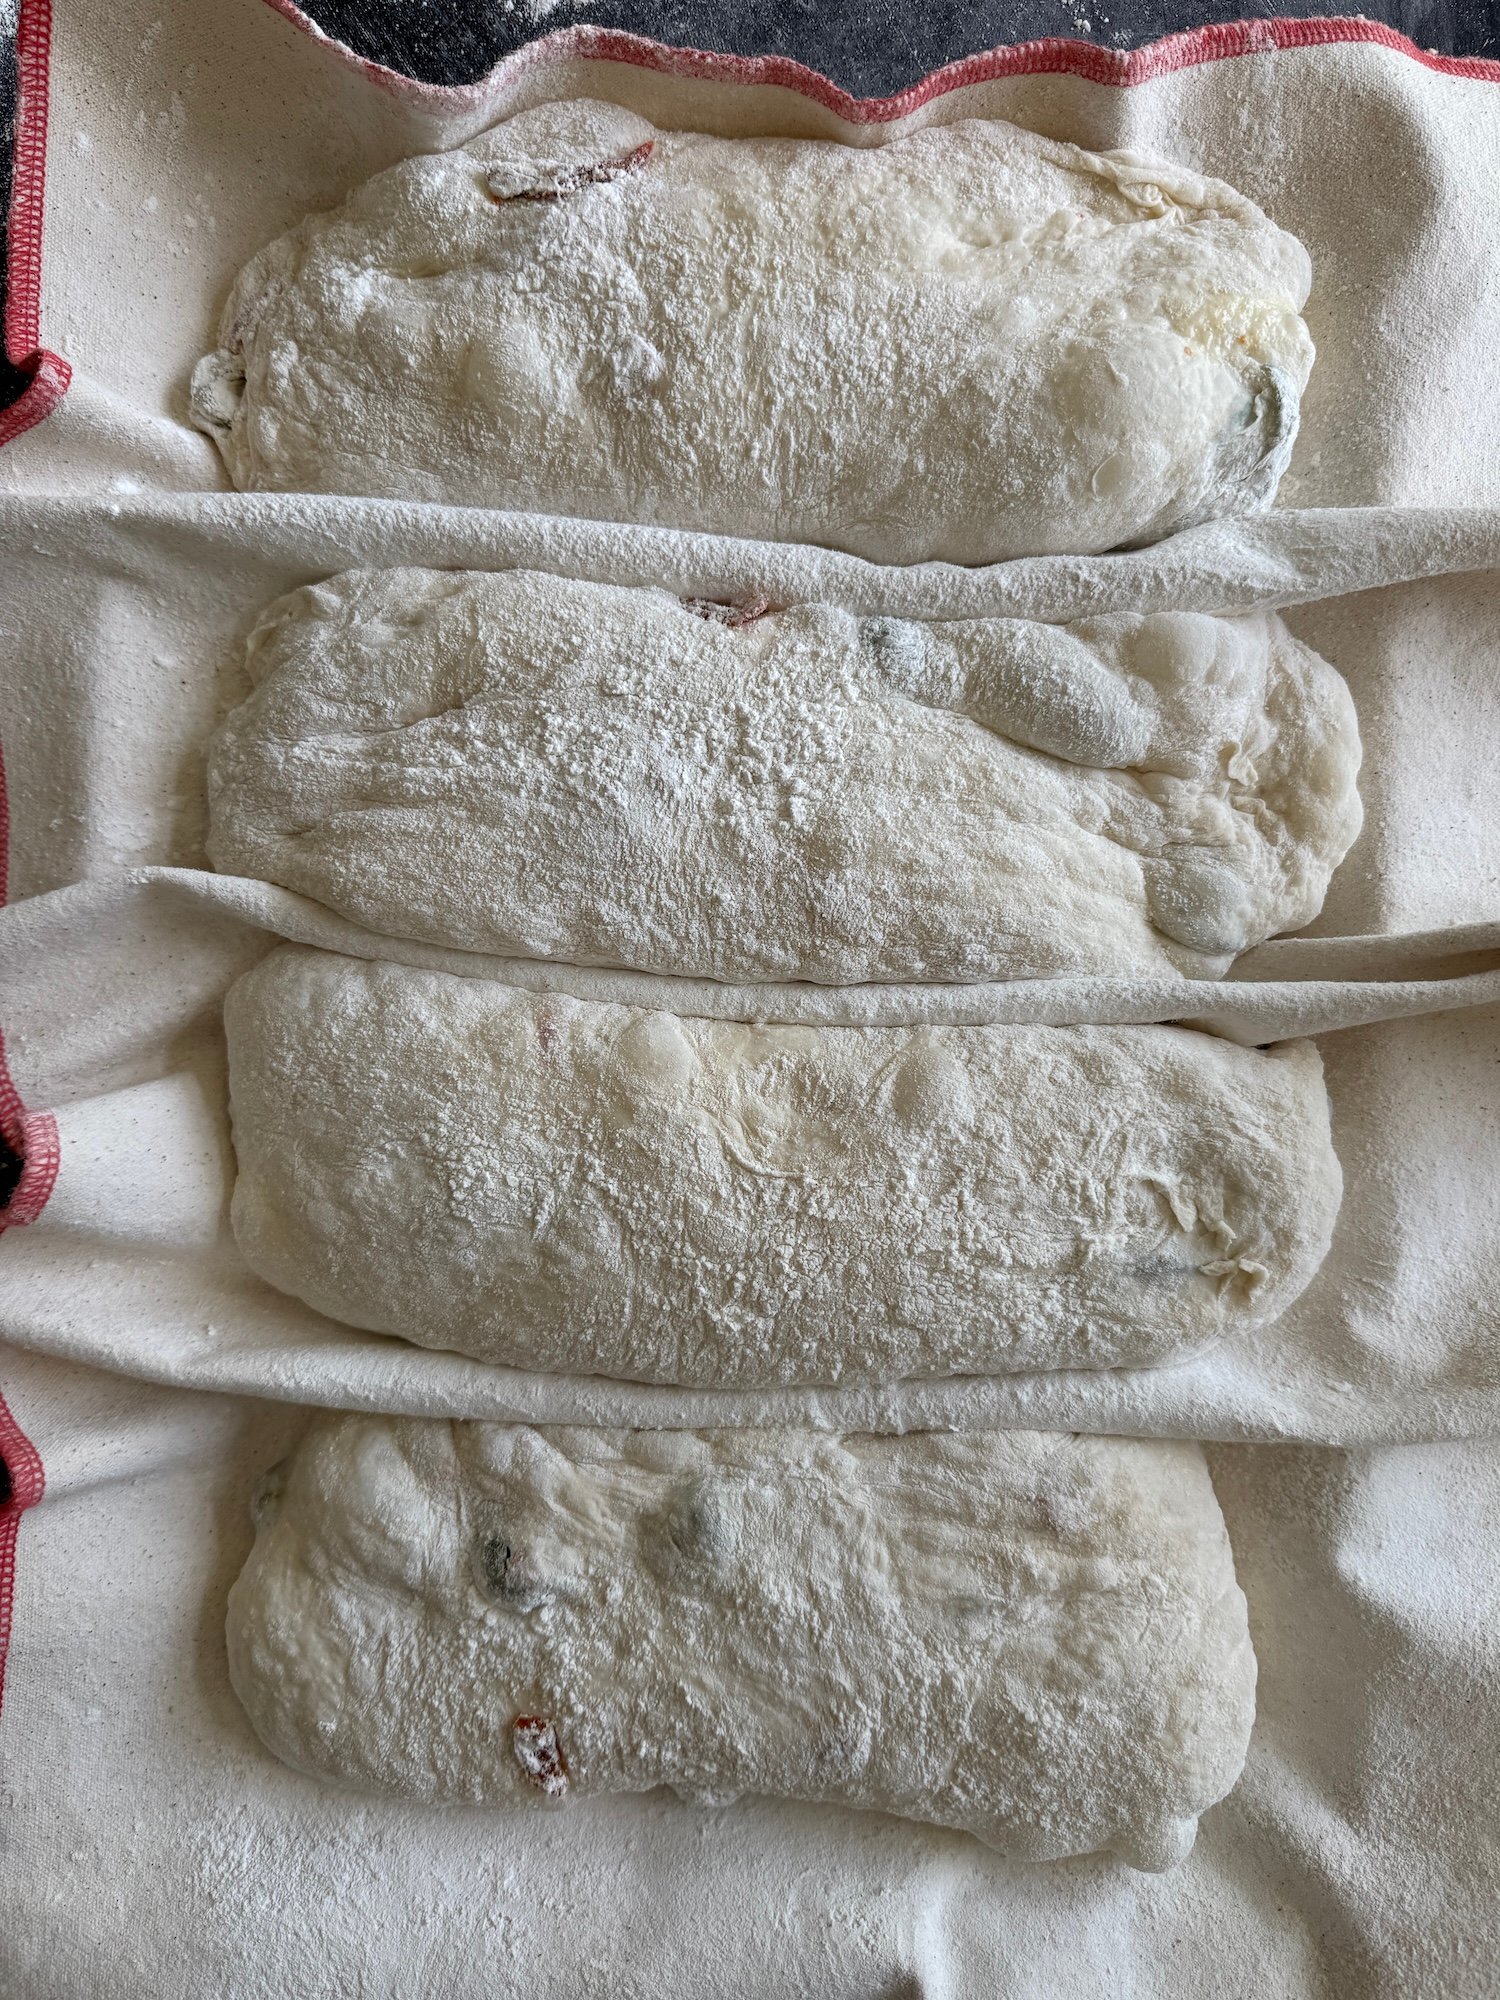
Use a sharp bench knife to slice the dough rectangle cleanly down the center into 2 equal slipper-shaped ciabatta loaves.
Gently nudge the cut edges inward to square them up. Transfer the loaves carefully onto baking coushe. Let them proof uncovered on the counter for 45 minutes to 1 hour.
Why Steam Matters for Ciabatta
Steam is one of the most important elements in ciabatta baking.
During the first stage of baking, steam keeps the outer surface of the dough soft and flexible, allowing the loaves to expand freely before the crust sets. This results in greater oven spring, larger air pockets, thinner crust, and the beautifully open crumb that ciabatta is known for.
Without enough steam, the crust forms too quickly, limiting expansion and producing a denser loaf.
Commercial bakeries solve this problem with steam-injected ovens. Home bakers often try to recreate the same environment using boiling water, cast-iron pans, lava rocks, spray bottles, or ice cubes.
While these methods can work, they often require extra effort and produce inconsistent results.
For this recipe, I use the Brod & Taylor Bread Steel Duo together with two Baking Shells.
The Bread Steel Duo stores a tremendous amount of heat and provides exceptional heat transfer throughout the bake. Because of its generous size, I can comfortably bake both ciabattas at the same time, making the process efficient and effortless.
The Baking Shells create a mini steam chamber around each loaf. As the ciabatta begins baking, moisture naturally released from the dough becomes trapped under the shell, creating the perfect steaming environment exactly where it is needed.
This simple system helps create:
- Exceptional oven spring
- Larger air pockets
- Better volume
- Thin crispy crust
- Beautiful caramelization
- Soft glossy crumb
Most importantly, it removes the guesswork and complexity from steam baking, allowing you to achieve professional-quality results with minimal effort.
Together, the Bread Steel Duo and Baking Shells make home baking so much easier and more reliable.
Oven Setup
Place the Bread Steel Duo inside the oven. Preheat the oven to 500°F / 260°C. Let the steel preheat thoroughly so it is fully saturated with heat.
Baking
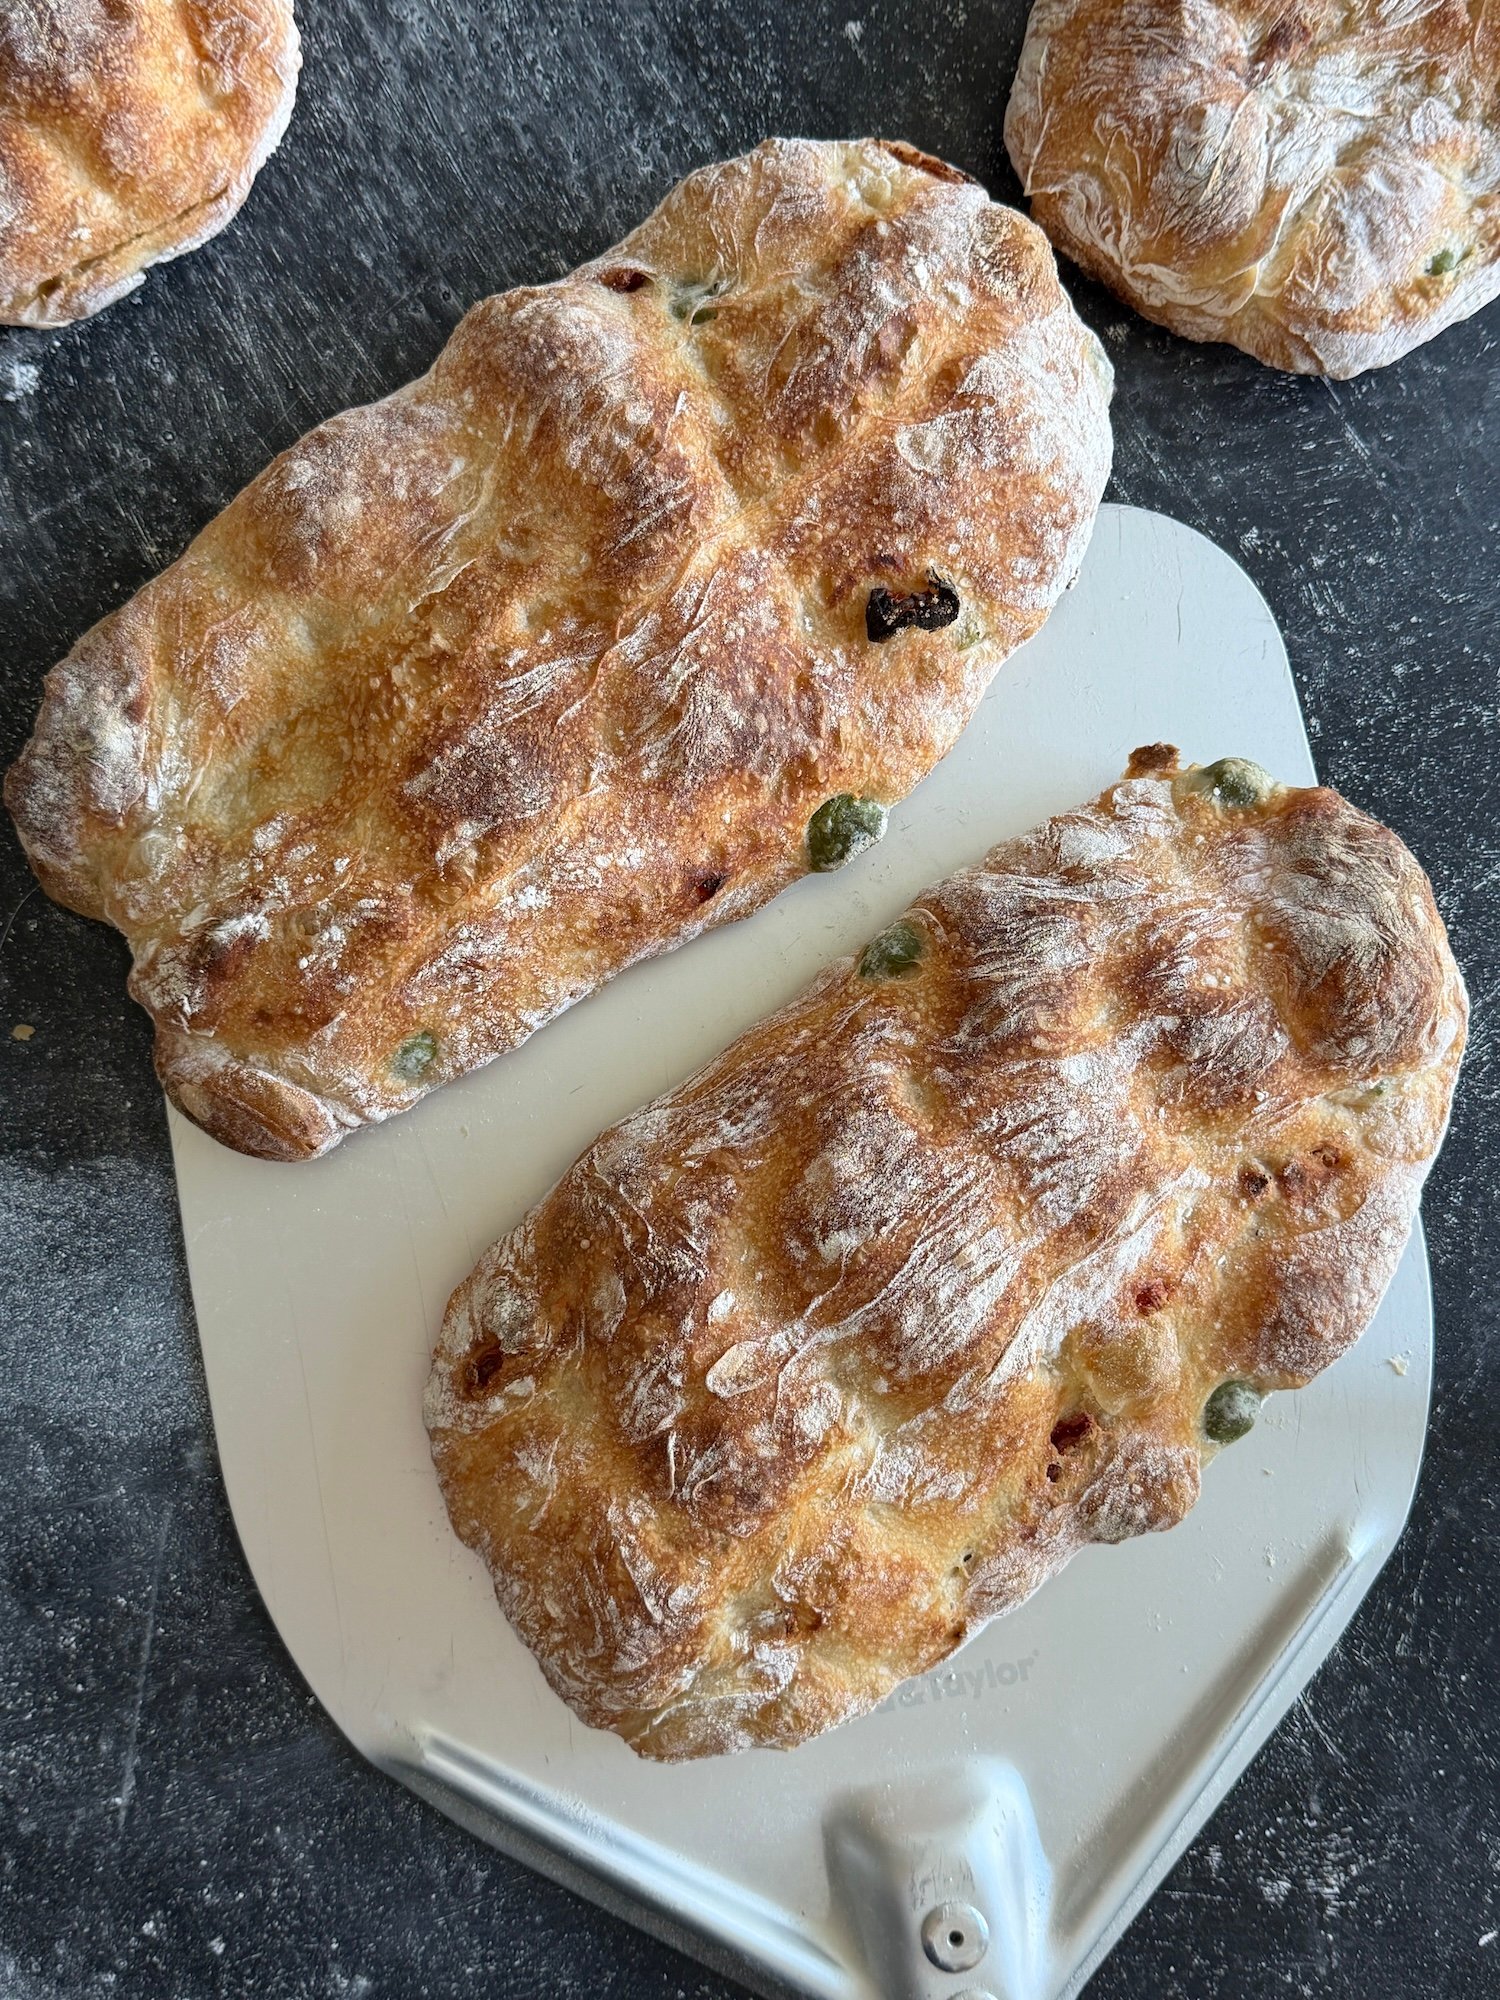
Carefully flip ciabatta from baking coushe onto a parchment paper(bottom part should go up), slide both ciabatta loaves onto the hot Bread Steel Duo. Immediately cover each loaf with a Baking Shell. Bake covered at 500°F / 260°C for 10 minutes. Remove the Baking Shells. Lower the oven temperature to 450°F / 232°C. Continue baking uncovered for another 10–15 minutes, until the crust is deeply golden, crisp, and beautifully caramelized. Let the loaves cool on a wire rack before slicing.
Flavor and Texture
The aroma while this bread bakes is incredible. The basil becomes fragrant, the sun-dried tomatoes add sweet savory pockets, and the olives bring the perfect salty balance.
The crust stays thin and crispy, while the inside remains soft, glossy, chewy, and full of open air pockets.
This Summer Ciabatta is perfect:
- dipped in olive oil
- served with burrata
- used for sandwiches
- toasted for bruschetta
- paired with fresh tomatoes and mozzarella
- served with soups, salads, or grilled vegetables
Q&A
Can I use different olives?
Yes. Kalamata, Castelvetrano, green olives, or a mix of olives will all work beautifully.
Can I use oil-packed sun-dried tomatoes?
Yes. Oil-packed sun-dried tomatoes work very well. Just drain them lightly before adding to the dough so they do not bring too much extra oil.
When should I add the basil?
Add fresh basil during the inclusion step, together with the sun-dried tomatoes and olives. This helps distribute it gently without overmixing the dough.
Why does this recipe use a biga?
The biga builds flavor, aroma, and dough strength before the final dough is mixed. It also makes this high-hydration ciabatta easier to handle and helps create a more open crumb.
Why is this dough so wet?
Ciabatta needs high hydration to create its signature open crumb, glossy interior, and light texture. The dough may look loose at first, but after proper mixing and fermentation it becomes much stronger.
Why do we let the dough double, fold it, and let it double again?
This helps the dough build structure while also creating large air pockets. The second rise is one of the key steps that gives ciabatta its light, open crumb.
Can I bake this without Baking Shells?
Yes, but the Baking Shells make the process much easier. They trap steam directly around the loaves, which helps with oven spring, thin crust, and open crumb.
How do I know the ciabatta is fully baked?
The crust should be deeply golden and crisp, and the loaf should feel very light when lifted. If using a thermometer, the internal temperature should be about 205–210°F / 96–99°C.
What is the best way to serve this bread?
It is amazing warm, dipped in olive oil, served with burrata, used for sandwiches, or toasted for bruschetta.
Do yo have a sourdough version ?
I’ve experimented with many sourdough ciabatta recipes using different hydration levels and starter percentages, but I honestly keep coming back to the ciabatta made with hybrid method. It consistently gives me a lighter, more open crumb and a loftier texture while still delivering excellent flavor.
Summer Ciabatta with Basil, Sun-Dried Tomatoes & Olives
Ingredients
- 210 g Bread flour
- 125 g Water
- 2 g Instant dry yeast
- approx. 337 g All of your prepared overnight biga
- 140 g Bread flour
- 190 g Water (Split into an initial 100g mixing pool and a 90g bassinage finish)
- 8 g Baking salt
- fresh basil 1 Generous handful (Finely chopped)
- ¼ Cup Sun-dried tomatoes (Chopped)
- ¼ Cup Olives (Chopped)
Equipment
- Small Bowl (For the overnight biga)
- Stand Mixer (Fitted with a dough hook attachment)
- Square or Rectangular Container (Essential for tracking the dough doubling in size)
- baking couche (Or a well-floured kitchen cloth towel)
- Brod & Taylor Bread Steel Duo
- Two Brod & Taylor Baking Shells (To create individual steam chambers)
- Sharp Bench Knife
Method
- In a small bowl, thoroughly dissolve your 2g of instant dry yeast into 125g of water.
- Add the 210g of bread flour and mix until a stiff, tight dough ball forms. Cover tightly and let it ferment at room temperature for 10 to 12 hours overnight.
- Tear your mature overnight biga into small pieces and place them directly into the bowl of a stand mixer.
- Add the first 100g of water, 140g of bread flour, and 8g of baking salt. Attach your dough hook and mix on low-medium speed for 5 to 7 minutes until the preferment pieces completely dissolve into a uniform, shaggy mass.
- Increase the mixer speed to medium-high and knead continuously for 7 to 10 minutes. At first, the high-hydration dough will look very loose, but it will gradually gain strength, become smoother and more elastic, and begin cleanly pulling away from the sides of the bowl.
- Pour in the remaining 90g of water and continue kneading for an extra 4 to 5 minutes until a strong, extensible gluten network is fully developed.
- Transfer the sticky dough into a lightly oiled square or rectangular container. Wet your hands with water, gently stretch the dough mass out thin right inside the container, and scatter the chopped fresh basil, sun-dried tomatoes, and olives evenly over the surface. Fold the dough into thirds like a letter to cleanly trap the inclusions inside.
- The First Doubling Check: Snap the lid onto your container and let the dough double in size completely untouched. This will take about 1.5 to 2 hours at a warm room temperature of 75–79°F (24–26°C).
- The Single Coil Fold: Once the dough has successfully doubled in volume, wet your hands with a little water. Lift the airy dough up from the center, allowing the loose outer sides to curl cleanly underneath themselves, and rotate the tub to form a tighter, more structured square log.
- The Second Doubling Check: Cover the container again and let the dough double in volume a second time. This takes about 1 hour at a warm room temperature of 75–82°F (24–28°C). Once it reaches this second doubling peak and is full of large, fragile air pockets, it is ready to be divided.
- Dust your workspace generously with a thick, heavy layer of flour.
- Carefully tip the airy dough straight out of your container onto the flour bed. Do not pull, press, stretch, or aggressively handle the dough here, as you must preserve all the internal gas bubbles.
- Dust the exposed sticky top surface of the dough with another uniform, generous layer of flour.
- Use a sharp bench knife to slice the dough rectangle cleanly down the center into 2 equal slipper-shaped ciabatta loaves.
- Gently nudge the cut raw edges inward to square them up. Transfer the loaves carefully onto your baking couche. Let them proof completely uncovered on the counter for 45 minutes to 1 hour.
- Place your Bread Steel Duo inside the oven on the middle rack. Preheat the oven to 500°F (260°C), letting the steel saturate thoroughly with heat.
- Carefully flip the ciabatta loaves from the baking couche onto a sheet of parchment paper so that the bottom part goes up. Slide both parchment-supported loaves directly onto the scorching hot Bread Steel Duo.
- Immediately cover each loaf with a Baking Shell. Bake covered at 500°F (260°C) for exactly 10 minutes.
- Remove the Baking Shells from the oven. Lower the oven temperature to 450°F (232°C). Continue baking completely uncovered for another 10 to 15 minutes until the crust turns deeply golden, thin, crisp, and beautifully caramelized. Let the loaves cool on a wire rack before slicing!
Nutrition
Notes
- Why We Let the Dough Double, Fold it, and Let it Double Again: This process builds structural support within an incredibly wet dough while safely creating massive, irregular air pockets. The second rise is the absolute key to achieving ciabatta’s distinctively light, open crumb.
- Why the Biga is Essential: The biga builds flavor, complex organic aromas, and gluten strength before the final dough is mixed. It makes this high-hydration ciabatta significantly easier to handle and directly helps create a more open crumb.
- Flipping the Dough Pre-Bake is Crucial: When transferring the loaves from the couche to the parchment paper, making sure the bottom side flips up to become the top is mandatory. This completely redistributes the rising gas pockets, preventing a single giant, hollow air cave from forming directly beneath the upper crust.
- If Using Oil-Packed Sun-Dried Tomatoes: These work beautifully, but make sure to drain them lightly before adding them to your dough container so they don’t leak unmeasured extra oil into the structure.
- Baking Without Baking Shells: If you do not own the Baking Shells, you can use traditional home steaming methods (like pouring boiling water into a preheated cast-iron skillet on the bottom rack). Check that your internal temperature hits 205–210°F (96–99°C) to verify it’s fully baked.
Tried this recipe?
Let us know how it was!Disclosure: As an Amazon Associate I earn from qualifying purchases.
Discover more from Natasha's Baking
Subscribe to get the latest posts sent to your email.