Pizza Dough for the Outdoor Oven
If you are using one of the outdoor pizza ovens, then I would strongly recommend for you to use this Pizza Dough. This recipe helps with lowering the dough hydration and using yeast instead of sourdough starter as a leavening agent. The reason being, the sourdough starter makes the crumb wet (if you bake pizza in an outdoor pizza oven like ROCCBOX by Gozney).
The recipe is super easy and can be mixed by hands.
Patience and lower temperature are the key components to achieve an open and light pizza crust.
Yield: 8 x 200g pizzas.
Ingredients
Main Dough
- 900g bread flour (90%)
- 100g stoneground whole wheat flour (10%)
- 630g water (63%)
- 0.1g instant dry yeast (0.01%)
- 30g salt
Directions
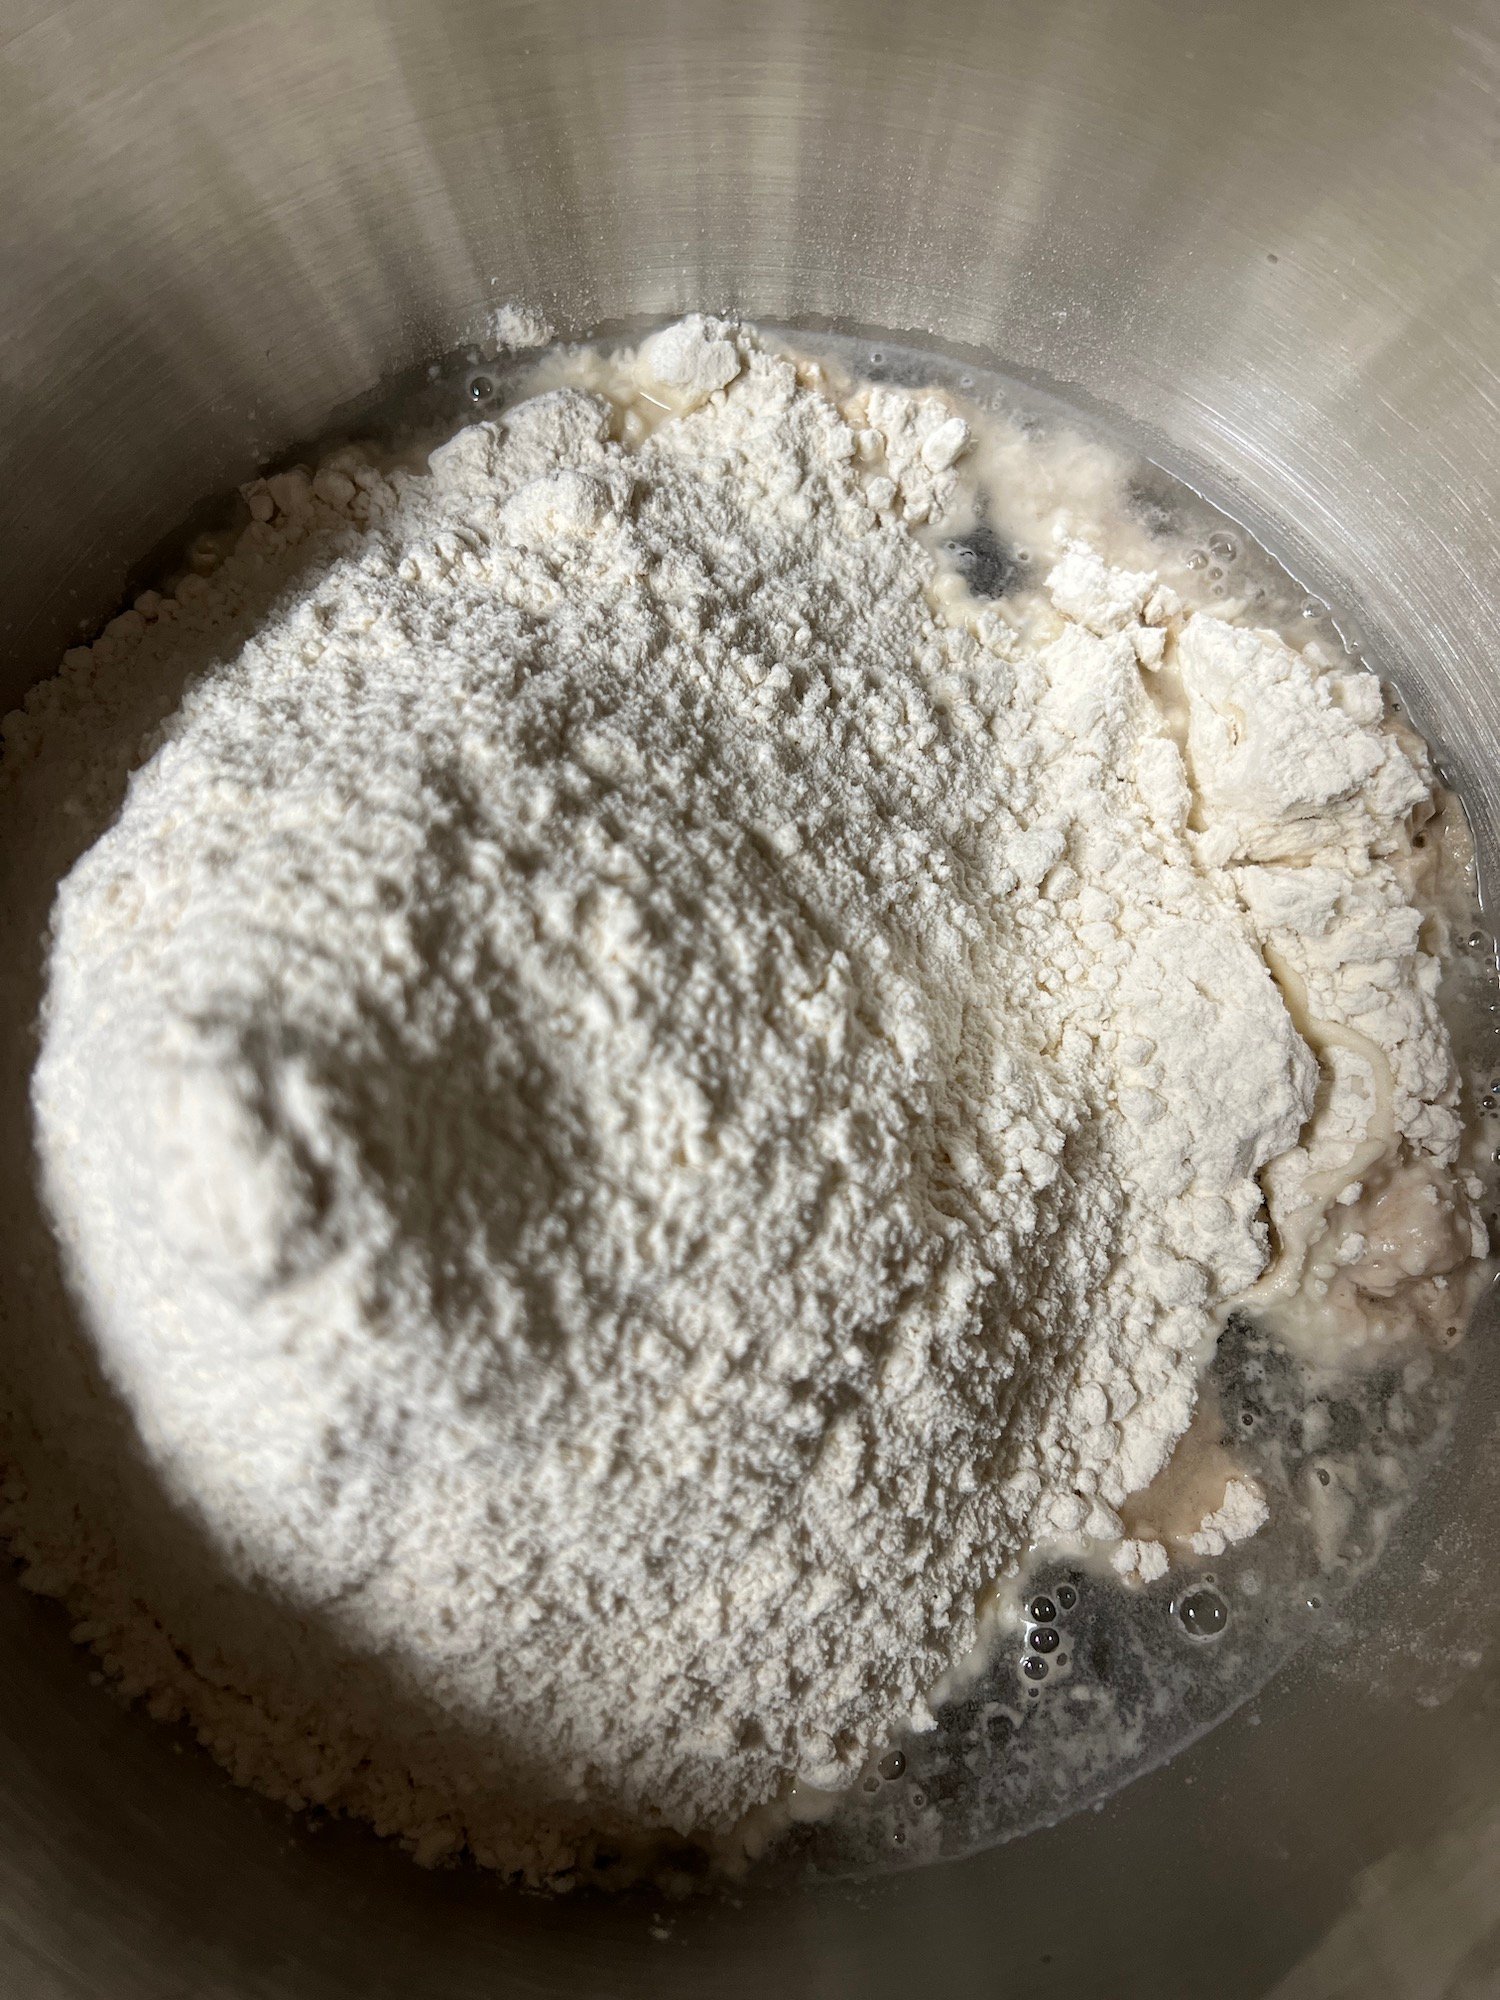
- 4 pm Dissolve yeast in water, add flour and salt, knead by hand or in mixer for couple of minutes, until all incorporated, but dough still look lumpy.
- Let rest 30 min covered
- 4:30 pm knead the dough by hand or in mixer for couple of minutes. Dough should start to look nice and smooth.
- Let rest 30 min covered.
- Prepare tray, oil it with olive oil.
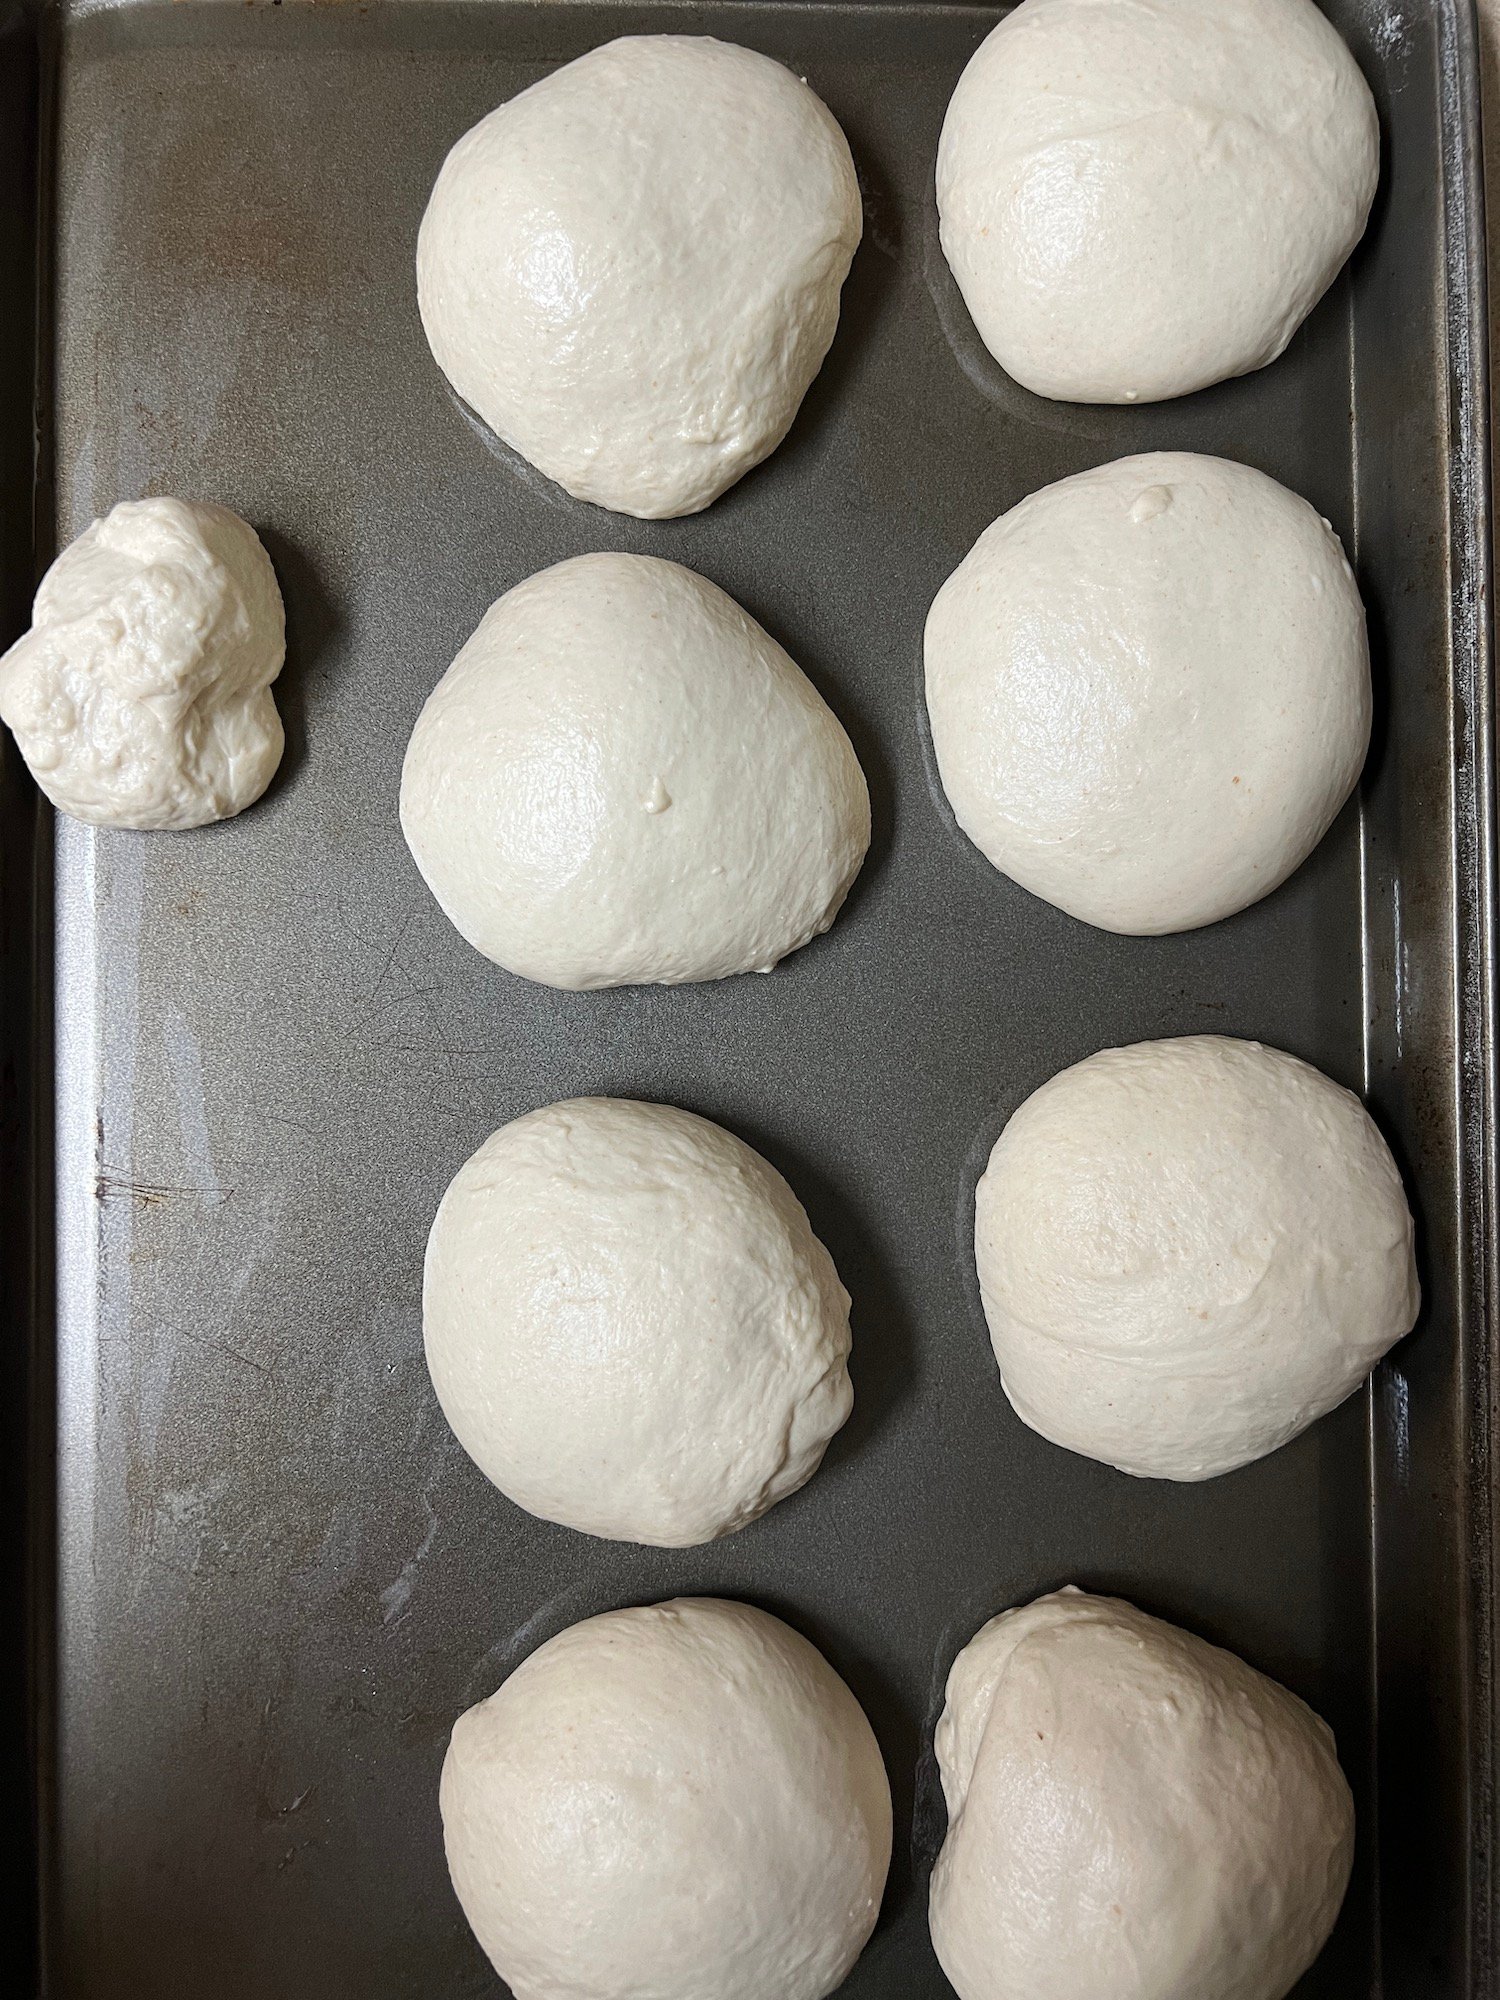
- 5 pm Divide the dough on 8 pieces, 200g each. Round them. Transfer pizza balls to the tray, cover with plastic.
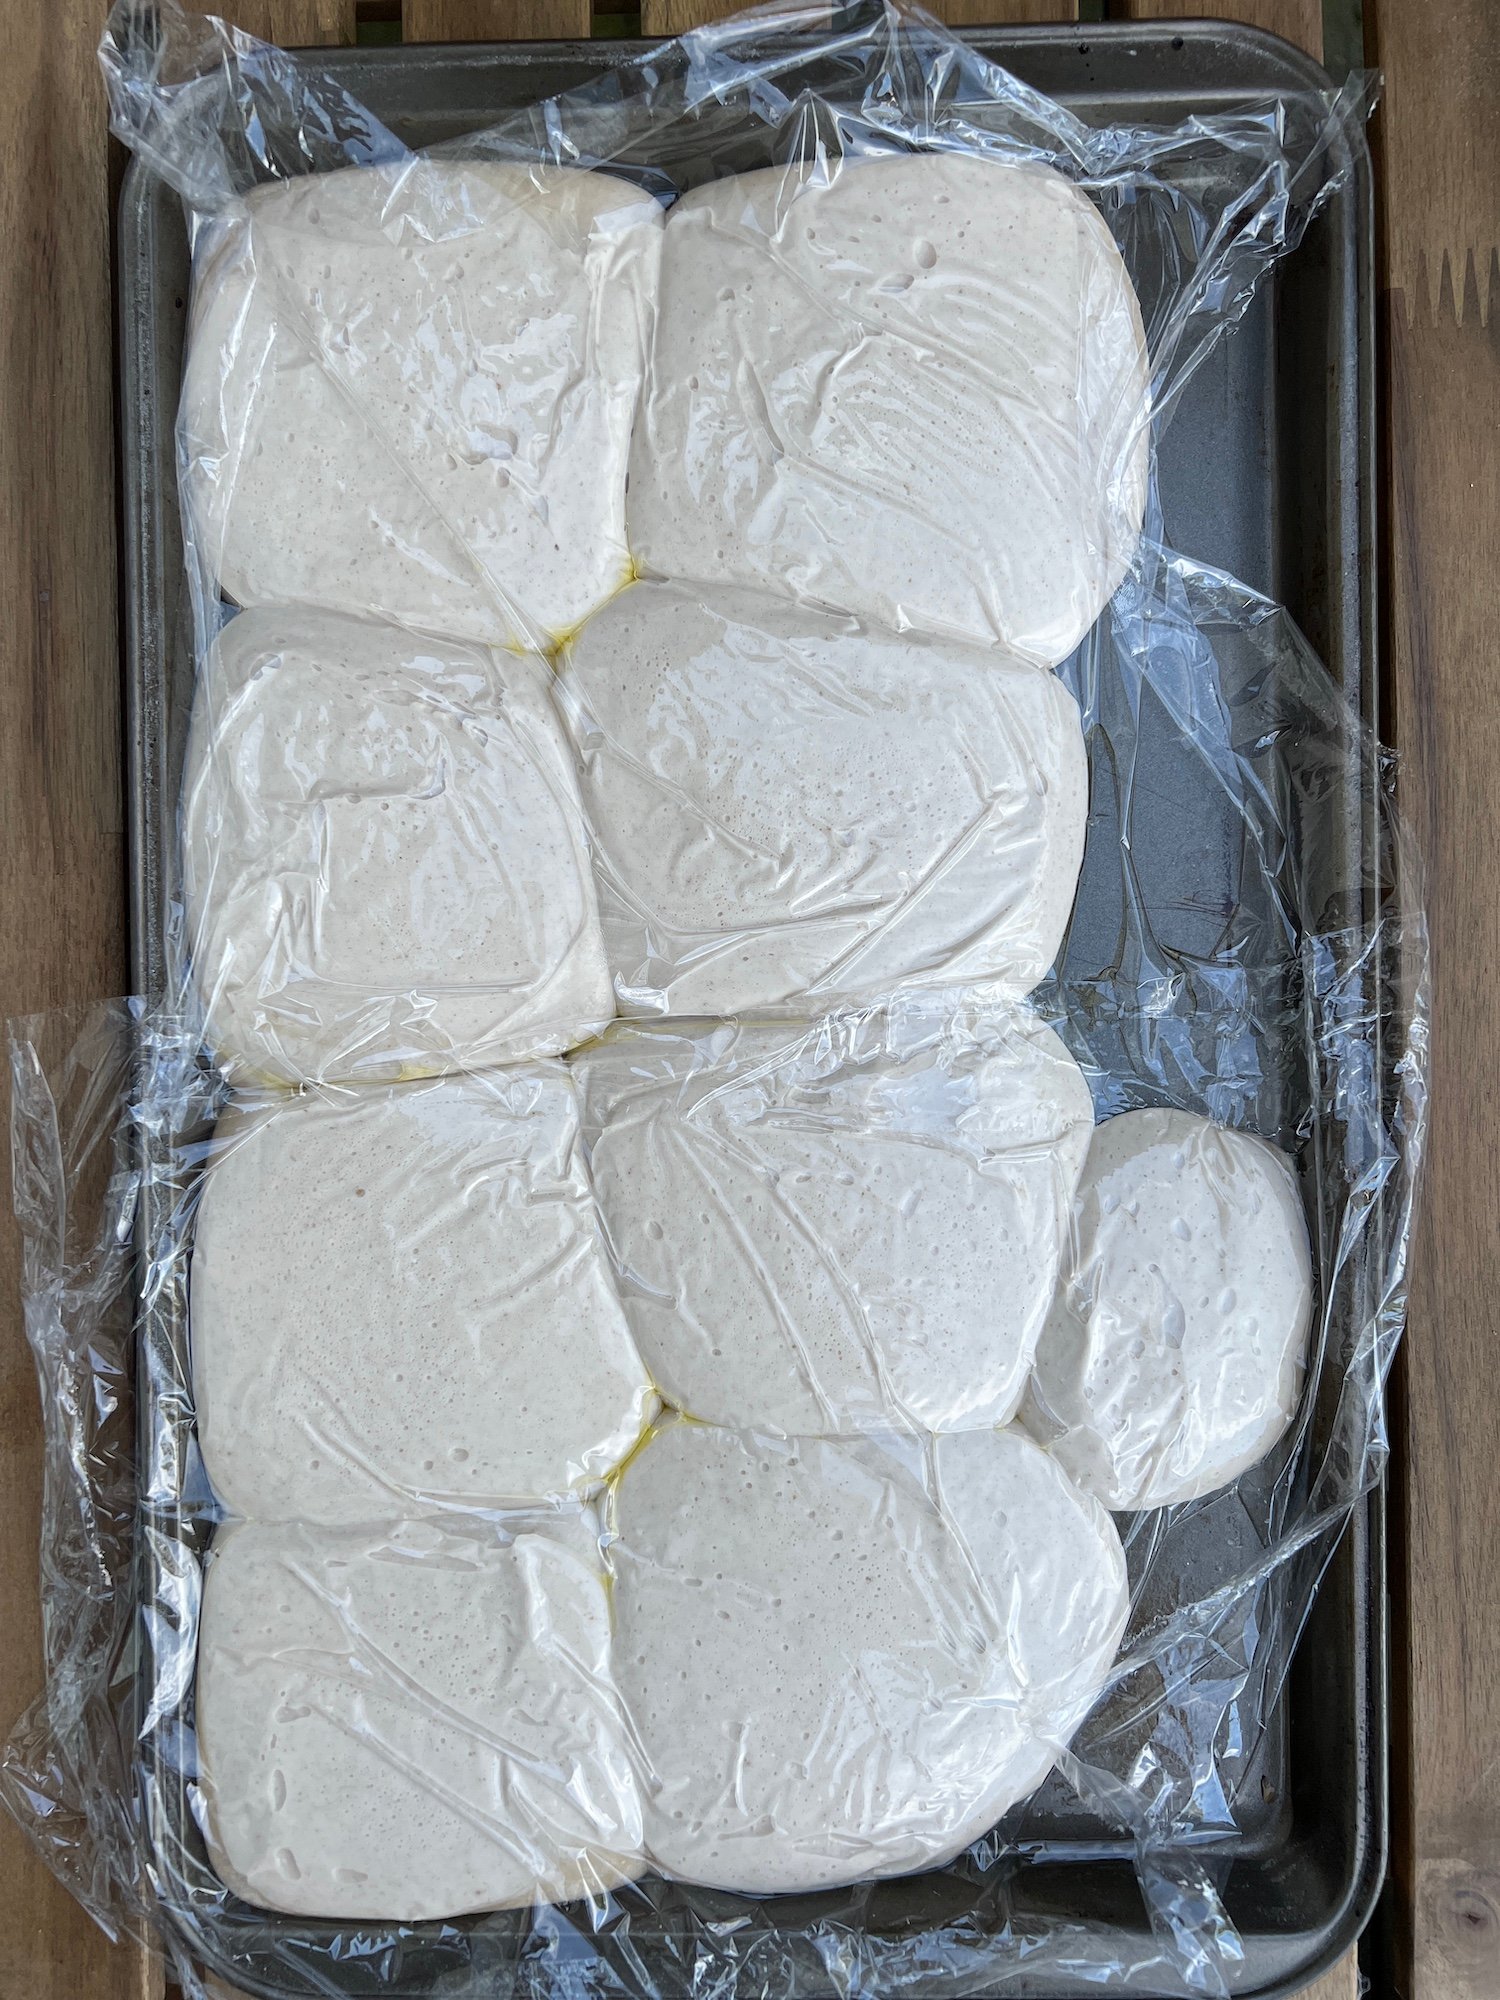
- Let ferment at 18-20C until next day (for 18-22 hours).
Note: find a cool place in your house. Slow and long fermentation at lower temperatures will give a nice open crumb to your pizza.
Next day
By the end of fermentation the dough will spread, and won’t look bubbly. It will remain kind of flat. That’s the key to a successful crust.
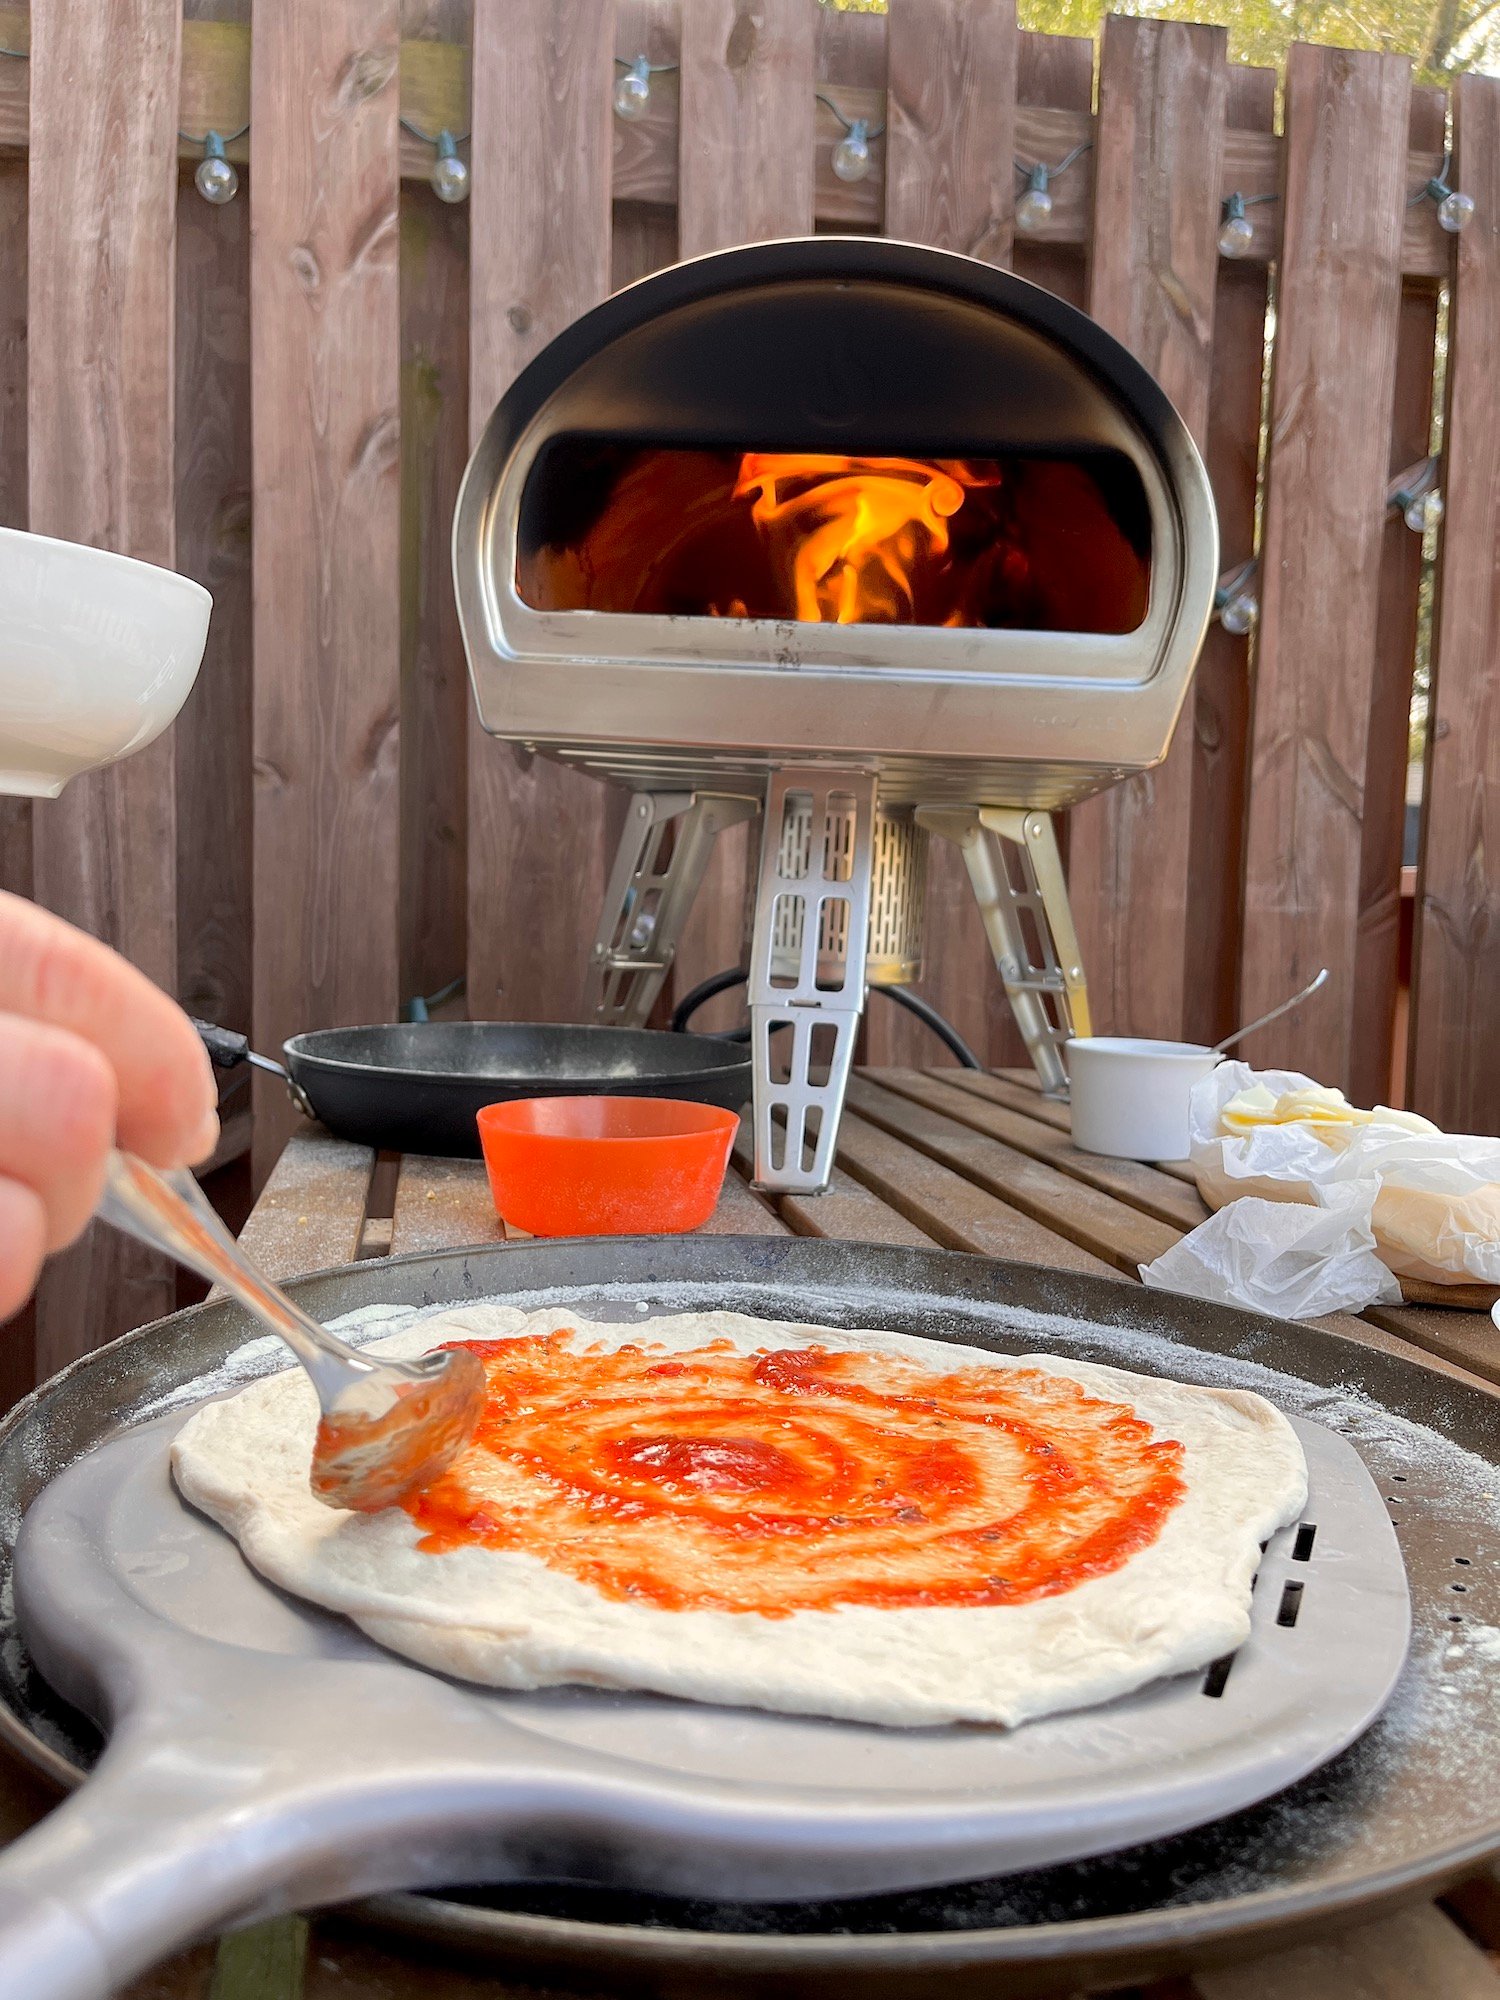
2 pm start preheating your rock box for at least 40 min on a high flame. The temperature has to reach 700F.
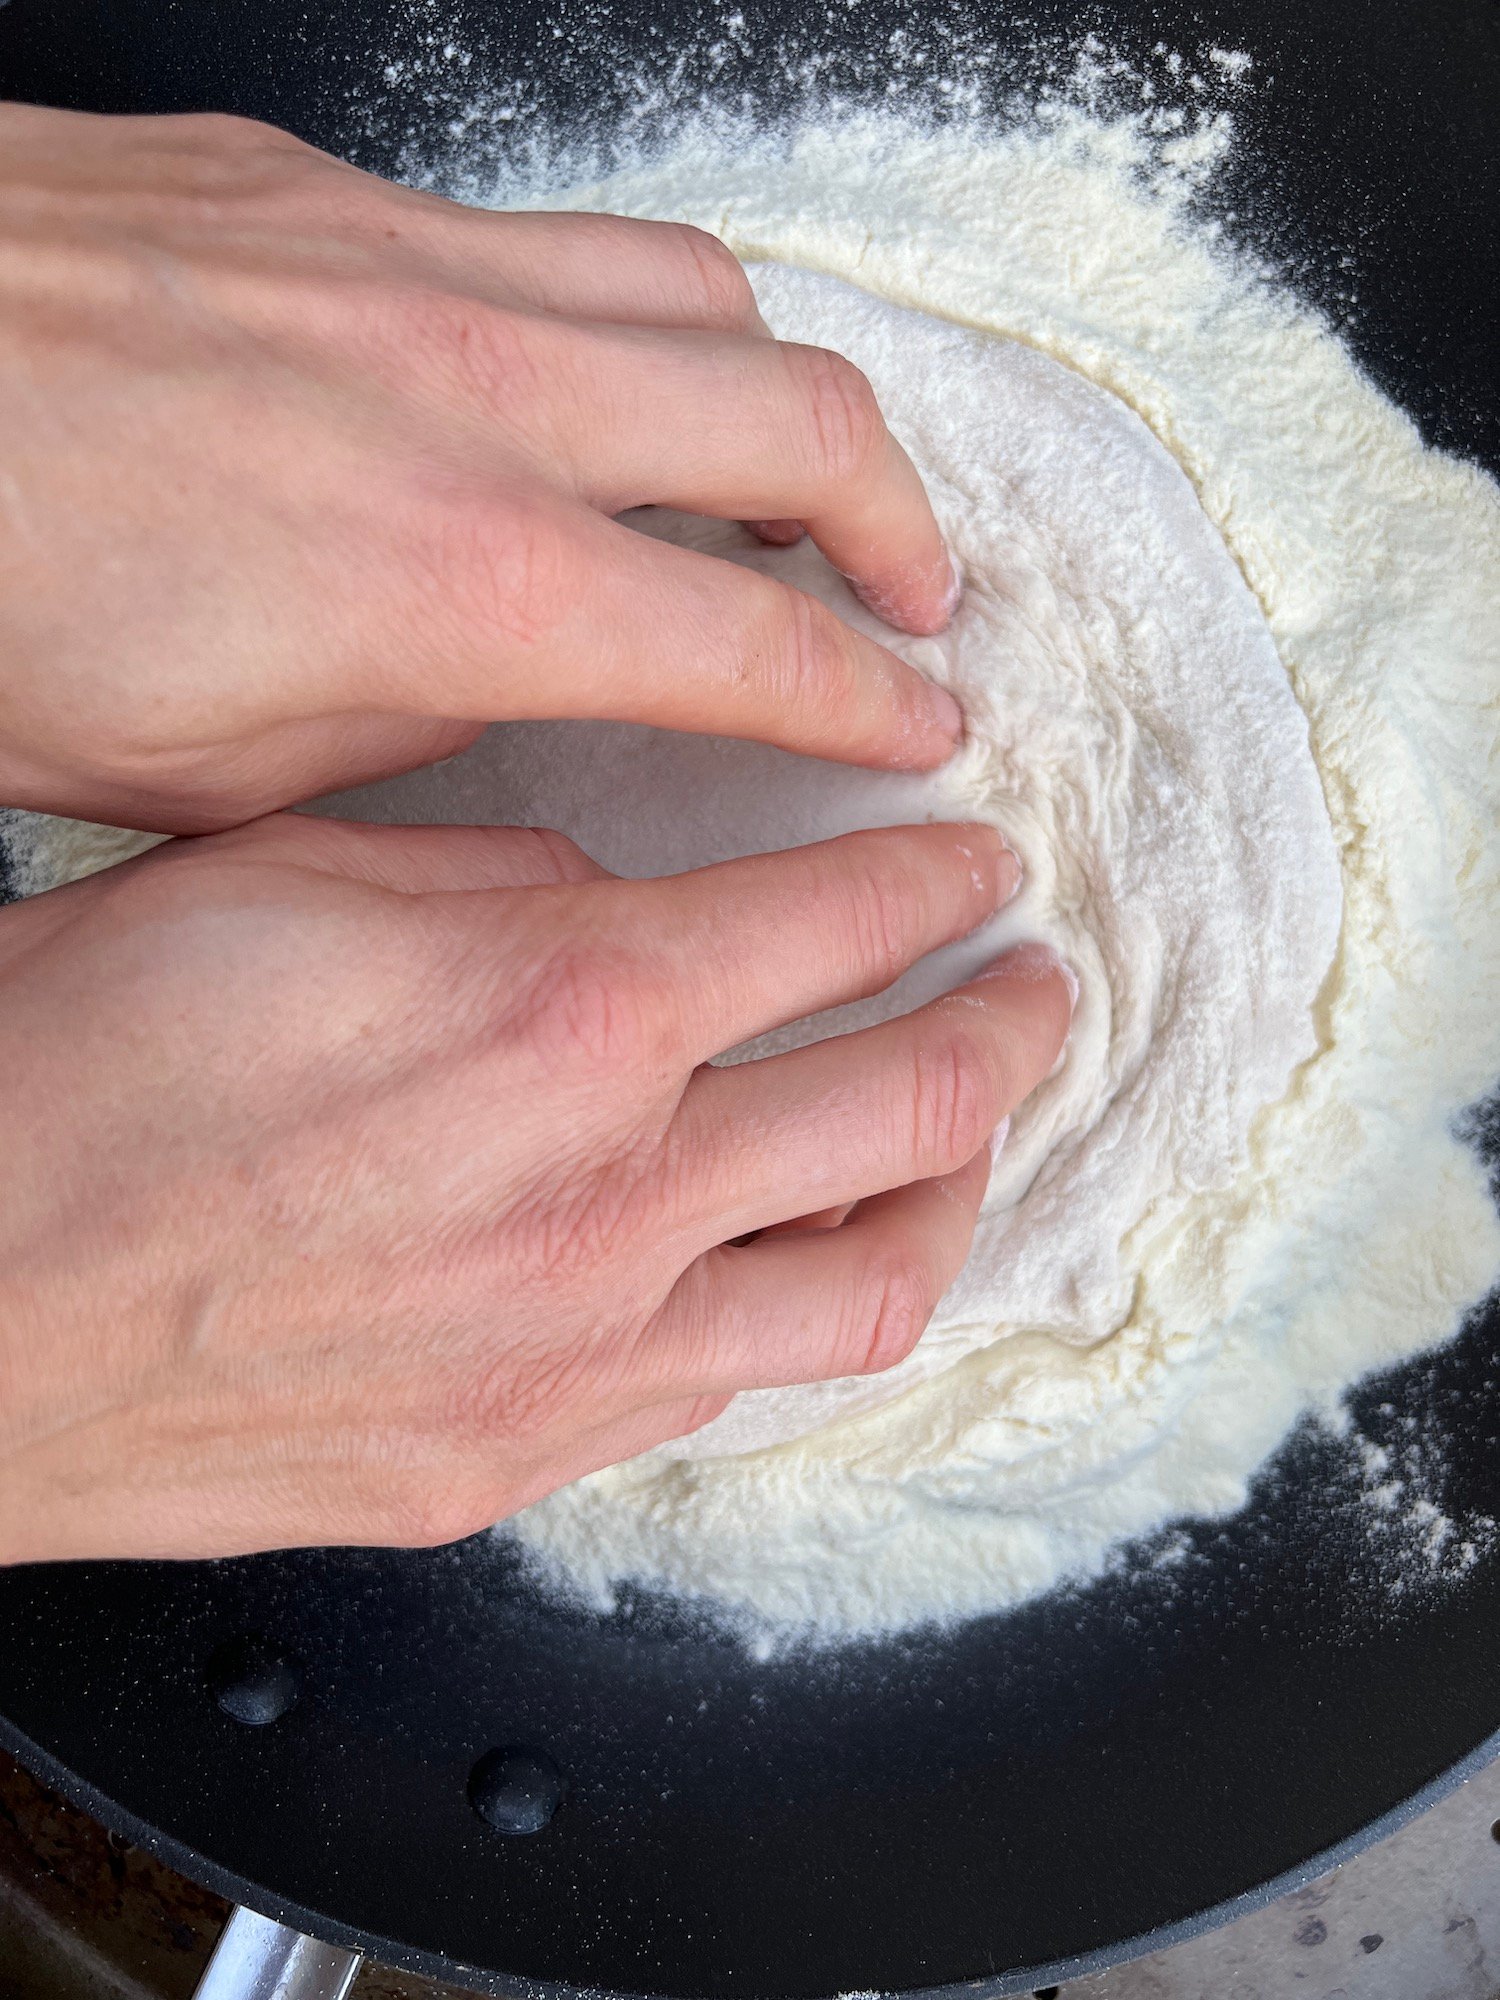
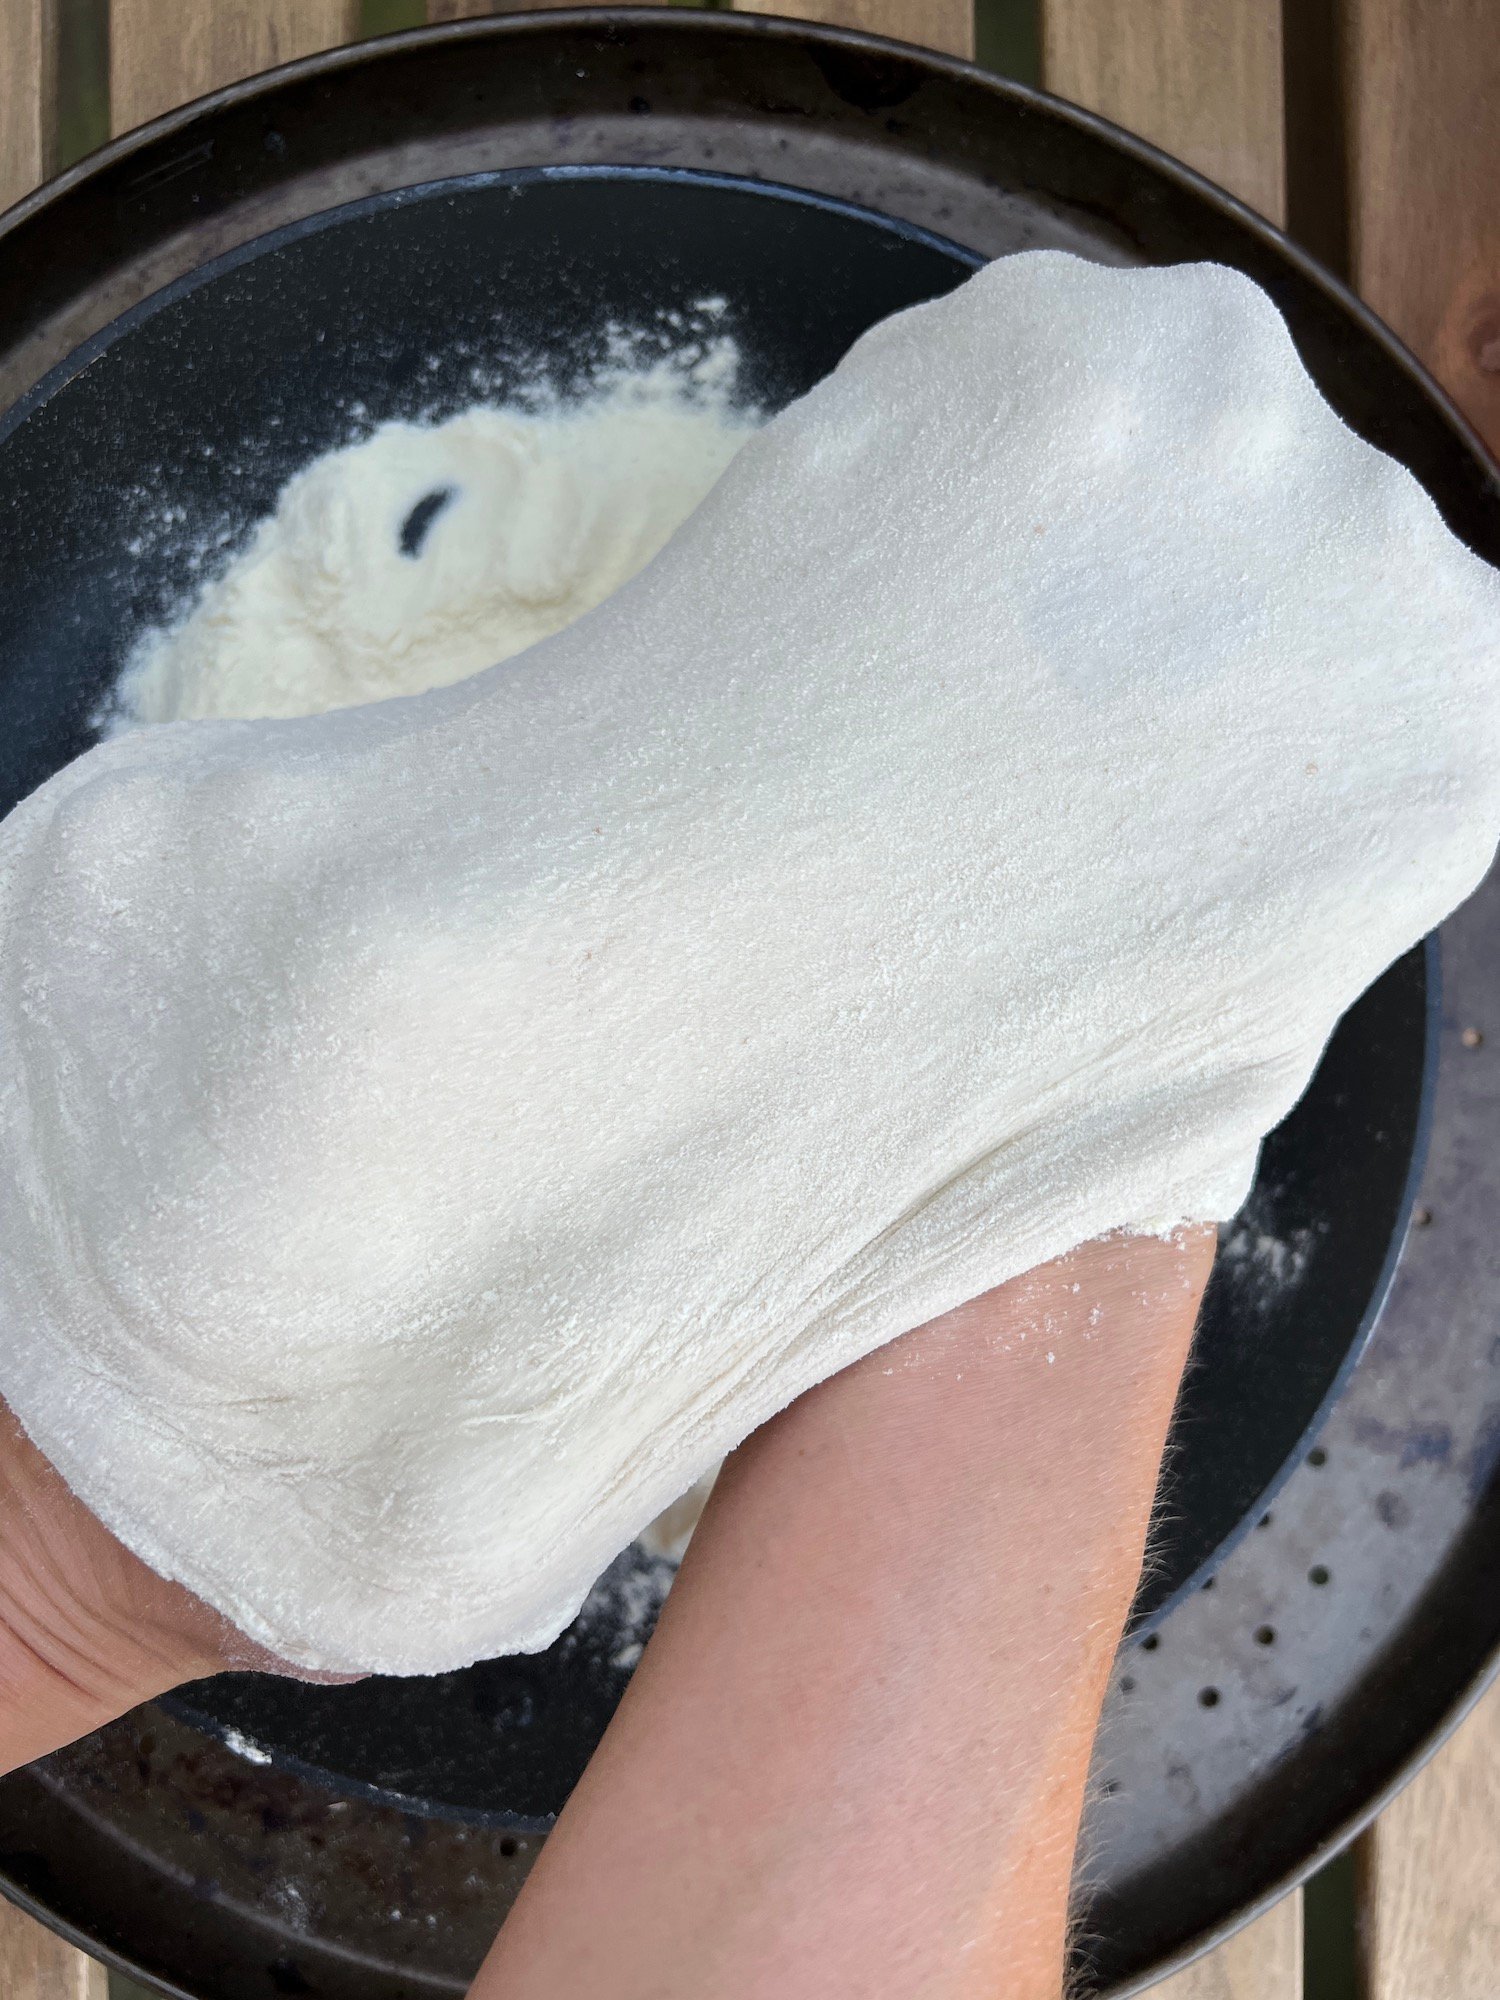
Start shaping your pizza dough.
Use semolina flour, to prevent sticking.
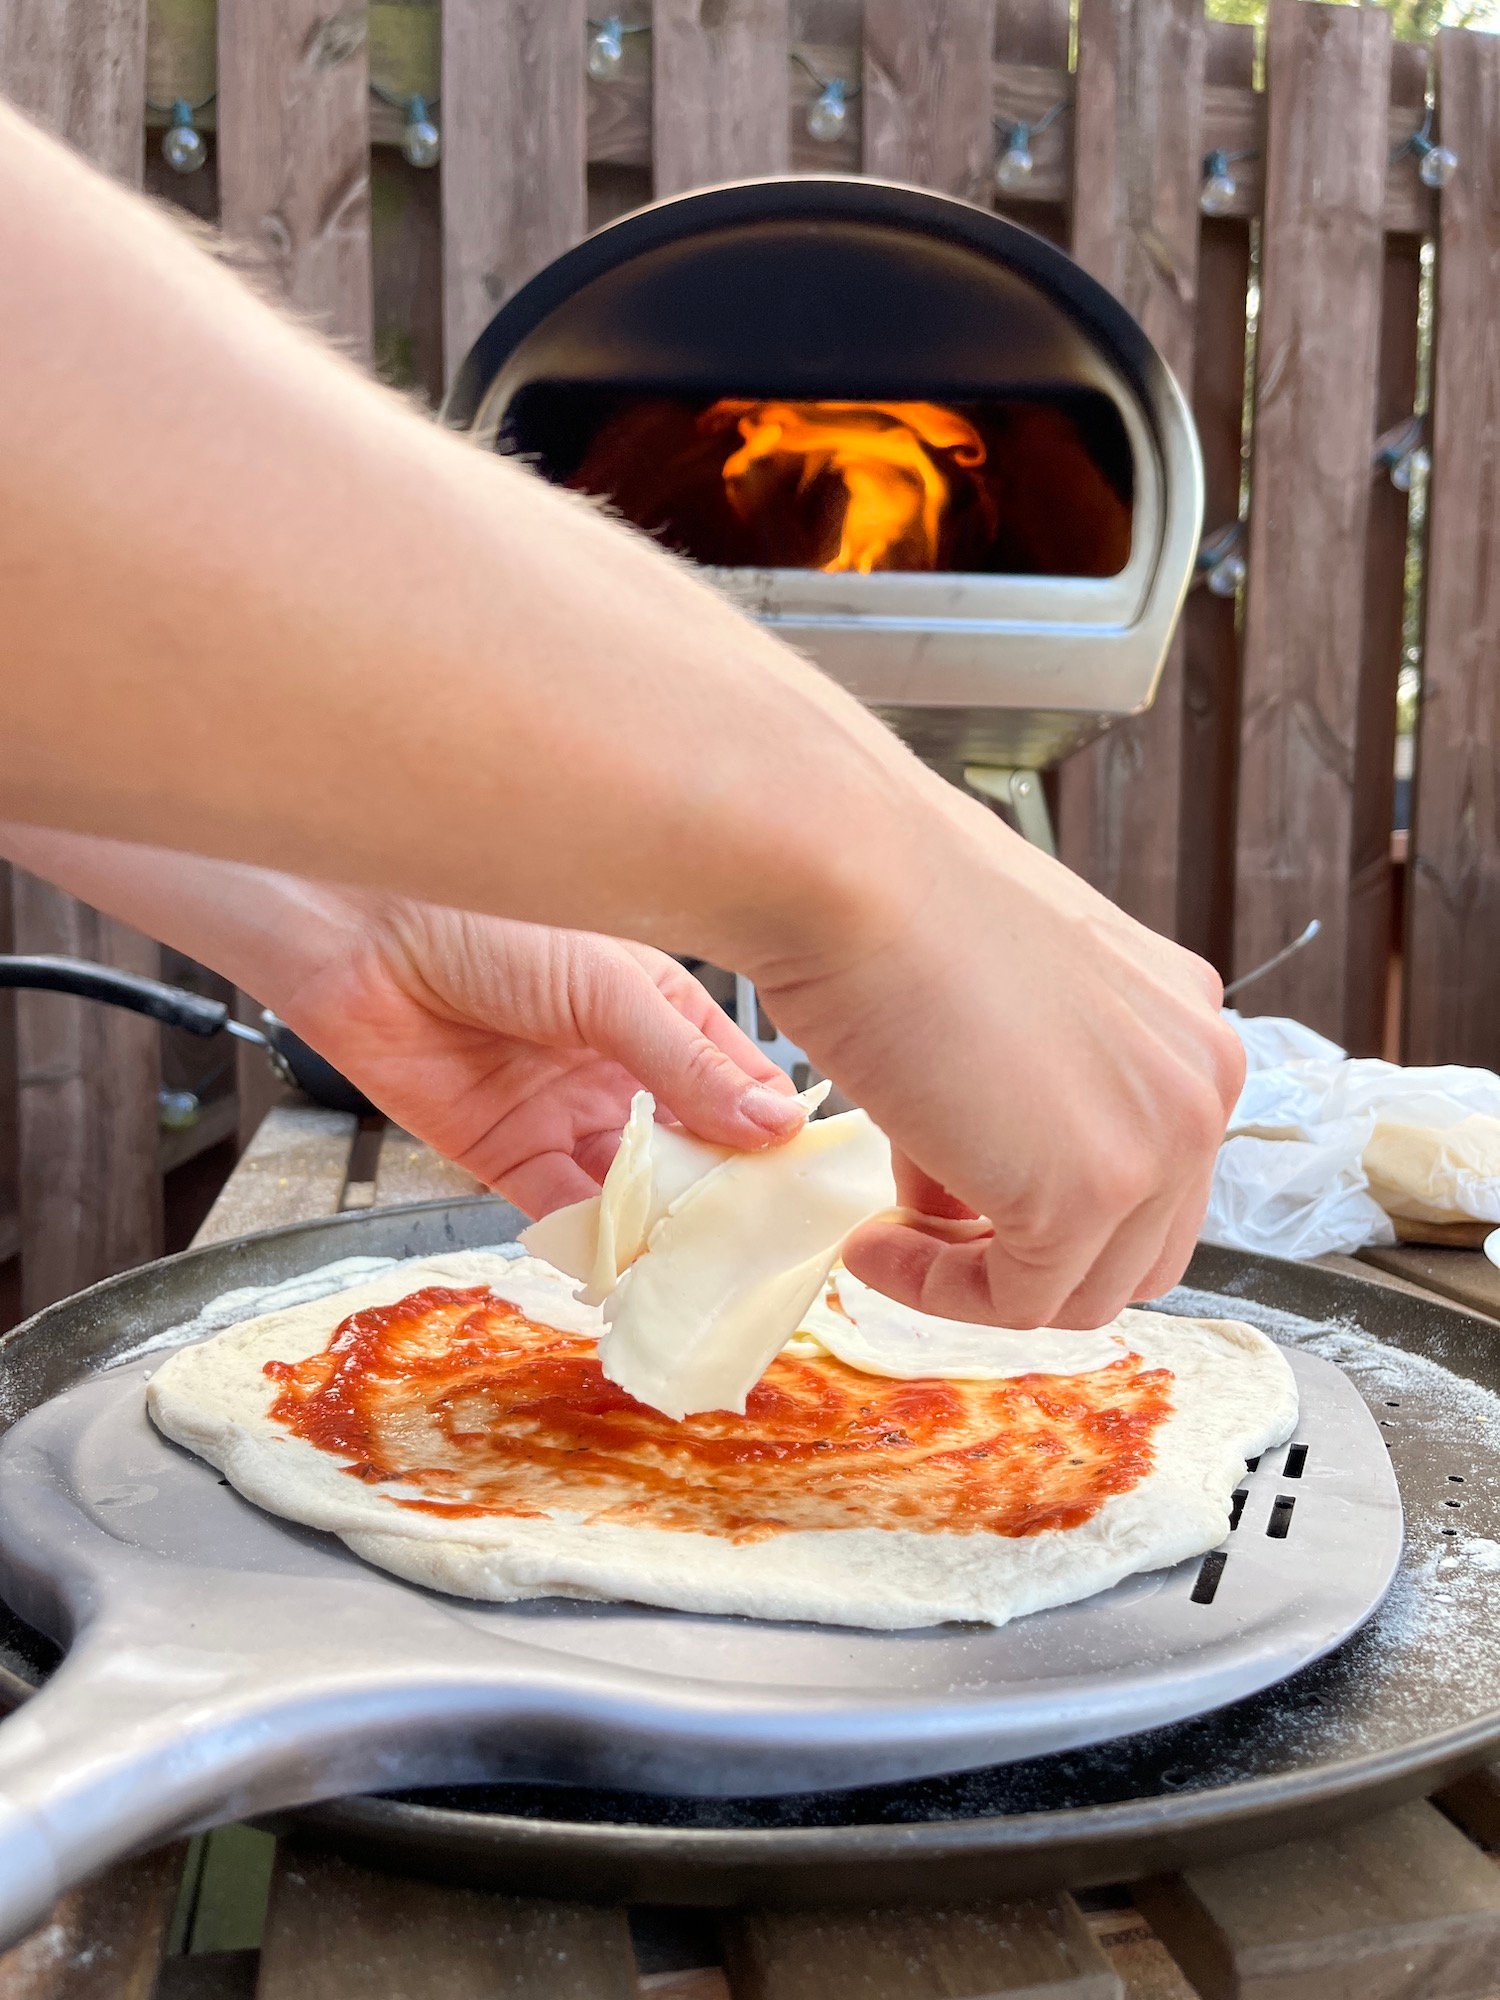
Garnish your pizza with sauce and toppings.
Load pizza inside the oven, change the flame to the lowest mode, keep rotating pizza every 15 seconds, to prevent burning.
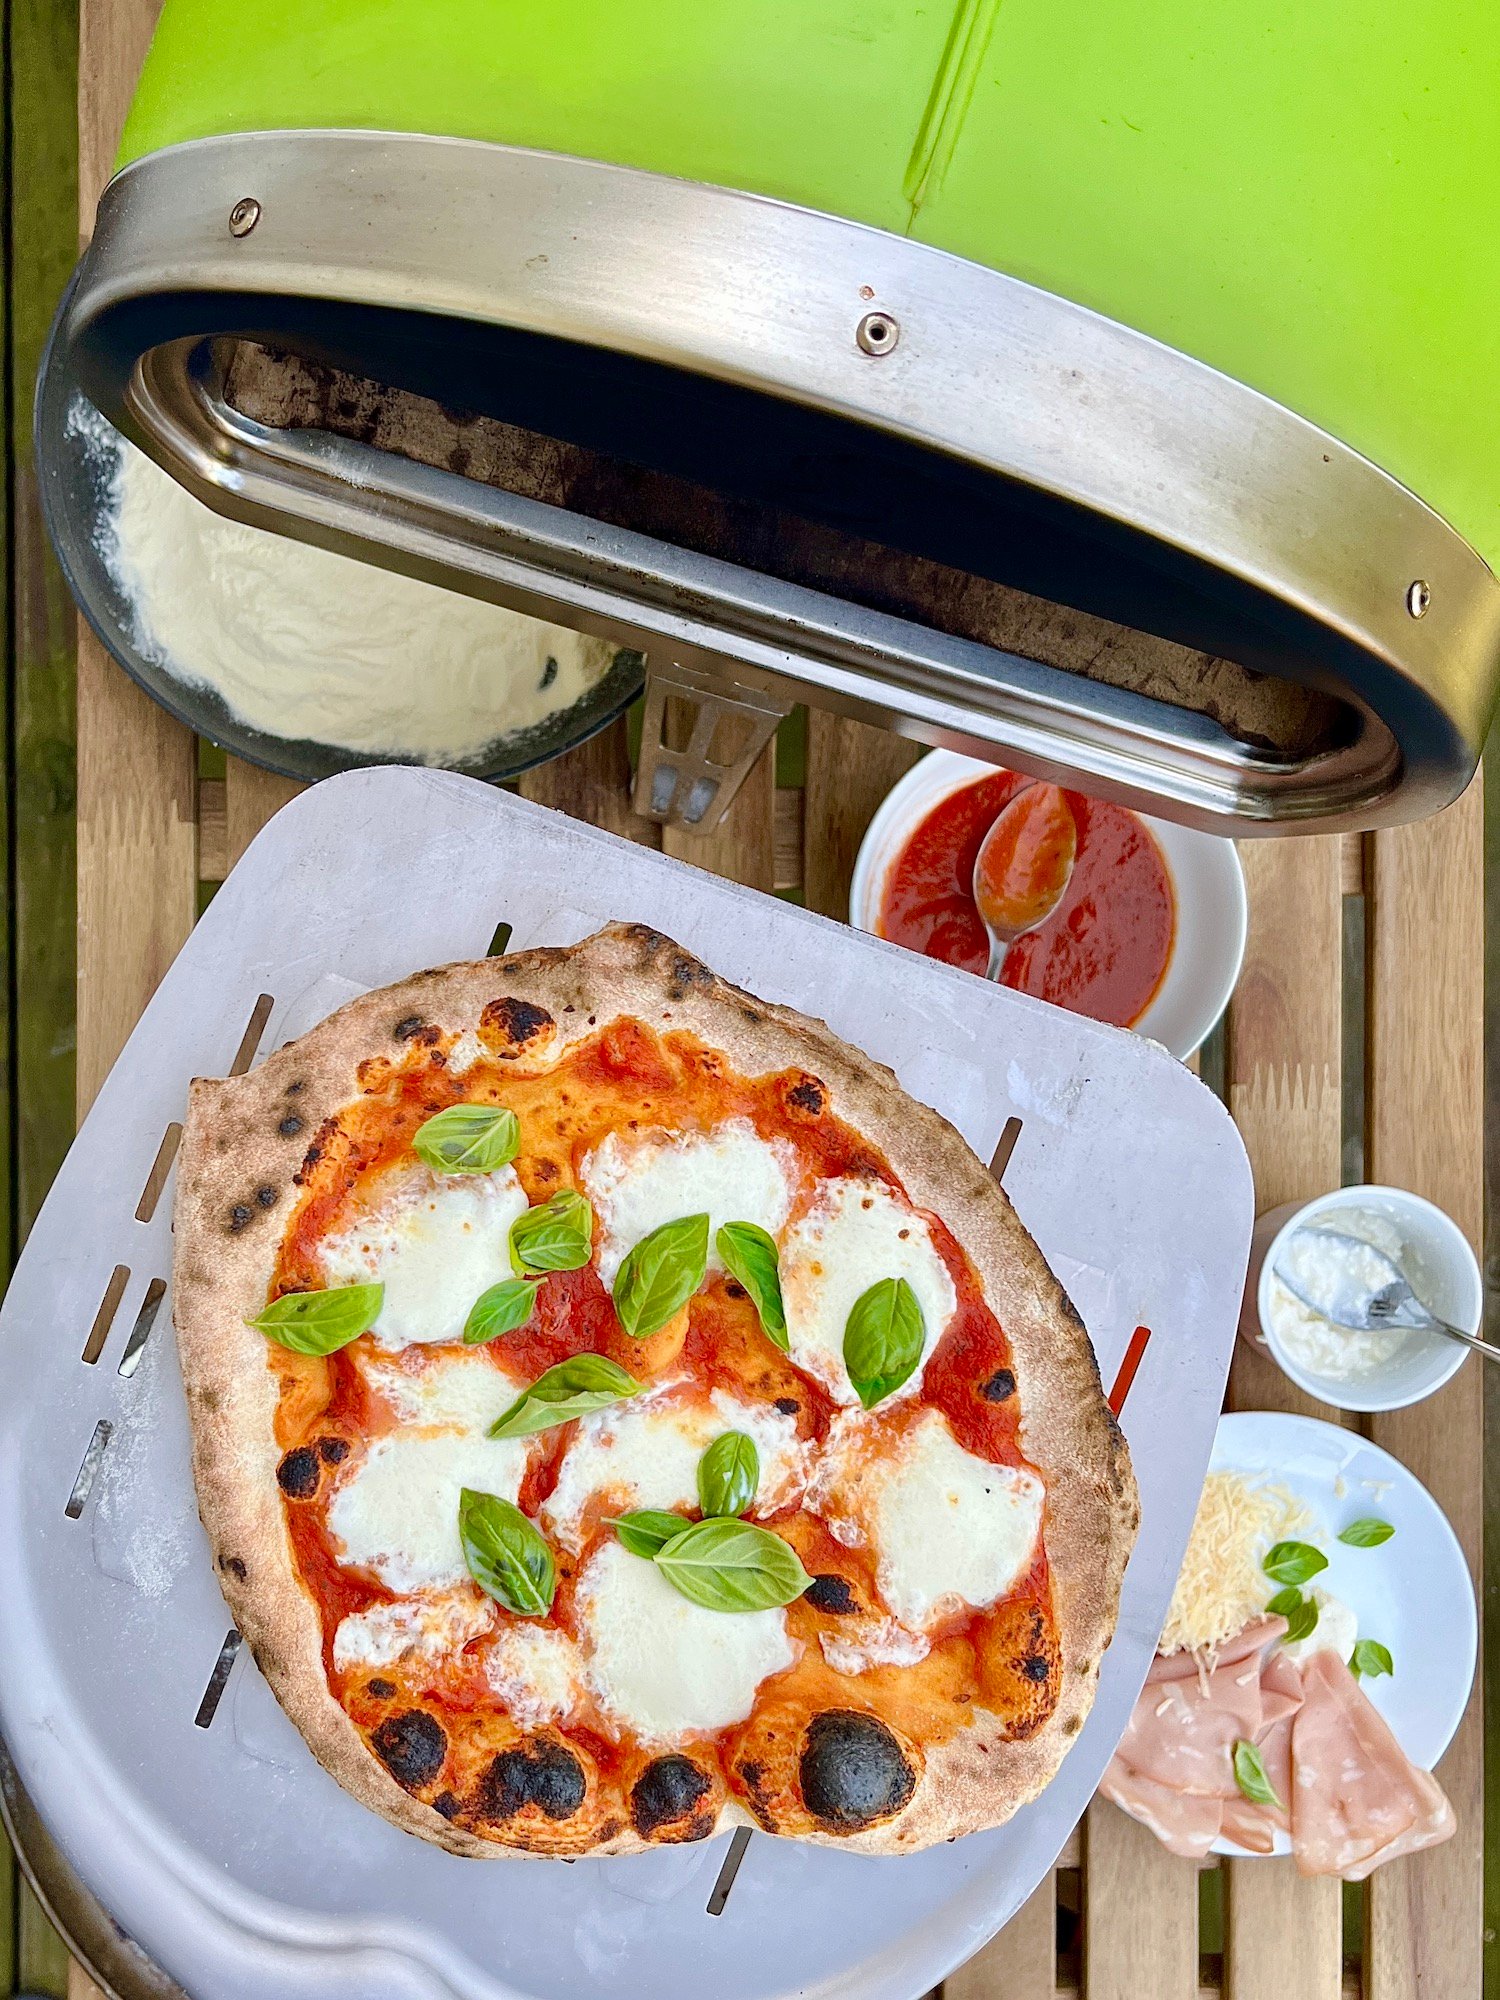
Enjoy!
P.S. if you are interested in sourdough pizza recipe, it is available in my book.

Pizza Dough for the Outdoor Oven
Ingredients
- 1000 g Tipo 00 flour Ideally a specialized pizza flour with roughly 12–13% protein
- 580 g Cold water 58% Hydration
- 3 g Instant dry yeast 0.3%
- 30 g Fine sea salt 3%
- 10 g Olive oil 1% – Optional, helps retain suppleness
Equipment
- Plastic Wrap or an airtight dough container
- Outdoor Pizza Oven (or a home oven with a pizza stone heated to maximum capacity)
Method
- In a large mixing bowl, whisk together the 1000g of Tipo 00 flour and 3g of instant dry yeast.
- Pour in 550g of the cold water (reserve 30g for later). Stir with your hands or a rigid dough whisk just until a shaggy, cohesive dough forms with no dry flour streaks. Cover the bowl and let rest for 20 minutes to jumpstart gluten development naturally.
- Pour the remaining 30g of water, 30g of fine sea salt, and the optional 10g of olive oil over the rested dough mass.
- Work the salt and oil into the matrix by squeezing and folding the dough firmly for 4 to 5 minutes until it turns completely smooth, non-sticky, and holds its shape in a tight ball.
- Cover the bowl tightly with plastic wrap and move it straight into the refrigerator for a long 20 to 24-hour cold fermentation retard. This slow, cold rest allows the yeast to slowly mature the starch network, delivering an incredible flavor profile and a crust that chars beautifully.
- 2 Hours Before Baking: Pull the cold dough out of the refrigerator. Tip it onto a clean, lightly floured workspace.
- Using a bench scraper and a kitchen scale, divide the large dough mass cleanly into 8 equal pieces weighing exactly 200g each.
- Shape each piece into a tight, smooth ball by pulling the outer edges down into the bottom center, then rolling it firmly against the counter under a cupped hand. Place the dough balls onto a lightly floured tray, cover them loosely, and let them rest at room temperature for 1 to 2 hours so the gluten relaxes completely.
- Fire up your outdoor pizza oven until the center of the baking stone registers at least 750–850°F (400–450°C) on an infrared thermometer.
- Dust your workspace with a bit of semolina or Tipo 00 flour. Take one relaxed dough ball and press your fingers firmly from the center outward to push the air into the rim (creating the cornicione). Gently stretch it out into a 10 to 12-inch circle without popping the puffy outer edge.
- Transfer the stretched crust onto a floured pizza peel, add a light layer of your favorite sauce and toppings, and slide it directly onto the roaring hot oven stone. Cook for 60 to 90 seconds, rotating the pizza every 20 seconds with a turning peel for an even, charred finish. Serve immediately!
Nutrition
Notes
- Why Low Hydration Wins in Outdoor Ovens: When baking pizza inside a standard kitchen home oven, high hydration levels (65–70%) are necessary to keep the crust from turning into a dry cracker during the long 10 to 15-minute bake. However, intense outdoor wood or gas-fired ovens cook pizzas in under 90 seconds. Dropping the hydration down to a tight 58% ensures that the interior cooks through completely without leaving behind a wet, gummy layer under the cheese.
- The Non-Negotiable Tipo 00 Flour Rule: Always use authentic Italian Tipo 00 flour for this recipe. This flour is exceptionally finely ground from durum wheat hearts and behaves uniquely under extreme heat. Standard all-purpose or bread flours contain complex starches that burn to a bitter ash at 800°F (425°C), whereas Tipo 00 withstands the open flames flawlessly to produce a soft, blistered, leopard-spotted crust.
- The Air-Preservation Stretch Technique: When preparing your dough circles in step 10, never use a rolling pin. Rolling pins flatten out the expanding carbon dioxide pockets completely, resulting in a dense, flat edge. Pressing with your fingertips from the center outward safely channels those delicate air pockets directly into the outer rim, guaranteeing a majestic, hollow, crispy puff in the oven fire.
- Managing Stickiness on the Pizza Peel: To prevent your raw pizza from sticking to your launching peel, dust the peel lightly with a 50/50 mix of Tipo 00 flour and coarse semolina flour right before placing the stretched dough on top. Work quickly once the sauce and cheese hit the dough—give the peel a gentle back-and-forth shake to ensure the pizza moves freely before launching it into the oven.
Tried this recipe?
Let us know how it was!Disclosure: As an Amazon Associate I earn from qualifying purchases.
Discover more from Natasha's Baking
Subscribe to get the latest posts sent to your email.
Your recipes looks delicious
Thank you 🙏
Amout of your dry yeast is not clear, I didnt undrstand , 0.1gr
How we measure it?
Just keep in mind that the amount of yeast should be less than 1 g by 10 times.
I am confused on this as well
Will this recipie work in an oven as well? You are amazing!
Monika
Buy a gram scale
Fantastic recipe, thank you!
Thank you for your feedback
I love your posts! And I was especially excited to find this one regarding pizza for the outdoor pizza oven. I have had MISERABLE luck with my Roccbox. The points of downfall are: (1) transferring the prepared pizza to and off the peel, and (2) finding the pizza burns too much along the edges before the rest of the pie has baked. From reading your post, I believe the reasons for these problems have to do with my dough being TOO HYDRATED and not lowering the temperature once the pizza pie is ready to bake. 🙂 🙂 I noticed also from looking at your pictures that you perhaps form your pizza in a nonstick pan and then transfer it to the peel! Yes?? What an ingenious idea!!!! Wow! OK. I’m diving into this again tonight fully determined to conquer this! I really don’t want to give up on this and revert to pizza-making in the oven. But these continuous failures and mounting frustration have zapped some of the enthusiasm of this process. Thanks for all your WONDERFUL posts!!!
Thank you so much for your feedback.
Yes!
Preheat the oven, then lower temperature ( it will extend baking time without burning)
Use less hydrated dough.
Also if you are struggling to transfer the pizza into the oven, use circle parchment paper, and shape pizza on it.
Transfer the pizza into the oven with parchment paper.
It will help to prevent burning the bottom and will make transfer easier.
Thanks so much for your response. I tried it the other day…. and YIPPEE! It worked!!! I am about to go make some more dough right now so that we can have pizza tomorrow! 🙂 I nearly gave up (well, not quite), but your guidance here saved the day! It was the best pizza I’ve made so far. Thanks again!!!
Can I freeze the pizza dough?
You can try but it won’t be as good.
Hi! Didn’t understand very well the amount of yeast. How do you measure an amount that is that small?
Hi!
It is very tiny!
Im just eyeballing.
hi! looks so great, thanks for sharing.
if the weather is hot, shuld i put the dough in the fridge for the long rest? and what shuld i do if I want to freeze
some of the dough balls?
shuld it be after the 18-22 h rest time or before? and shuld i increase the yeasts amount maybe? thank you!
With a gram scale
Scales with grams don’t measure that small of an amount. 0.1grama is about 1/16 of a tsp
buy a pocket scale. they’re $10-$20 and will measure to .01 (a hundredth of a gram) some even go to .001 (a thousandths of a gram)!
Thank you 🙏
Oh no I like that idea. I’ll have to check that out. Thanks for the info
Wondering What’s the secret of using so low yeast, all the recipes I’ve seen are at least 1-2%. What does it help with ?
Wow.!!! cant believe this recipe was free all along! been making pizza when pandemic starts and cant find the real and best recipe.. and voila i find your reels on facebook and brought me here… Thank you so so
and Thank You LORD !
definitely i WILL try this IMMEDIATELY! soo exited…
ADDTIONAL QUESTION :what if the weather is HOT, should i put the dough in the fridge for the long rest? and what shuld i do if I want to freeze
Thank you and best regards…
from Philippines
Also curious about this! If its been 18-20hrs and you want them later, can you put in the fridge?
Hello Guys, I’m Ronald! My Uncle works as a manager at Jack In The Box restaurant. He said their management offers free tacos to their customers who participated in the Jacklistens Survey, which is available at https://www.jacklistens.page/.
Can I use a traditional oven for this recipe?
JackListens is a web-based client criticism stage that was sent off by Jack in the Crate, a famous drive-through eatery chain, in light of the developing significance of consumer loyalty. https://ijacklistens.com/
Is it possible to make this with sourdough starter?
Yes, it is definitely possible to make this recipe with sourdough starter! Simply substitute the sourdough starter for some of the flour and liquid in the recipe, add 1% of yeast from total amount of flour and adjust the rising times accordingly. Sourdough adds a delicious tangy flavor to bread and can enhance the overall taste of your dish. Enjoy experimenting with your sourdough starter in this recipe!
Is sourdough starter suffice w cold fermentation so we can skip the yeast?
Dear Natalya what a lovely a recipe and I would like to try it soon, but if I have to let the dough ferment more than 22 hours, would it be ruined?
Can i put it in the fridge to slow down the process?
well hello, I couldn’t find any answer from you, so I am just going to say this. First thank you for this great recipe, it was delicious and I can’t describe how much! second, I kind of messed up the time schedules and instead of 2 pm I wanted to bake it for dinner so I put the dough in the fridge for about 12 hours and then brought it out and let it rest for 18 hours! ( stupid of me IKR?) but the pizza was the best and the dough was the ace TBH. So THANK YOU, your recipes are amazing XOXO
Thank you so much for your kind words! We’re thrilled to hear that you enjoyed the recipe and that the pizza turned out so well, despite the extended resting time for the dough. It sounds like your improvisation paid off in the end! We appreciate your feedback and are glad to hear that our recipes are hitting the mark for you. Happy baking! XOXO
Thank you for your comment! If you need to let the dough ferment for longer than 22 hours, you can definitely put it in the fridge to slow down the process. This will help prevent the dough from over-fermenting and developing off flavors. Just make sure to cover the dough tightly with plastic wrap or a lid to prevent it from drying out. When you’re ready to continue with the recipe, simply take the dough out of the fridge, let it come to room temperature, and
Hi
18-20c
What’s the best place to go ferment please?thank you
Hi there! To ferment your ingredients at around 18-20°C, the best place would be a cool, dark area in your home. You can consider using a basement, pantry, or a cupboard that maintains a consistent temperature. Make sure to monitor the temperature regularly to ensure that it stays within the desired range for successful fermentation. Happy fermenting!
Taking the survey for a chance to win $500 in the lottery is obviously the most appealing part of the offer. Since a lottery system is used to choose winners at random, bias is not an issue. We will contact you via email in the event that you are the lucky lottery winner.
This store has allure’s link to the computer network survey to take responses from allure customers at the Kohl’s Store Survey captured at the official setting having to do with this store.
Each client who visits a Jack in the Case area and makes a buy gets a receipt. This receipt incorporates a novel overview code, which is the doorway to the jacklistens.com 14 digit code stage.
Customers who complete this survey have the opportunity to win great prizes, such as gift baskets and Wawa gift cards, in addition to helping Wawa improve.
Visit Here DQFanFeedback Survey
TellPopeyes surveys consumers to learn about their experiences and what can be done to improve the menu and give patrons the best possible dining experience at Popeyes restaurants.
Visit Here TellPopeyes Survey